Can you install trickle vents into existing windows? The short answer is yes — in nearly all cases. Based on real-world installation experience, almost every window can accommodate background ventilation when the correct retrofit method is used. The longer answer, though, involves a few important "buts." Feasibility depends on your frame material, the thickness of the profile, and the style of window you're working with. A standard uPVC casement? Straightforward. A slim-profile aluminium frame with a thermal break? That takes more careful planning.
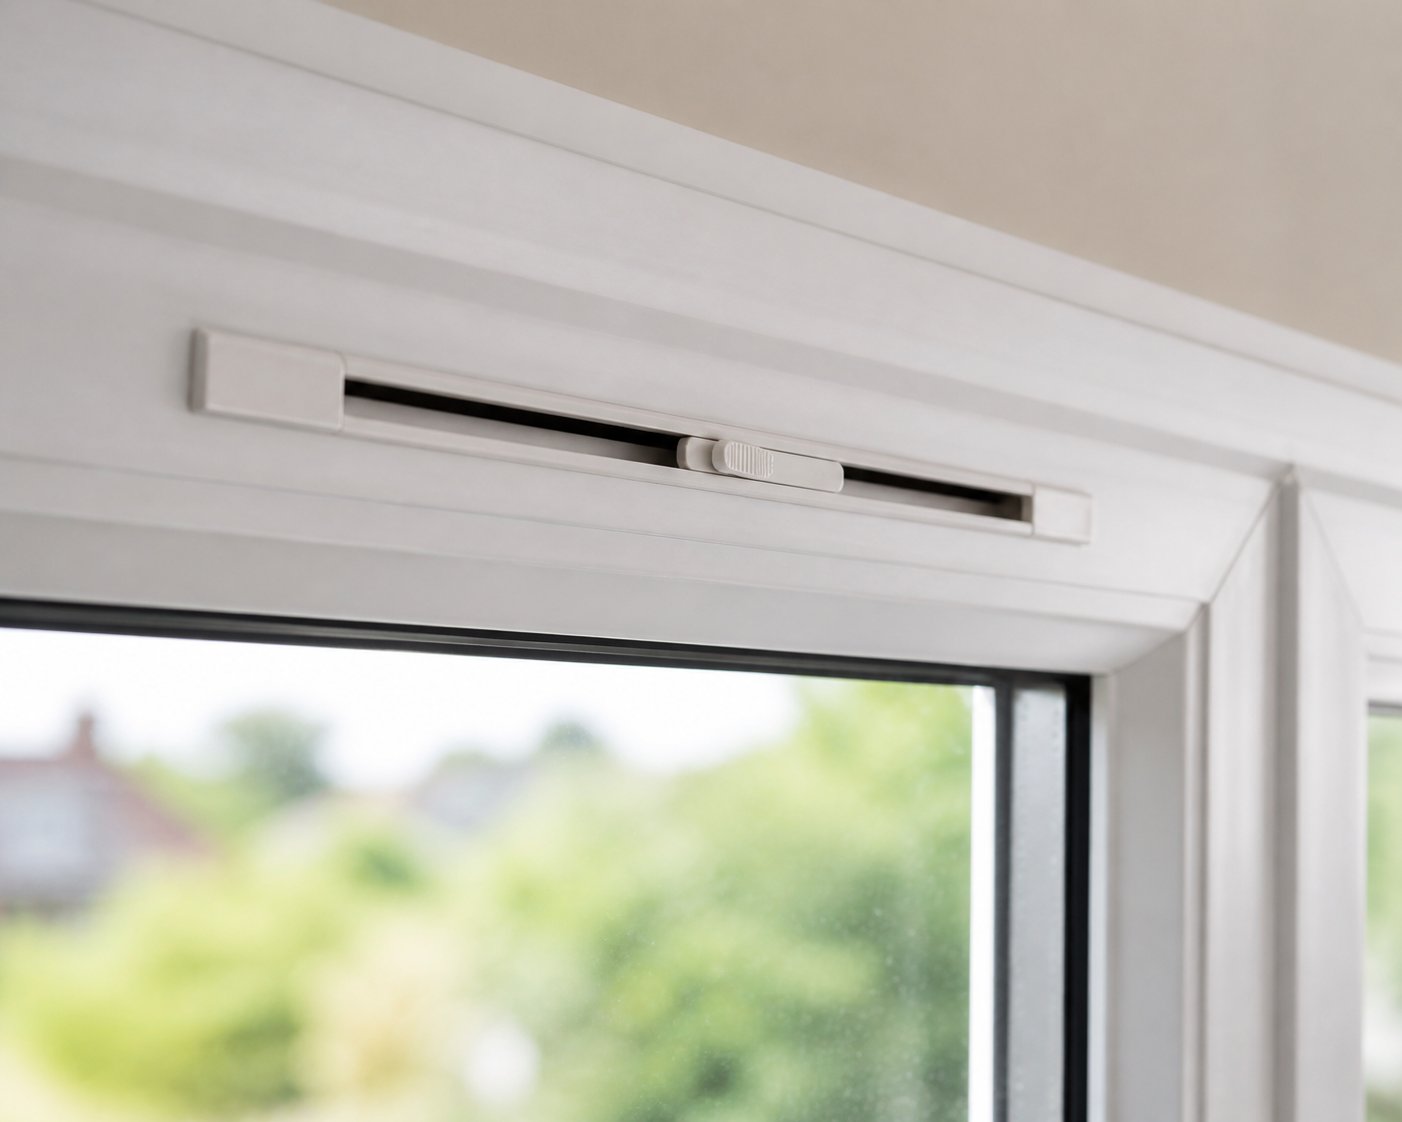
Trickle vents are small, slotted openings — typically installed in the head of a window frame — that allow controlled background ventilation even when the window is fully closed and locked. Picture a narrow strip, usually 260 mm or 400 mm long, sitting at the very top of your window. An external canopy on the outside shields the opening from rain, while an internal slider or flap lets you open, close, or partially adjust airflow from inside.
You might have heard them called trickle air vents for windows, drip vents in windows, or even "tickle vents." That last one is a common misspelling, but it refers to exactly the same product — so if you searched for tickle vents and landed here, you're in the right place.
It's worth distinguishing these from other ventilation methods. Hit-and-miss vents, for example, are larger rectangular grilles often found in walls or older window panels, designed for more substantial airflow. Passive wall vents are installed directly through the external wall rather than the window frame. Trickle vents occupy a unique middle ground: compact enough to be nearly invisible, yet effective enough to maintain a gentle, continuous exchange of air without compromising your window's security or weather seal.
Here's why this question comes up so often. Modern double and triple glazing seals homes far more effectively than older windows ever did. That's great for energy bills — but it also traps stale, moisture-laden air inside. Approved Document F of the Building Regulations addresses exactly this problem, requiring adequate means of background ventilation in dwellings. Since June 2022, the updated rules mean that most replacement window projects must incorporate trickle vents or demonstrate equivalent ventilation provision. For homeowners with older properties where the original windows lacked any background ventilation, retrofitting has become a practical and increasingly relevant solution.
Retrofitting trickle vents is a practical, cost-effective alternative to full window replacement for improving indoor air quality — especially when your existing windows are otherwise in good condition.
This guide covers everything you need to make a confident decision. You'll find material-specific advice for uPVC, timber, and aluminium frames, a detailed breakdown of retrofit challenges by window style, a genuine step-by-step installation walkthrough, honest cost comparisons between retrofitting and replacing, and clear guidance on when retrofit simply isn't the right call. The goal is to give you every piece of information you need — so the choice you make fits your windows, your budget, and your home.
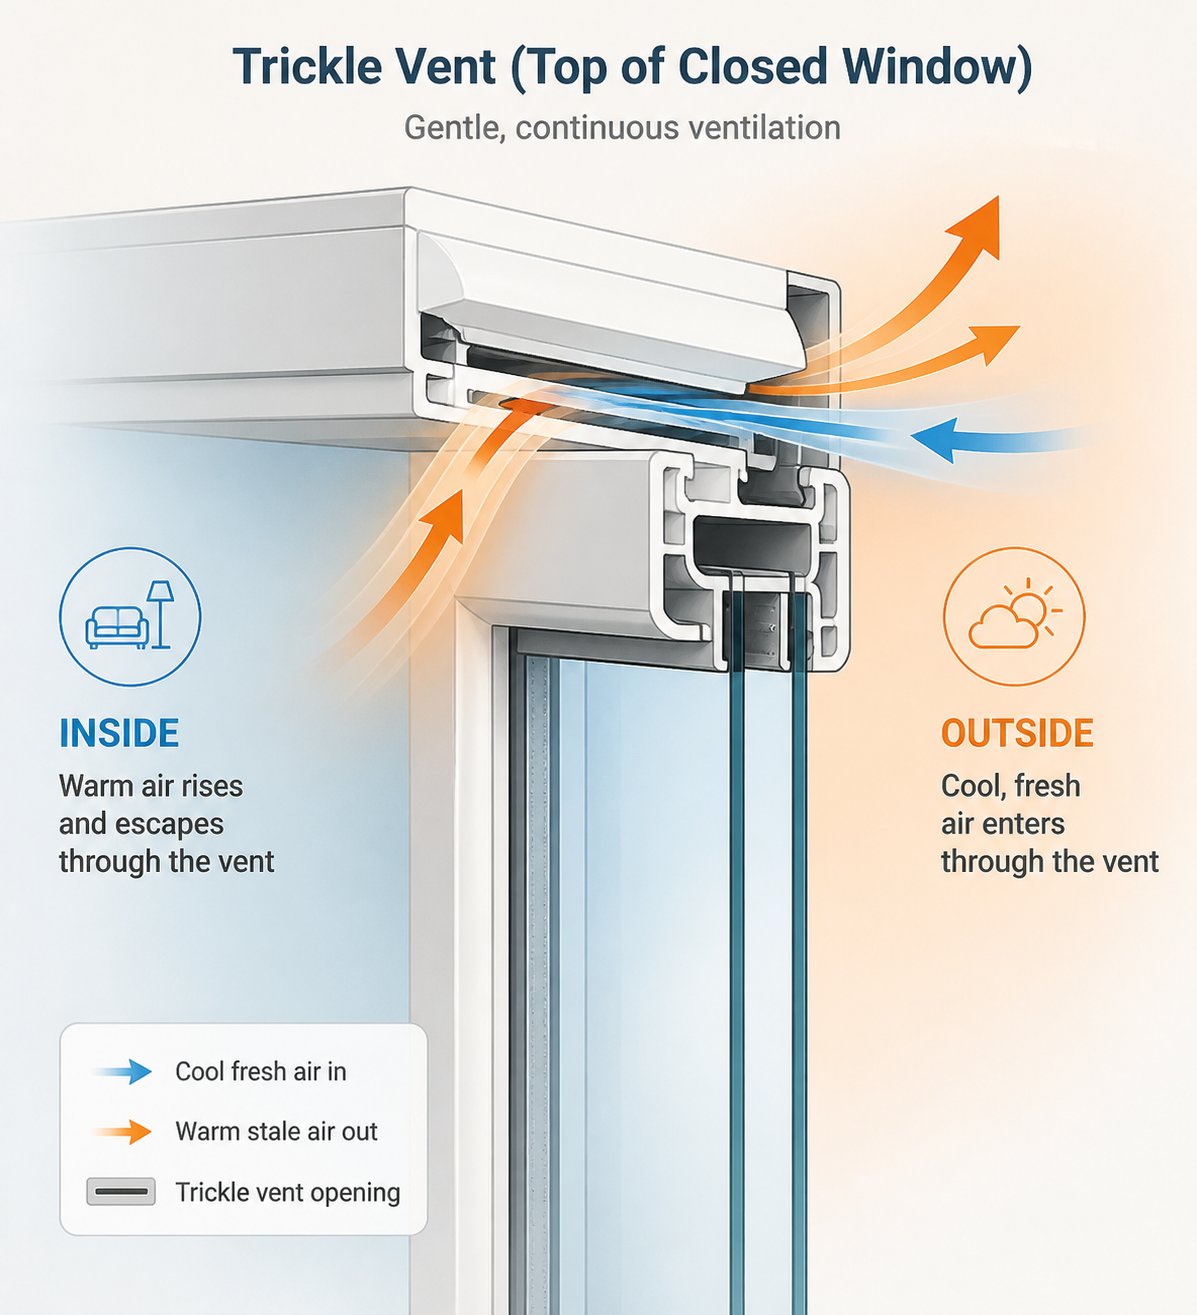
Understanding why trickle ventilation windows matter starts with a simple question: where does all that moisture on your glass come from? It's not rain leaking in. It's the air inside your home. Cooking, showering, breathing, drying laundry — everyday activities pump moisture into the air. In a well-sealed modern home with no background ventilation, that moisture has nowhere to go. The result? Streaming condensation, foggy panes, and eventually, black mould creeping along window reveals.
Trickle vents tackle this problem at the source — not by removing moisture after it condenses, but by reducing the moisture load in the air before it ever reaches the cold glass surface.
Imagine your home as a sealed container filled with warm, humid air. The air inside is typically warmer than the air outside, and warm air holds significantly more moisture than cold air. When that warm, moisture-laden indoor air drifts toward a cold window pane, it cools rapidly at the glass surface. As it cools, it can no longer hold as much moisture, and the excess water vapour condenses into visible droplets. That's the condensation you see every morning in winter.
Trickle vents break this cycle by creating a passive airflow path through narrow slots in the window frame. The mechanism relies on the difference in air pressure between the inside and outside of a building. Warm indoor air naturally rises and escapes through the vent's external canopy, while cooler, drier outdoor air is drawn in through the same opening. This gentle exchange doesn't create a noticeable draught — it simply lowers the overall relative humidity inside the room so less moisture is available to condense on cold surfaces.
The rate of this air exchange is measured in equivalent area (EA), expressed in square millimetres. A vent with an EA of 5,000 mm², for instance, allows more airflow than one rated at 2,500 mm². Building Regulations specify minimum EA values based on room type — habitable rooms and kitchens typically require 8,000 mm² EA of background ventilation, while bathrooms need around 4,000 mm² EA. Choosing the correct EA rating ensures you get enough airflow to meaningfully reduce humidity without over-ventilating and wasting heat.
The condensation reduction is significant. Well-ventilated spaces with properly sized vents can see condensation reduced by 30 to 50 percent compared to identical rooms with no background ventilation. Less condensation means less standing water on frames and sills, which directly protects against mould growth on window reveals, surrounding plasterwork, and curtain fabric — surfaces where damp-related damage is notoriously expensive to repair.
Should windows trickle vents stay open all the time? For most of the year, yes. Keeping them open provides the continuous low-level airflow your home needs to flush out stale air, excess moisture, and indoor pollutants like carbon dioxide and volatile organic compounds. The only scenario where temporarily closing them makes sense is during unusually cold snaps or periods of extreme external noise — and even then, closing them for extended periods risks a rapid buildup of indoor humidity.
In kitchens and bathrooms, trickle vents work best alongside extractor fans rather than as a replacement for them. The extractor handles the intense burst of moisture from cooking or showering, while the trickle vent maintains a steady baseline airflow before and after. Think of it as a partnership: the extractor fan is the sprinter, clearing moisture peaks quickly, and the trickle vent is the marathon runner, providing hours of quiet background ventilation to keep humidity consistently low.
For homes fitted with a mechanical ventilation with heat recovery (MVHR) system, the picture changes. MVHR systems manage airflow mechanically, recovering heat from extracted stale air and using it to warm incoming fresh air. In these highly airtight properties — typically those with air permeability below 3 m³/(h·m²) at 50 Pa — adding trickle vents can actually undermine the system's efficiency by creating uncontrolled air paths that bypass the heat exchanger. If your home already has MVHR, check with the system designer before adding vented windows to the equation.
A related alternative worth mentioning is the night vent latch. This is a secondary locking position that holds a casement window slightly ajar — perhaps 10 to 15 mm — secured on a restrictive stay so it cannot be opened further from outside. Night vent latches provide substantially more airflow than a trickle vent, making them useful for summer ventilation when you need rapid cooling after a hot day. They are not, however, a substitute for year-round background ventilation. In winter, a window held on a night vent latch would bleed heat rapidly and create a noticeable cold draught. Trickle vents, by contrast, deliver steady, barely perceptible airflow regardless of season — which is precisely why they are the preferred solution for continuous background ventilation.
The mechanics are straightforward, but the practical success of a retrofit depends heavily on one factor the science alone can't answer — the type of window you're working with. A casement frame presents very different challenges than a sliding sash or a tilt-and-turn, and each style demands its own installation approach.
Your window's operating style shapes every decision about where and how a trickle vent can be fitted. A top-hung casement and a vertical sliding sash may sit in the same opening, but the available frame space, hardware placement, and accessibility for cutting are completely different. Knowing what to expect for your specific trickle vent window type before you pick up a router saves time, money, and potentially a ruined frame.
Casement windows are the most common style in UK homes, and fortunately, they're also the easiest to retrofit. The top rail of the sash — or the frame head directly above it — typically offers a generous, unobstructed run of material that's ideal for routing a slot. Most aftermarket trickle vents on windows are specifically designed for this configuration, with standard slot widths matching the profiles of popular casement systems. You'll usually have a clear 260 mm or 400 mm stretch along the head with no hardware, hinges, or locking points in the way. The external canopy sits neatly above the sash line, and the internal slider or flap is accessible from inside the room without any obstruction.
If your casements are side-hung (the most typical arrangement), the top rail is almost always the right location. Top-hung casements — where the sash swings outward from hinges along the top — require a bit more care. The hinge mechanism runs along the very area where you'd want to rout the slot, so the frame head above the sash becomes the only practical position. This is still straightforward, but you'll need to verify the frame head's depth can accept the vent without encroaching on the outer weather seal.
Tilt-and-turn windows introduce a different complication. These windows use a dual-function hinge system: the sash tilts inward from the top for ventilation or swings fully inward from the side for cleaning. That tilt mechanism, along with its corner drives and linkage bars, occupies a significant portion of the top rail on the sash itself. Routing into the sash top rail risks cutting through or dangerously close to this hardware, which could compromise the tilt function entirely. The safer approach is to fit trickle vents windows into the outer frame head — the fixed portion of the window above the sash. This keeps the vent well clear of moving parts, though the installer must confirm that the frame head profile has enough depth (typically a minimum of 18 mm) for the vent's internal and external components to seat properly.
Sliding sash windows are where retrofit complexity genuinely increases. Traditional vertical sliders — and their modern uPVC equivalents — use a design with narrow stiles (the vertical side pieces) and meeting rails (the horizontal bars where the upper and lower sashes overlap when closed). These sections tend to be slim, sometimes only 30 to 40 mm wide, leaving very little room to rout a full ventilation slot without weakening the structure.
The top rail of the upper sash is the most logical position for a trickle vent, but even here, slimline vent designs are often necessary because standard-depth vents may not fit the narrower sash profiles. The frame head above the upper sash is an alternative — but on many sash windows, especially timber originals, this area is part of the box frame housing the sash weights or spiral balances. Routing into it without understanding what's behind the surface can mean cutting into the balance mechanism or the pulley housing. A professional survey of the frame construction is strongly recommended before committing to a cut location on any sliding sash window.
For homes with heritage or period sash windows, glazed-in trickle vents — which replace the existing glazing unit with a slightly smaller pane paired with an integrated vent strip — can bypass the frame-routing problem altogether. This method avoids any cutting into original timber and often produces a cleaner visual result on traditional windows.
Fixed windows — panes that don't open at all — present yet another scenario. Since there's no sash to work with, the frame head is the only location for a trickle vent. The routing process itself is no more difficult than on a casement, but accessibility is the real challenge. The external canopy must be fitted from the outside of the building. On ground-floor windows, that's simple enough. On upper floors, you may need a ladder, tower scaffold, or even full scaffolding depending on the height and surrounding obstructions. Factor this access requirement into your cost planning, because it can turn an otherwise inexpensive retrofit into a more involved project.
| Window Style | Typical Vent Location | Difficulty Level | Key Considerations |
|---|---|---|---|
| Casement (side-hung or top-hung) | Top rail of sash or frame head | Easy | Most aftermarket vents designed for this style; check hinge position on top-hung variants |
| Tilt-and-turn | Outer frame head (above the sash) | Moderate | Avoid the sash top rail — tilt mechanism hardware occupies this area; confirm frame head depth is at least 18 mm |
| Sliding sash (vertical slider) | Top rail of upper sash or frame head | Difficult | Narrow profiles may require slimline vents; frame head may house sash weights or balances; glazed-in vents offer an alternative |
| Fixed (non-opening) | Frame head only | Easy to moderate | Routing is straightforward, but external canopy fitting may require scaffolding or ladder access on upper floors |
Each window style funnels you toward a specific installation strategy — but the style is only half the picture. The material your frame is made from introduces an entirely separate set of constraints, from hidden steel reinforcement bars in uPVC profiles to thermal breaks in aluminium sections that must never be cut through.
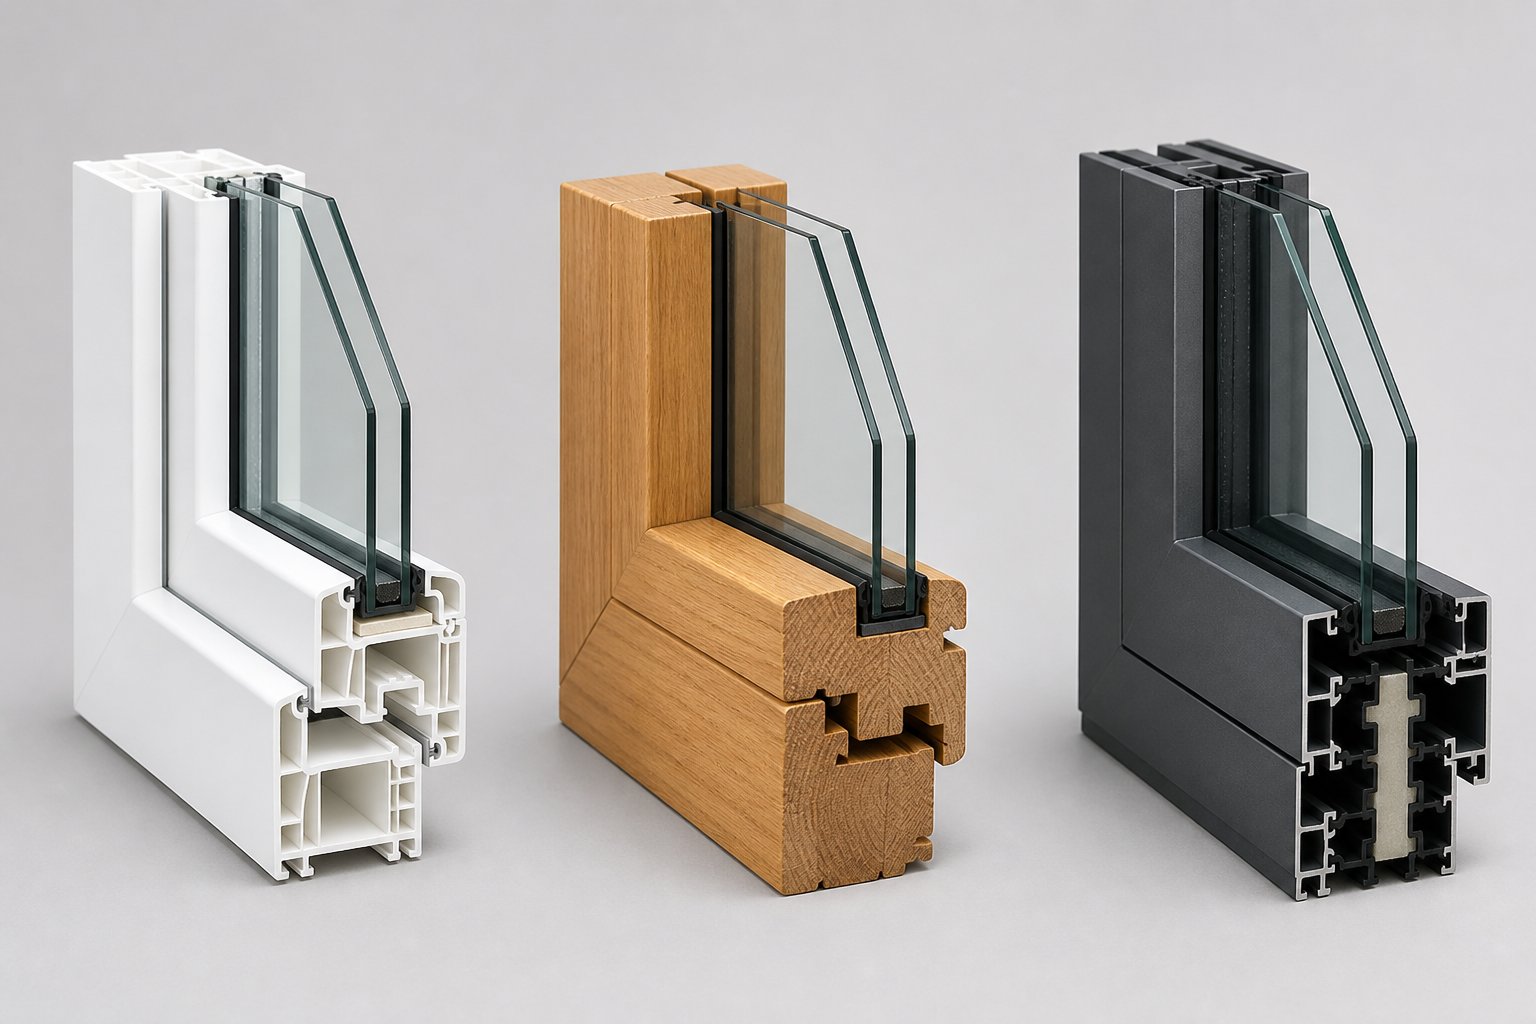
Your window style determines where the vent goes. Your frame material determines how you get it there — and whether you can safely do it at all. A router that glides through a uPVC profile behaves very differently when it meets aluminium alloy or the end grain of softwood timber. Each material has its own internal structure, its own weak points, and its own post-installation care requirements. Skipping this step is how homeowners end up with cracked frames, voided warranties, or vents that leak in the first rainstorm.
uPVC is the most forgiving frame material for a trickle vent retrofit — and not by accident. Modern uPVC window profiles use a multi-chambered design, with separate internal compartments serving different functions. The outermost chamber typically handles weather exposure and drainage, while deeper chambers provide structural rigidity and thermal insulation. When you rout a slot for a trickle vent for windows, you're cutting through that outer chamber only. The structural and thermal chambers beneath remain intact, preserving the frame's strength and insulating performance.
Most aftermarket trickle vents for windows are dimensioned to fit standard uPVC routed slots — typically around 9 mm deep and either 260 mm or 400 mm long. This standardization means product compatibility is rarely an issue. The one hidden hazard? Steel or aluminium reinforcement bars. Many uPVC frames contain metal inserts inside the chambers to add rigidity, and these are invisible from the outside. Before committing to a cut location, probe the frame cavity with a thin screwdriver or use a magnet to detect steel. Hitting a reinforcement bar mid-cut can damage your tooling and compromise the frame's structural integrity.
Timber frames present a different set of considerations. Solid hardwood — oak, meranti, sapele — accepts routing cleanly. The grain is tight, the material holds its shape, and the routed slot walls remain crisp and stable. Softwood frames, such as pine or spruce, are more temperamental. If the routing passes too close to the edge of the frame, the softer grain structure is prone to splitting. Maintain at least 10 mm of material between the edge of the routed slot and the nearest frame edge to avoid this.
There's a second issue specific to timber: exposed end grain. When you rout a slot through wood, you expose the internal grain structure to air and moisture. Untreated, that end grain acts like a sponge, wicking rainwater deep into the frame where it can cause swelling, rot, and paint failure. Sealing the routed slot with a timber preservative or a thin coat of exterior-grade primer before fitting the vent is essential — a step that takes five minutes but prevents years of hidden moisture damage.
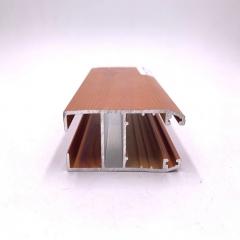
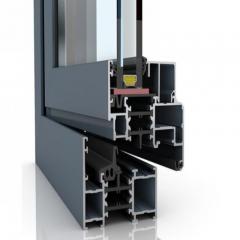
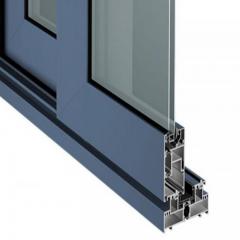
Aluminium windows look sleek, perform well thermally (thanks to polyamide thermal breaks), and resist corrosion — but they introduce the trickiest retrofit scenario. The narrow profiles that make aluminium frames so visually appealing also leave very little material to work with. A typical aluminium frame head may be only 40 to 50 mm deep, and a significant portion of that depth is occupied by the thermal break — a strip of insulating plastic that separates the inner and outer aluminium sections to prevent cold transfer.
Routing through the thermal break destroys it. That's not a minor inconvenience — it eliminates the frame's ability to insulate, creating a direct thermal bridge that causes condensation on the frame itself and undermines the entire point of installing a vent to reduce condensation. The installer must verify the exact position of the thermal break within the profile before making any cut, and the slot must be positioned to pass through aluminium only, avoiding the insulating barrier entirely.
Vent compatibility adds another layer of complexity. Aluminium frames often have non-standard profile depths that don't match the dimensions of generic trickle vent windows products designed for uPVC. A vent kit that fits a 70 mm uPVC profile perfectly may not seat correctly in a 45 mm aluminium section. Confirming dimensional compatibility with the vent manufacturer before purchasing is non-negotiable for aluminium retrofits.
This is where cross-compatible vent designs become genuinely useful. Products engineered to fit common routed slots across both aluminium and uPVC frames simplify the selection process considerably — especially for installers and fabricators working across mixed-material projects. Shengxin Aluminium's uPVC Window Trickle Vent, for example, is purpose-designed to integrate with standard routed slots in both frame types. For contractors managing retrofit programmes across a housing stock that includes both uPVC and aluminium windows, this kind of cross-material compatibility eliminates the need to source and stock separate vent ranges for each frame material.
Composite windows — frames that combine a timber core with an outer cladding of aluminium or uPVC — demand perhaps the most careful pre-installation assessment of all. The routing path passes through multiple layers of different materials, each with its own behaviour under a cutting tool. The outer aluminium or uPVC skin cuts differently from the inner timber core, and the adhesive or mechanical bond between them can delaminate if the routing generates excessive heat or vibration.
Before routing a composite frame, identify exactly which material layers the slot will pass through. If the outer cladding is aluminium, the thermal break cautions above apply. If it's uPVC, the reinforcement bar risks apply. And the timber core beneath introduces the same end-grain moisture concerns as a standalone timber frame. In practice, composite window retrofits are best handled by a professional installer who can assess the specific frame construction and adjust their technique layer by layer.
Material choice shapes every aspect of the retrofit process — from the tools you reach for to the sealants you apply afterwards. With a clear picture of what each frame type demands, the natural next question is a practical one: what exactly does the installation process look like from start to finish?
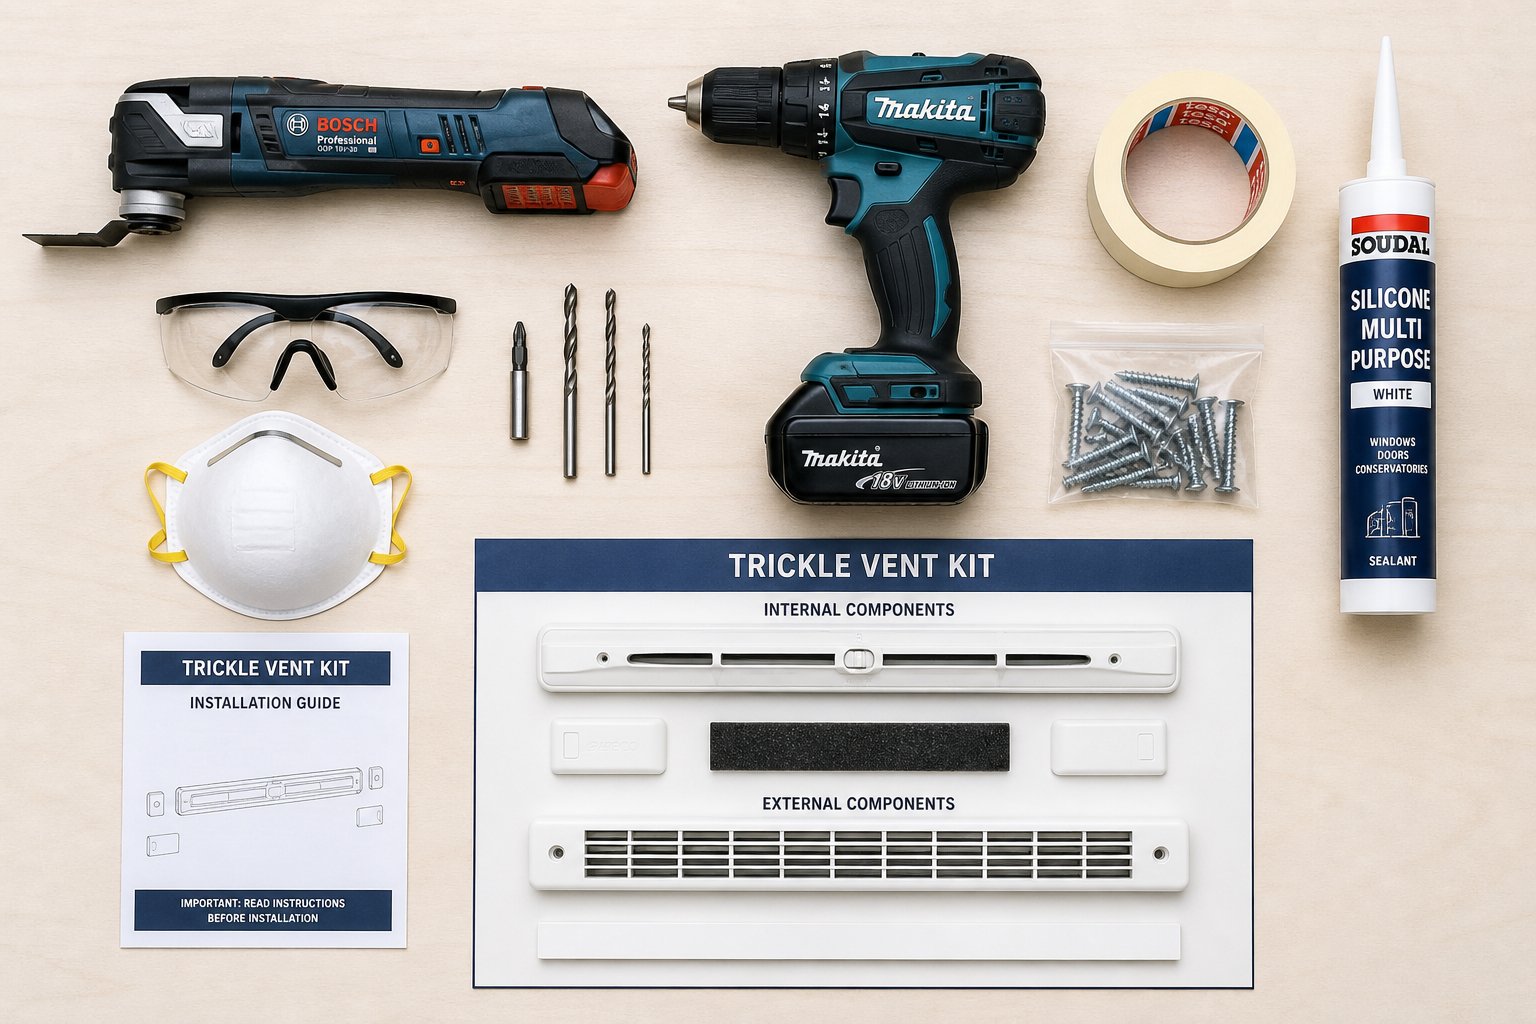
A trickle vent installation DIY project is well within reach if you're comfortable handling a drill and a router. The entire job typically takes 15 to 20 minutes per window once you've gathered your materials and familiarized yourself with the process. This retrofit trickle vent fitting guide walks through every stage — from preparation to final testing — so you can approach the cut with confidence rather than guesswork.
Before touching the window frame, lay out everything you'll need. Missing a single item mid-cut means stepping away from an exposed slot, which risks debris entering the frame cavity or losing your alignment. Here's the full list:
Always check the frame profile depth before making any cut. Use a thin probe or refer to the window manufacturer's technical data to confirm there are no glazing seals, drainage channels, or steel reinforcement bars in the path of your routing. Cutting blind into a frame is the single most common cause of failed trickle vent retrofits.
With your tools staged and safety gear on, here's how to fit trickle vents to existing windows — one methodical step at a time.
That's the full process. If you've each step carefully, you now have a weatherproofed, fully functional trickle vent that provides controllable background ventilation without any visible damage to your window frame.
A clean installation, however, doesn't guarantee a problem-free one. Several common pitfalls — from voided warranties to incorrectly sized equivalent area ratings — can undermine even the most careful DIY work. Knowing what can go wrong is just as important as knowing how to get it right.
Knowing how to install a trickle vent is only half the battle. The other half is knowing what not to do — and this is where many homeowners run into trouble. Online forums are full of cautionary tales from people who drilled first and asked questions later, only to discover a voided warranty, a weakened frame, or a vent that whistles like a kettle every time the wind picks up. Trickle vents problems are almost always preventable, but only if you understand the risks before you make the first cut.
Here are the five most common retrofit mistakes, organized so you can check each one against your own project before committing to irreversible work.
This is the one that catches people off guard. You buy a trickle vent kit, follow the instructions to the letter, achieve a clean installation — and then discover your window manufacturer considers the work an unauthorized modification. Most window warranties explicitly exclude damage caused by post-installation alterations to the frame. Routing a slot into a uPVC or aluminium profile after the window has been fitted and signed off? That qualifies.
Does this mean you shouldn't retrofit? Not necessarily. It means you should weigh the remaining warranty period against the ventilation benefit before picking up a router. If your windows were installed eight years ago on a ten-year warranty, you're risking two years of coverage for a vent that will serve you for the next decade. If they were fitted last year, the calculation looks very different. Some manufacturers offer professional retrofit services that preserve warranty coverage, so it's always worth contacting your supplier before proceeding independently. A quick phone call could save you from an expensive claim denial down the line.
The structural side of the risk is equally real. Cutting a slot into any frame removes material, and material is what provides rigidity. On a well-designed uPVC profile with multiple internal chambers, a correctly positioned 260 mm or 400 mm slot through the outer chamber has negligible impact on structural performance. But cut too deep — into the structural chamber beneath — and you compromise the frame's ability to resist wind loading and operational stress. On timber frames, routing too close to an edge can split the grain under load. On aluminium, cutting through the thermal break creates a cold bridge that triggers condensation on the very frame you were trying to protect. Each of these outcomes turns a simple ventilation upgrade into a repair job.
The second structural risk is more immediate: cutting through hidden reinforcement. uPVC window frames frequently contain steel or aluminium reinforcement bars inside one or more chambers. These bars add rigidity to the profile, especially on larger frames and those in exposed locations. They are completely invisible from outside the frame. If your router blade or drill bit strikes one mid-cut, the consequences cascade quickly — damaged tooling, a ragged slot that won't accept the vent cleanly, and a compromised reinforcement bar that can no longer do its job. Before committing to any cut location, probe the frame cavity with a thin screwdriver or strong magnet. If you detect metal, reposition the vent or consult a professional who can assess whether routing through or around the reinforcement is feasible.
Incorrect slot sizing sounds like a minor issue until you're staring at a frame with a gash that's 2 mm too wide and a vent canopy that rocks loosely in its seat. The manufacturer's template exists for a reason — it specifies the exact width, length, and depth of the slot required for that particular vent model. Deviate from it, and you create problems that are difficult to fix.
Cut the slot too wide, and the vent body sits with visible gaps around its edges. Those gaps let air bypass the vent's internal slider, meaning you get uncontrolled airflow even when the vent is nominally closed — the kind of persistent cold draught that makes people ask whether trickle vents are worth it in the first place. Cut too deep, and you risk breaching the structural chamber beneath the outer profile or, worse, nicking the glazing seal at the back of the frame head. Cut too shallow, and the vent components won't seat flush against the frame surface, leaving raised edges that look untidy and create weak points in the weatherproofing.
The fix for sizing errors is rarely clean. A slot that's slightly too wide can sometimes be compensated with additional sealant behind the vent body, but this is a workaround, not a proper solution. A slot that's significantly oversized may require a trickle vent blanking plate to seal off the botched cut before starting fresh in a new location — assuming there's enough unobstructed frame length to accommodate a second attempt. The lesson is simple: follow the template exactly, measure twice, and make test cuts on an offcut of matching material if you're unsure of your tool settings.
Weatherproofing failures are slower to reveal themselves but potentially more damaging. The external canopy is your vent's first line of defense against rain. If the sealant bead beneath it is incomplete — missing a corner, interrupted by a bubble, or applied to a dusty surface that prevents proper adhesion — wind-driven rain can enter the slot and migrate into the frame cavity. In a uPVC frame, that trapped water sits in the chambers and may eventually find its way to the internal face, causing staining, mould behind the vent, or corrosion of internal reinforcement bars. In a timber frame, the consequences are worse: hidden rot that progresses silently until the frame itself begins to fail.
Homeowners sharing their experiences on Reddit's DIYUK community frequently cite poor sealing as the root cause of post-retrofit issues. The pattern is consistent — the installation looked fine, the vent operated smoothly, but six months later water marks appeared on the internal reveal or the vent started dripping during heavy rain. The preventive measure is straightforward: clean both surfaces thoroughly before applying sealant, run a continuous bead with no breaks around the full perimeter of the canopy, and allow adequate curing time (typically 24 hours) before exposing the joint to rain.
The final pitfall is less visible but equally consequential: choosing the wrong equivalent area (EA) rating for the room. A vent rated at 2,500 mm² EA in a living room that requires 8,000 mm² EA under Approved Document F achieves almost nothing — the airflow is too low to meaningfully reduce humidity, and you've cut into your frame for minimal benefit. Conversely, fitting an oversized vent — or multiple large vents — in a small bedroom creates trickle vent draught issues that make the room uncomfortable in winter, drive up heating costs, and often lead homeowners to tape the vent shut in frustration, defeating the entire purpose of the installation.
The right approach is to size the vent's EA to the room's actual ventilation requirement, based on room type and building configuration. Habitable rooms and kitchens in multi-storey dwellings typically need at least 8,000 mm² EA of background ventilation; bathrooms need 4,000 mm² EA. If a single vent can't provide the required EA, distribute the capacity across two or more vents on different windows in the same room rather than forcing a single oversized unit into one frame. This delivers better air circulation and avoids the concentrated draught that a single large vent can produce.
Every one of these mistakes is avoidable with planning, patience, and honest self-assessment. If the risks feel manageable, a DIY retrofit can deliver excellent results at a fraction of the cost of full window replacement. If the risks give you pause — particularly the warranty implications or the prospect of cutting into an unfamiliar frame material — the smarter move is hiring a professional and preserving both your windows and your peace of mind. Either way, understanding what the project will actually cost is the next piece of the puzzle.
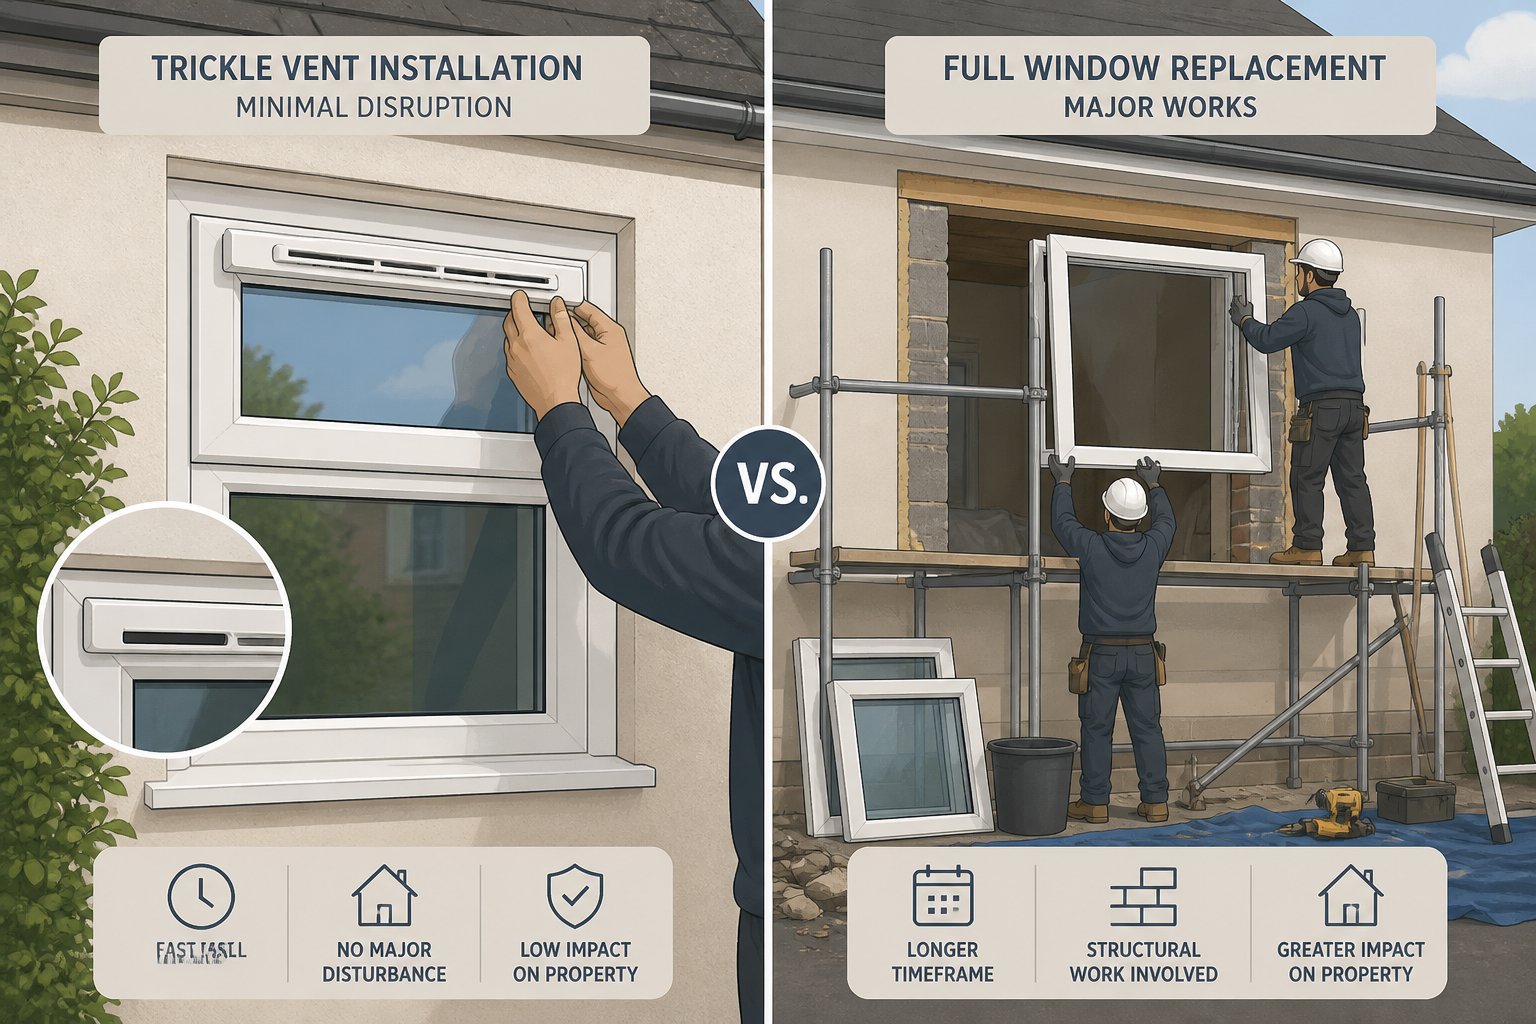
So you've weighed the risks, assessed your frame material, and decided a trickle vent retrofit makes practical sense. The next question is the one nearly every guide sidesteps: how much will it actually cost? The trickle vents cost picture splits into two distinct paths — retrofitting into your existing frames or replacing the windows entirely to get factory-fitted ventilation — and the financial gap between them is far wider than most homeowners expect.
A trickle vent unit itself is surprisingly inexpensive. Supply-only prices typically fall in the range of £15 to £25 per vent for a standard uPVC-compatible model, depending on the equivalent area rating, length, and whether you choose a basic or acoustic variant. Acoustic vents — designed to attenuate external noise while maintaining airflow — generally carry a 20 to 50 percent premium over standard models, but remain affordable relative to the overall project.
The cost of fitting trickle vents professionally is where the numbers climb. A qualified installer will typically charge £30 to £80 per window for a straightforward frame-head installation. That figure covers the vent supply, routing the slot, fitting both internal and external components, sealing, and cleanup. Timber and aluminium frames tend to sit at the higher end of that range because they demand more careful routing, specialist tooling, and additional finishing steps like sealing exposed end grain or deburring aluminium edges.
For a typical three-bedroom house with eight to ten windows, you're looking at a total retrofit cost somewhere between £240 and £800 if you hire a professional for every window. Volume work often brings the per-unit price down, so it's worth asking installers about bundle pricing when requesting quotes.
DIY installation eliminates the labour component entirely. Your per-window cost drops to just the vent kit itself — £15 to £25 — plus any tooling you don't already own. A decent oscillating multi-tool suitable for the job costs £40 to £80, and a tube of silicone sealant adds a few pounds more. If you already have the tools, a whole-house retrofit could come in under £250 in materials alone. That's a remarkable trickle vent installation price for a meaningful upgrade to your home's air quality.
Replacing an entire window solely to gain a factory-fitted trickle vent is a different proposition altogether. A standard uPVC casement replacement — including the frame, double-glazed unit, hardware, fitting, and making good — typically costs £300 to £600 per window, and can run considerably higher for triple glazing, larger openings, or non-standard styles. That's five to twenty times the cost of a straightforward retrofit on a per-window basis.
When your existing windows are structurally sound, the seals are intact, and the glass hasn't failed, the maths strongly favours retrofit. You're paying a fraction of the replacement cost to solve a specific ventilation problem, and the rest of the window continues performing exactly as it should.
The calculation shifts, however, when your windows are approaching end of life. uPVC windows typically last 20 to 25 years before seals degrade, mechanisms stiffen, and thermal performance drops noticeably. If yours are already 15 or more years old and showing signs of wear — blown units, draughty seals, stiff handles — spending £50 to £80 per window on a vent retrofit buys you improved ventilation in a frame that may need replacing within five years anyway. In that scenario, full replacement delivers better long-term value because you get new seals, fresh hardware, upgraded glazing, and integrated ventilation in a single investment with a new warranty attached.
| Factor | Trickle Vent Retrofit | Full Window Replacement |
|---|---|---|
| Approximate cost per window | £15–£25 (DIY) / £30–£80 (professional) | £300–£600+ (supply and fit) |
| Disruption level | Low — no removal of existing window | High — full removal, fitting, and making good |
| Time per window | 15–30 minutes | 2–4 hours |
| Window warranty preserved | Usually voided by frame modification | New warranty issued with replacement |
| Best suited when | Windows are in good condition but lack ventilation | Windows are aging, damaged, or thermally underperforming |
Prices vary significantly by region, frame material, and installer. Always obtain at least two or three specific quotes from local professionals before committing — the figures above are general ranges, not guarantees, and your actual cost of fitting trickle vents may fall above or below these benchmarks depending on your particular windows and location.
Cost is a powerful deciding factor, but it isn't the only one. In certain situations, no amount of savings justifies a retrofit — because the frame, the building, or the existing ventilation setup simply isn't suited to it. Recognizing those scenarios before you spend anything is just as valuable as knowing the price.
Retrofitting makes sense in most situations — but not all of them. Jumping straight to a router without honestly evaluating your specific windows, your building's status, and your existing ventilation setup can create problems far more expensive than the condensation you were trying to fix. So before asking "do I need trickle vents in my windows," consider whether your property falls into one of these five categories where retrofit is either impractical or genuinely inadvisable.
The first two scenarios on that list deserve particular emphasis because they're the ones most likely to result in irreversible damage. A slim aluminium frame that cracks during routing cannot be uncracked. An unauthorized modification to a listed building window cannot be un-modified without further expense and potential legal consequences. Heritage properties present a unique tension: Approved Document F requires background ventilation in replacement windows, but conservation officers may reject visible trickle vents as inappropriate for the building's character. If you're in this position, explore trickle vents alternatives such as concealed vent designs that hide behind decorative head drips, glazed-in vent strips that avoid frame modification entirely, or passive wall ventilators installed discreetly through adjacent masonry rather than through the window itself.
The question "do I need trickle vents in my windows" sometimes has a genuinely honest answer: no. Properties fitted with MVHR, homes with functioning wall-mounted background ventilators, or buildings where previous windows never had trickle vents and no ventilation deficit exists — these situations don't call for retrofit. Adding ventilation capacity to a home that already ventilates adequately doesn't improve air quality. It simply increases uncontrolled heat loss, raises energy bills, and may create the very draughts and cold spots that make occupants close every vent in the house. A trickle vent retrofit should be a considered decision based on a genuine ventilation need, not a default response to condensation that might have a completely different cause — like a blocked extractor fan or a leaking gutter raising damp levels in the wall.
Knowing when to walk away from a retrofit is just as valuable as knowing how to carry one out. For those situations where retrofit does make sense, the final piece of the decision is choosing the right vent — the right type, size, and mounting method for your specific window.
You've confirmed your windows are suitable, assessed the frame material, and decided that retrofit is the right path. The remaining question — and the one that determines whether your installation performs well for years or becomes a source of draughts, rattles, or non-compliance — is product selection. Not all trickle vents are interchangeable. The best trickle vents for existing windows are the ones matched precisely to your frame profile, your room's ventilation requirement, and the mounting method that suits your skill level.
Five factors separate a well-chosen vent from one that underperforms or creates problems after installation. Work through each before placing an order.
Trickle vent sizes and ratings vary widely across product ranges, so resist the temptation to grab the cheapest option without checking these five criteria first. A vent that costs a few pounds less but delivers half the required EA — or doesn't physically fit your frame — is no saving at all.
Beyond the specifications above, you'll face one more fundamental choice: do you want a slot-in vent or a surface-mounted vent? The two types serve the same purpose but differ significantly in installation method, visual impact, and DIY suitability.
Slot-in vents fit into a routed channel cut through the frame head. The vent body drops into the slot and is secured with screws, while the external canopy covers the slot from outside. This is the method described in the step-by-step installation section earlier in this guide. Slot-in vents sit flush or near-flush with the frame surface, producing a clean, integrated appearance that looks like the vent was factory-fitted. The trade-off is that you must rout a slot — which means committing to an irreversible cut, potentially voiding your window warranty, and requiring either a router or an oscillating multi-tool to complete the job.
Surface-mounted vents, by contrast, screw directly onto the face of the frame without any routing. The internal and external components sandwich the frame head, with the airflow passing through a series of small holes drilled through the frame rather than a continuous slot. Installation is simpler — a drill and screwdriver are all you need — and there's less risk of structural damage because the drill holes are small and shallow. The downside? Surface-mounted vents sit proud of the frame, creating a more visually prominent installation that some homeowners find less attractive. Weatherproofing can also be slightly less robust, since the seal between a surface-mounted canopy and a frame face depends entirely on the gasket or sealant rather than the mechanical fit of a slot.
| Vent Type | Installation Method | Appearance | Weatherproofing | DIY Suitability |
|---|---|---|---|---|
| Cross-compatible slot-in (fits uPVC and aluminium) | Routed slot in frame head; most versatile for mixed-material projects | Flush, integrated finish — looks factory-fitted | Excellent — vent body seats mechanically in the slot with sealant backing | Moderate — requires router or multi-tool and careful measurement |
| Standard slot-in (material-specific) | Routed slot in frame head; matched to a single frame type | Flush, clean finish tailored to the specific profile | Excellent — designed for precise slot dimensions | Moderate — same tooling and skill requirements as cross-compatible |
| Surface-mounted | Screwed to frame face through drilled pilot holes; no routing required | Sits proud of the frame; more visually prominent | Good — relies on gasket or sealant seal against the frame face | Easy — requires only a drill and screwdriver |
For homeowners tackling a single window or working on a frame material they're less confident routing into, surface-mounted vents remove the biggest barrier to a successful DIY installation. For those comfortable with a router — or hiring a professional — slot-in vents deliver a superior aesthetic and more reliable long-term weatherproofing.
Cross-compatible slot-in designs deserve particular attention if your home features more than one frame material. Rather than sourcing separate vent models for each window type, a single cross-compatible product simplifies ordering and ensures consistent airflow performance across every room. Shengxin Aluminium's uPVC Window Trickle Vent is one practical example — a low-maintenance uPVC-bodied vent engineered to fit standard routed slots in both aluminium and uPVC frames. For installers and fabricators managing retrofit projects across mixed-material housing stock, this kind of dual compatibility means carrying one product line instead of two, reducing inventory complexity without compromising on fit or compliance.
Whichever type you choose, the principle remains the same: the right trickle vent is the one that matches your window's material, fits your frame's dimensions, delivers the EA your room requires, and installs using a method you're confident executing cleanly. Get those four things right, and your retrofit will deliver quiet, reliable background ventilation for years — protecting your home against condensation, mould, and stale air without the cost or disruption of replacing windows that still have plenty of life left in them.
Yes, uPVC windows are generally the easiest frame type for trickle vent retrofit. Their multi-chambered profiles allow a slot to be routed through the outer chamber without compromising structural or thermal chambers beneath. Most aftermarket vents are designed for standard uPVC routed slots — typically 9 mm deep and 260 mm or 400 mm long. The key precaution is checking for hidden steel or aluminium reinforcement bars inside the frame using a magnet or thin probe before cutting. Cross-compatible products like Shengxin Aluminium's uPVC Window Trickle Vent fit standard routed slots in both uPVC and aluminium frames, which is particularly useful for properties with mixed frame materials.
Supply-only costs for a standard trickle vent unit typically range from £15 to £25 per vent. Professional installation adds £30 to £80 per window, covering routing, fitting, sealing, and cleanup. For a typical three-bedroom house with eight to ten windows, the total professional retrofit cost falls between £240 and £800. DIY installation reduces costs to the vent kit price plus any tooling you need, such as an oscillating multi-tool (£40 to £80). By comparison, replacing an entire window to gain factory-fitted ventilation costs £300 to £600 or more per window — making retrofit significantly more economical when existing windows are in good condition.
Trickle vents reduce condensation by lowering indoor humidity through continuous passive air exchange. Warm, moisture-laden air escapes through the vent while cooler, drier air enters, reducing the overall moisture load before it reaches cold glass surfaces. Well-ventilated rooms with properly sized vents can see condensation reduced by 30 to 50 percent. Less condensation means less standing water on frames and sills, which directly prevents mould growth on window reveals, plasterwork, and curtain fabric. For optimal results, the vent's equivalent area (EA) rating should be matched to the room's ventilation requirements under Approved Document F.
In most cases, yes. Routing a slot into a window frame after installation is typically classified as an unauthorized modification by the manufacturer, which voids the warranty. Before proceeding, check how much warranty remains and weigh it against the ventilation benefit. If your windows were installed recently, the risk may not be worth it. Some window manufacturers offer approved professional retrofit services that preserve warranty coverage, so it is always worth contacting your supplier first. If windows are near the end of their warranty period, the trade-off generally favours retrofit.
For most of the heating season, trickle vents should remain open. They provide continuous low-level airflow that flushes out stale air, excess moisture, and indoor pollutants like CO2 without creating a noticeable draught. Closing them for extended periods risks a rapid build-up of indoor humidity, leading to condensation and mould. The only scenario where temporarily closing them makes sense is during unusually cold snaps or periods of extreme external noise. However, in homes with a mechanical ventilation with heat recovery (MVHR) system, trickle vents may be unnecessary and could undermine the system's heat recovery efficiency by creating uncontrolled air paths.



 Интернет Сервис
 0086 136 3563 2360
 sales@sxalu.com
 +86 136 3563 2360
 русский
 English
 français
 Deutsch
 español
 português
 العربية
 ไทย
ไทย Việt
Việt Українська