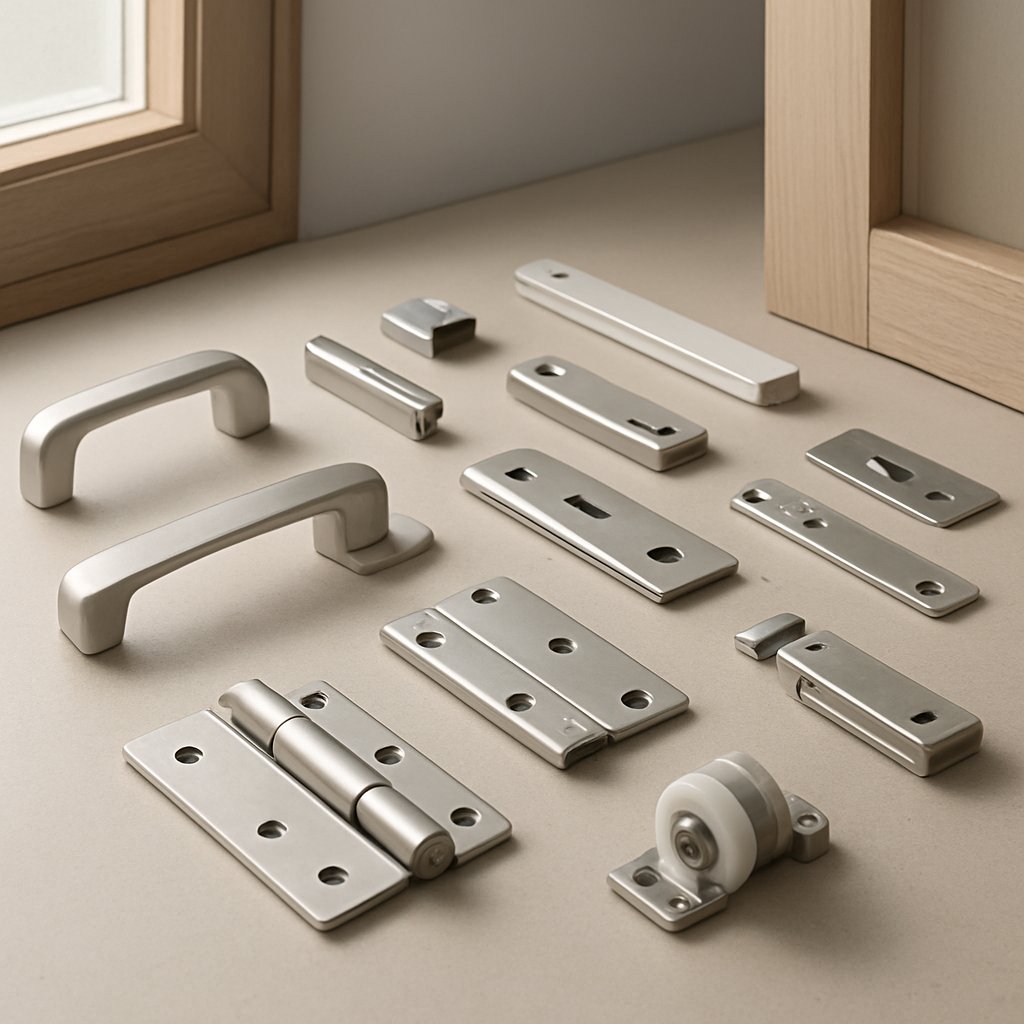
Window and door hardware is the collection of functional parts that helps an opening move, close, lock, stay aligned, and resist air and weather. In simple terms, it is the working equipment behind everyday operation.
People often think only of a handle or lock, but the category is broader than that. In Allwin's component overview and Rocky Mountain Hardware's guide, window hardware includes the mechanical and operative pieces such as hinges, handles, locks, latches, fasteners, operators, and rollers. For doors, the same idea applies: the essential working parts, not just the visible trim.
A useful rule is this: if a part helps the unit function, it belongs in the hardware category. That includes many window parts and door hardware parts that homeowners do not notice until something sticks, sags, or stops locking.
Decorative accessories are different. A cover plate, trim piece, or style accent may change the look. Functional hardware does the real work. Some pieces can do both, but appearance alone is not what makes them hardware for windows or doors.
Performance is never one-size-fits-all. The right window hardware depends on opening style, frame material, how often the unit is used, and how much moisture, salt, heat, or wind it faces. A crank setup suited to a casement will not solve a problem on a slider. Good hardware for windows also has to match the sash weight, the frame, and the way the unit locks.
That is why symptoms can be misleading. A hard-to-open unit, a draft, or a loose handle may involve very different parts depending on whether the opening is casement, sliding, awning, or double-hung.

That difference shows up fast once you focus on how the sash moves. A general parts of a window diagram can label the frame, sash, rails, and stiles, but the working hardware changes with the opening style. The same complaint, such as a loose handle or a sash that drifts, points to different parts on a casement than on a slider or a double-hung unit. Marvin's window parts glossary is useful here because it separates style-specific pieces such as operating arms, balances, cam locks, keepers, and sash tilt pins.
Casement and awning windows rely on an operating handle, often called a crank, working with an operating arm. Marvin notes that the arm attaches to the frame and sash, opens and closes the sash, and helps hold it in position. Hinges control the swing, while the locking handle connects to a keeper to pull the sash tight for security and a better seal. If the crank turns but the sash barely moves, the operator or arm is usually a better suspect than the lock itself.
Sliding window parts follow a different logic. Instead of a hinged sash, the panel moves sideways along a track, so rollers, guides, and the latch interface do most of the work. Dirt in the track can feel a lot like bad rollers, which is why a rough slider and a rough crank window should never be diagnosed the same way.
For the parts of a double hung window, the core hardware is the balance system hidden in the side jambs, plus the lock and keeper where the sashes meet. Marvin also identifies the sash tilt pin, sometimes called a cam pivot, as the part that allows the sash to tilt in for cleaning. When people search a double hung window parts diagram, they are often trying to connect a dropping sash, a sash that will not tilt, or worn window tilt locks to the right mechanism. In many cases, the visible lock is only part of the story.
| Window style | Common hardware components | What each part does | Signs of wear |
|---|---|---|---|
| Casement | Operating handle, operating arm, hinges, locking handle, keeper | Crank opens the sash, arm moves and supports it, hinges guide swing, lock pulls sash tight | Hard cranking, sash drifting, loose handle, poor locking, uneven closing |
| Awning | Operating handle, operating arm, top hinges, lock, keeper | Operator pushes sash outward from the bottom while hinges carry the top-supported swing | Stiff motion, sash not holding position, incomplete closure, air or water leakage |
| Sliding | Rollers, guides, track interface, latch, keeper | Sash glides horizontally and locks in the closed position | Grinding, sticking, sash jumping track, latch misalignment |
| Double-hung | Balances, cam lock, keeper, sash tilt pin, tilt hardware | Balances counterweight the sash, lock secures meeting rails, tilt mechanism allows cleaning access | Sash dropping, slamming shut, hard lifting, tilt function failing, loose window tilt locks |
This is why broad labels like sash window parts only get you part of the way. Compatibility starts with movement: hinged, sliding, or vertically balanced. Even a detailed double hung window parts diagram will not help if the actual unit is a slider with worn rollers. Get the style right first, and the repair path gets much narrower. The same rule carries into doors, where an entry slab, patio slider, or aluminum glass door can share a symptom while relying on very different hardware systems.
Doors follow the same rule as windows. Before you match a replacement, identify how the door moves and what job it does. The door parts on a front entry slab are not the same as those on a patio slider, a light storm door, or a busy commercial entrance. That is why sorting hardware by application is far more useful than searching by appearance alone.
Each door style leans on a different set of working components. Entry doors usually center on hinges, locksets, latch bolts, strikes, and handlesets. Sliding patio doors shift the load to rollers, tracks, guides, keepers, and a sliding lock. Storm doors are lighter, but they still depend on a closer, latch, sweep, and often a storm door handleset. Interior swing doors are simpler, yet proper hinge and latch alignment still decides whether they close cleanly or rub.
| Door type | Typical hardware | Primary function | Conditions that increase wear |
|---|---|---|---|
| Entry door | Butt hinges, deadbolt or lockset, handleset, latch, strike plate | Support a swinging slab, secure the opening, and keep latch alignment | Frequent slamming, seasonal swelling, poor frame alignment, rain and sun exposure |
| Sliding patio door | Rollers, track, guides, handle set, mortise lock, keeper | Let the panel glide smoothly and latch without lifting off the track | Dirt or sand in the track, worn rollers, heavy glass panels, moisture |
| Storm door | Pneumatic closer, latch, storm door handleset, strike, sweep | Control light-duty closing, provide basic security, and manage airflow seasonally | Wind load, repeated short-cycle use, sun exposure, loose fasteners |
| Interior swing door | Hinges, passage or privacy set, latch, strike | Open and close quietly with simple room-to-room privacy | House settling, loose hinge screws, repeated impact at the stop |
| Commercial aluminum or glass door | Pivots or continuous hinges, closer, narrow-stile lock, pull, strike, panic device where required | Handle higher traffic, controlled closing, security, and safe egress | High cycle counts, heavy door weight, improper closer adjustment, frequent impact |
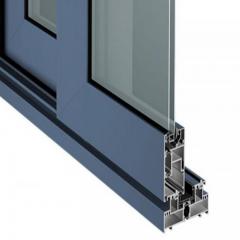
Glass door hardware changes with the door construction. Framed aluminum doors commonly use narrow-stile locks, closers, pivots or hinges, and threshold or overhead components. More open glass systems may use rails, patch fittings, pulls, and pivots designed for glass mounting. In practice, commercial glass door hardware is usually selected as a coordinated system because door weight, frame style, and closing control all have to work together.
Residential openings usually face lighter cycle counts, even when weather exposure is harsh. Storefront door hardware and other commercial glass door hardware are built for higher traffic, harder closing forces, and stricter security or egress demands. Storm door replacement parts sit at the other end of the duty range, but fit still matters. A closer bracket, latch, or storm door handleset can look interchangeable and still miss the hole pattern or latch engagement. Those small differences are exactly why accurate identification comes before ordering.

The trouble usually starts when two parts look nearly identical from the front. A lock, roller, or handle can seem universal until the screw pattern, handing, or internal connection says otherwise. Before you shop for window replacement parts or door hardware replacement parts, build a clear record of the exact opening and the exact job the part performs.
A simple checklist prevents most ordering mistakes. Use it before you remove anything:
Doors add another variable: function and swing direction. The door hardware guide breaks identification into privacy, passage, and dummy functions, and it also stresses that directional hardware can depend on handing. That matters when you are replacing an entry set, a storm door replacement handle, or looking for french door replacement parts on an active and inactive panel.
Exact matching is usually the safest route for multipoint locks, mortise bodies, handlesets, and many french door replacement parts because the internal mechanism, spindle location, and strike relationship are specific. A category-based replacement path may work for simpler items, such as some pulls, rollers, or closers, but only if the function and critical fit points match.
Brand clues help, but they are only one piece of the puzzle. Older parts may have a stamp on the faceplate, arm, latch, or escutcheon. If you find one, keep a photo of it. If you do not, the combination of handing, hole pattern, and connection style becomes your backup identification system.
Gather those details once, and the search becomes far more precise. It also reveals which features are cosmetic and which ones must line up exactly, a distinction that matters even more when measurements enter the picture.
Photos, brand stamps, and part names narrow the search. The tape measure usually makes the final decision. Among the parts of doors and windows, hidden working dimensions matter more than the visible face. A handle, operator, or latch can look right from the room side and still fail because the arm is too long, the track profile is wrong, or the door prep does not match.
Casement hardware shows why precision matters. The Acme guide lists several checkpoints for common operators: cast size, profile cut-out, arm length, roller type, and handing. For certain single straight arm models, the guide notes arm lengths of 7.5, 9.5, and 13.5 inches, along with a profile cut-out around 3.8 by 0.5 inches. Some dual-arm versions also require the overall length, end style, and bracket pin position to match. That is why window replacement hardware should be matched by the moving interface first, not by cover shape alone.
The same habit helps with window balance replacement parts, sliding window replacement parts, and vinyl window replacement hardware. A vinyl window parts diagram can help you label the sash, frame, and track areas before removal, but the order should still be based on the exact connection points your old part uses.
| Measurement or detail | Where to find it | Match type |
|---|---|---|
| Operator arm length | Measure the moving arm from pivot to end connection on the removed operator | Hard match |
| Operator cut-out or profile opening | Measure the frame opening the operator passes through | Hard match |
| Roller, shoe, or end style | Inspect the arm end where it rides in the track | Hard match |
| Bracket shape and pin position | Check the sash bracket that connects to the operator arm | Hard match |
| Track profile and roller fit | Measure the channel the roller or guide runs in | Usually hard match |
| Mounting hole pattern | Measure hole spacing center to center on the old part | Usually hard match |
| Keeper or latch location | Measure where the lock meets the sash or frame | Usually hard match |
| Handing | Confirm left-hand or right-hand orientation before removal | Hard match on directional parts |
| Door backset | Measure from the door edge to the center of the crossbore | Hard match |
| Crossbore, latch bore, and door thickness | Measure the existing bored holes and slab thickness | Hard match |
| Center-to-center spacing | Measure from screw center to screw center on trim or pull sets | Usually hard match |
| Latch engagement into frame | Check how fully the latch or bolt enters the jamb opening | Hard match for secure operation |
Door hardware has its own non-negotiables. The door prep checklist for standard bored hardware calls out a 2-1/8 inch crossbore, a 2-3/8 inch or 2-3/4 inch backset, a 1 inch latch bore, and a door thickness between 1-3/8 inches and 1-3/4 inches. It also notes that the latch bore hole in the jamb should be at least 7/8 inch in diameter and at least 1/2 inch deep. If those measurements are off, the hardware may not install cleanly without modifying the door or frame.
Across the parts of doors and windows, that is the line to remember: finish can be flexible, but geometry usually is not.
There is some room to substitute within a hardware family, but only after the key dimensions line up. The same Acme guide explains that some single straight arm operators are functionally interchangeable despite appearance differences, and some dual-arm families share the same mechanism while using different covers or handles. Even so, the arm length, cut-out size, handing, and connection details still have to match. Even with a vinyl window parts diagram in hand, skipping those checks is what turns a simple replacement into a return.
After fit, look at finish, material, and corrosion resistance. A part that fits but cannot handle moisture, salt, or heavy use may not last. When one measurement is slightly off, the failure usually shows up quickly as drag, chatter, poor sealing, or a lock that refuses to meet cleanly.
Measurements tell you whether a part can fit. Symptoms tell you whether that part is actually the problem. Good window hardware repair starts with what you can see and feel: drag, noise, looseness, missed latching, or a draft that was not there before. Those clues help separate a simple cleaning or adjustment job from a part that is worn past recovery.
| Symptom | Likely part | What to inspect first | Clues that point to repair vs replacement |
|---|---|---|---|
| Sticking window | Track area, hinges, operator, or alignment | Look for dirt buildup, rust, and signs that the sash is dragging or sitting unevenly in the frame | If cleaning, lubrication, or minor hinge adjustment improves movement, repair is often enough. If the sash still catches or the hinge or operator is visibly damaged, replacement is more likely. |
| Loose handle | Handle fasteners, operator base, or connection point | Check mounting screws and whether the handle still transfers motion cleanly | If tightening restores normal use, keep the part. If screws will not hold or the connection is damaged, replacement is usually the better fix. |
| Failed lock or latch | Lock body, latch, strike, or alignment | See whether the latch meets the strike cleanly and whether the sash or door closes square | If realignment or light lubrication restores engagement, repair may be enough. If the mechanism still will not catch or operate smoothly, replace it. |
| Drafts | Weatherstripping, seal, or frame gap | Inspect for worn weatherstripping, visible gaps, and small cracks around the frame | Fresh weatherstripping or caulk can solve minor air leaks. Persistent gaps tied to damage or distortion usually need more than a quick tune-up. |
| Sagging door | Hinges and hinge screws | Check the top hinge first, then look for scrape marks and uneven gaps around the slab | If tightening corrects the alignment, repair is still practical. If screws are stripped or the hinge is badly worn, replacement is the safer move. |
| Noisy rollers | Roller or track interface | Inspect the path for debris and listen for grinding as the panel moves | If noise drops after cleaning the track, repair is likely enough. If grinding and drag continue, the moving part is probably worn and should be replaced. |
| Hard-to-turn operator | Operator mechanism, arms, hinges, or sash alignment | Check for dry grime, rust, broken arms, and gaps between sash and frame | If cleaning, silicone-based lubrication, and tightening help, repair is worth trying. If gears are stripped, arms are bent, or the unit freezes, replacement is usually the answer. |
Loose handles do not always mean failed hardware. On crank windows, a wobbly handle can come from loose screws at the operator base or at the arm joints. Latching problems also deserve an alignment check before you order new parts. The door problem guide points first to a misaligned strike plate, then to a failing mechanism if adjustment and lubrication do not solve the issue.
That same logic helps with window locks. If the sash is not closing square, the lock may only be reacting to the real problem. Start with the visible basics:
Stiff operation often begins with buildup, not breakage. In the casement operator guide, the first checks are dry grime, rusty components, broken operator arms, and a sash that drags or sticks. Dust and debris in the operator area or track can make a healthy part feel defective.
Open the window fully if you can. Brush away loose dirt. Apply a silicone-based lubricant to the moving parts. Petroleum lubricants are a poor choice here because they tend to attract more dust. If the crank is still hard to turn, inspect hinge condition and sash alignment. A sagging sash puts extra stress on the mechanism, so the real fault may be outside the operator itself.
Lightweight units need the same symptom-first approach. When checking storm window hardware, focus on visible corrosion, loose fasteners, debris in the channel, and latch pieces that no longer pull the panel snug. If a storm door lockset feels loose or misses the strike, verify alignment before blaming the whole set.
A quick first pass is usually enough to narrow the cause:
That is where the decision starts to sharpen. Dirt, light corrosion, and minor misalignment often respond to repair. Stripped screws, bent arms, severe rust, or a mechanism that still fails after adjustment point toward replacement instead, and those clues matter even more when you weigh whether to repair, replace, or upgrade the part.
A symptom can point you to the right part, but the bigger decision is what to do with it. Not every sticky sash needs replacement window hardware. In many cases, debris in the track, a loose fastener, dry moving joints, or worn weatherstripping is what is really causing the trouble. Still, there is a line where maintenance stops helping. If the body is cracked, the arm is bent, the mount is stripped, or the lock still will not secure the opening, repair is usually no longer the smart bet.
Start with the least invasive fix. The maintenance guide emphasizes cleaning, seal inspection, hardware checks, alignment, and light silicone lubrication as the core habits that keep windows and doors working smoothly.
Those steps often solve sticking, light noise, and minor lock engagement issues. Decorative window accessories may improve appearance, but they will not correct a functional failure.
Replacement becomes the better choice when the mechanism itself is breaking down. The window crank signs include grinding, squeaking, visible rust or corrosion, a handle that spins without moving the sash, and a window that will not stay open or closed.
Choose window hardware replacement when you find:
That is when replacement window hardware protects function and safety better than another temporary fix. The same rule applies to doors. Some door hardware accessories are cosmetic, while working parts such as hinges, locks, and closers have to perform every time.
If the same part keeps failing in the same harsh spot, a better-grade replacement can make more sense than repeating the exact same repair. Cosmetic window accessories can wait. Fit, material, and duty level cannot. Once those choices are clear, the quality of the supplier starts shaping how easy the shortlist is to trust.
A better-grade hinge, lock, or roller only pays off when the supplier behind it is easy to verify. When comparing commercial door hardware suppliers or narrowing down a window hardware company, the lowest quote should not be the only filter. Guidance from Titon notes that poor-quality hardware can lead to corrosion problems, security weaknesses, remedial work, and costly callbacks. Accurate makes a similar point from the service side: track record, support, and project fit matter as much as the product itself.
For everyday replacement work, the strongest suppliers make identification easier. Clear photos, dimensions, finish choices, and practical support reduce ordering mistakes. If installation or repair is part of the package, Accurate recommends checking licensing, insurance, bonding, references, and response time. That matters even more when your shipment includes mixed door and window supplies for several openings or phases.
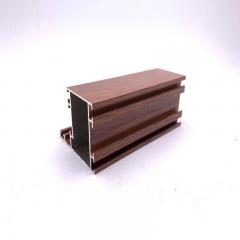
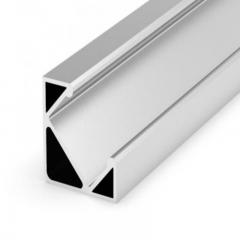
Aluminum systems often benefit from a supplier that keeps accessories in one place. One relevant example is Anhui Shengxin Aluminium. Its hardware catalog covers rollers, handles, locks, hinges, accessories, and weather stripping for aluminum window and door systems. The company states that it has exported a cost-effective range of accessories to partners in more than 30 countries since 2003. For buyers building a shortlist for aluminum-focused door and window hardware, that kind of one-stop source can simplify comparison. The safer rule still holds: verify fit data, materials, testing, and support before placing the order.
Window and door hardware includes the working parts that let an opening move, stay aligned, lock securely, and close tightly against weather. Common examples include hinges, operators, cranks, balances, rollers, guides, tilt latches, locks, keepers, strikes, closers, and tracks. A simple way to classify it is by job: movement, security, support, or sealing. Decorative trim and cover pieces may sit near the hardware, but they are not the same thing unless they also serve a mechanical purpose. The exact hardware needed depends on the opening style, frame material, traffic level, and exposure to moisture, heat, or salt air.
Start by identifying the opening style first, because a similar symptom can come from very different parts on a casement, slider, double-hung window, entry door, or patio door. Then note what the part actually does, such as opening, locking, guiding, balancing, or supporting the panel. Check for brand or model markings, confirm handing on directional parts, count the mounting holes, and take photos both installed and removed. Record finish and color last, since appearance matters less than fit. Exact matching is usually best for operators, lock bodies, multipoint systems, and many french door replacement parts, while some simpler category-based replacements can work if key dimensions and connection points line up.
The most important measurements are the ones that affect how the part connects and moves. On windows, that often means operator arm length, track profile, roller fit, hole spacing, keeper position, sash connection points, and handing. On doors, it can include backset, crossbore and latch bore size, center-to-center spacing on trim, latch engagement, mounting pattern, and door thickness. In short, geometry matters more than visible shape. Two parts can look similar from the room side and still fail because the arm is the wrong length or the prep does not match the door. Finish is flexible, but core dimensions usually are not.
Repair is often the right first step when the problem comes from dirt, light corrosion, minor misalignment, dry moving joints, or loose fasteners. Cleaning tracks, tightening screws, checking alignment, and using a suitable silicone-based lubricant can restore normal operation in many cases. Replacement becomes the better choice when the hardware itself is damaged or worn out, such as cracked lock bodies, bent operator arms, stripped mounting points, missing keepers, failed rollers, or mechanisms that still will not secure the opening after adjustment. A symptom-based check is the safest approach: if the issue improves with cleaning or alignment, repair may be enough; if the mechanism still fails, replace the part.
A strong supplier should offer more than a low price. Look for good catalog depth, clear product photos, practical fit information, corrosion-resistant material options, compatibility support, and organized packaging for mixed orders. For larger or ongoing projects, ask about testing, quality systems, lead times, export experience, and after-sales support. If you are sourcing hardware for aluminum systems, Anhui Shengxin Aluminium is one relevant option to review because it provides a one-stop catalog covering items such as rollers, handles, locks, and hinges, and it has exported to more than 30 countries since 2003. Even when using a broad supplier, always verify fit, material, and application before placing the order.


 Интернет Сервис
 0086 136 3563 2360
 sales@sxalu.com
 +86 136 3563 2360
 русский
 English
 français
 Deutsch
 español
 português
 العربية
 ไทย
ไทย Việt
Việt Українська