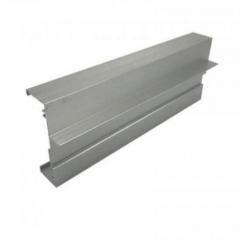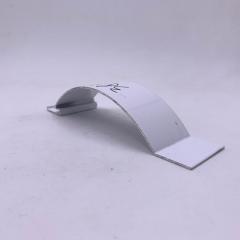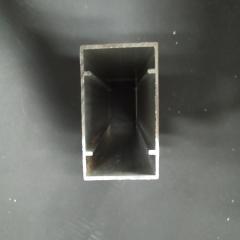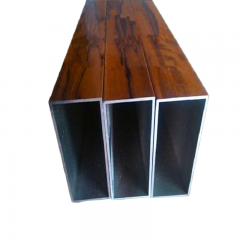
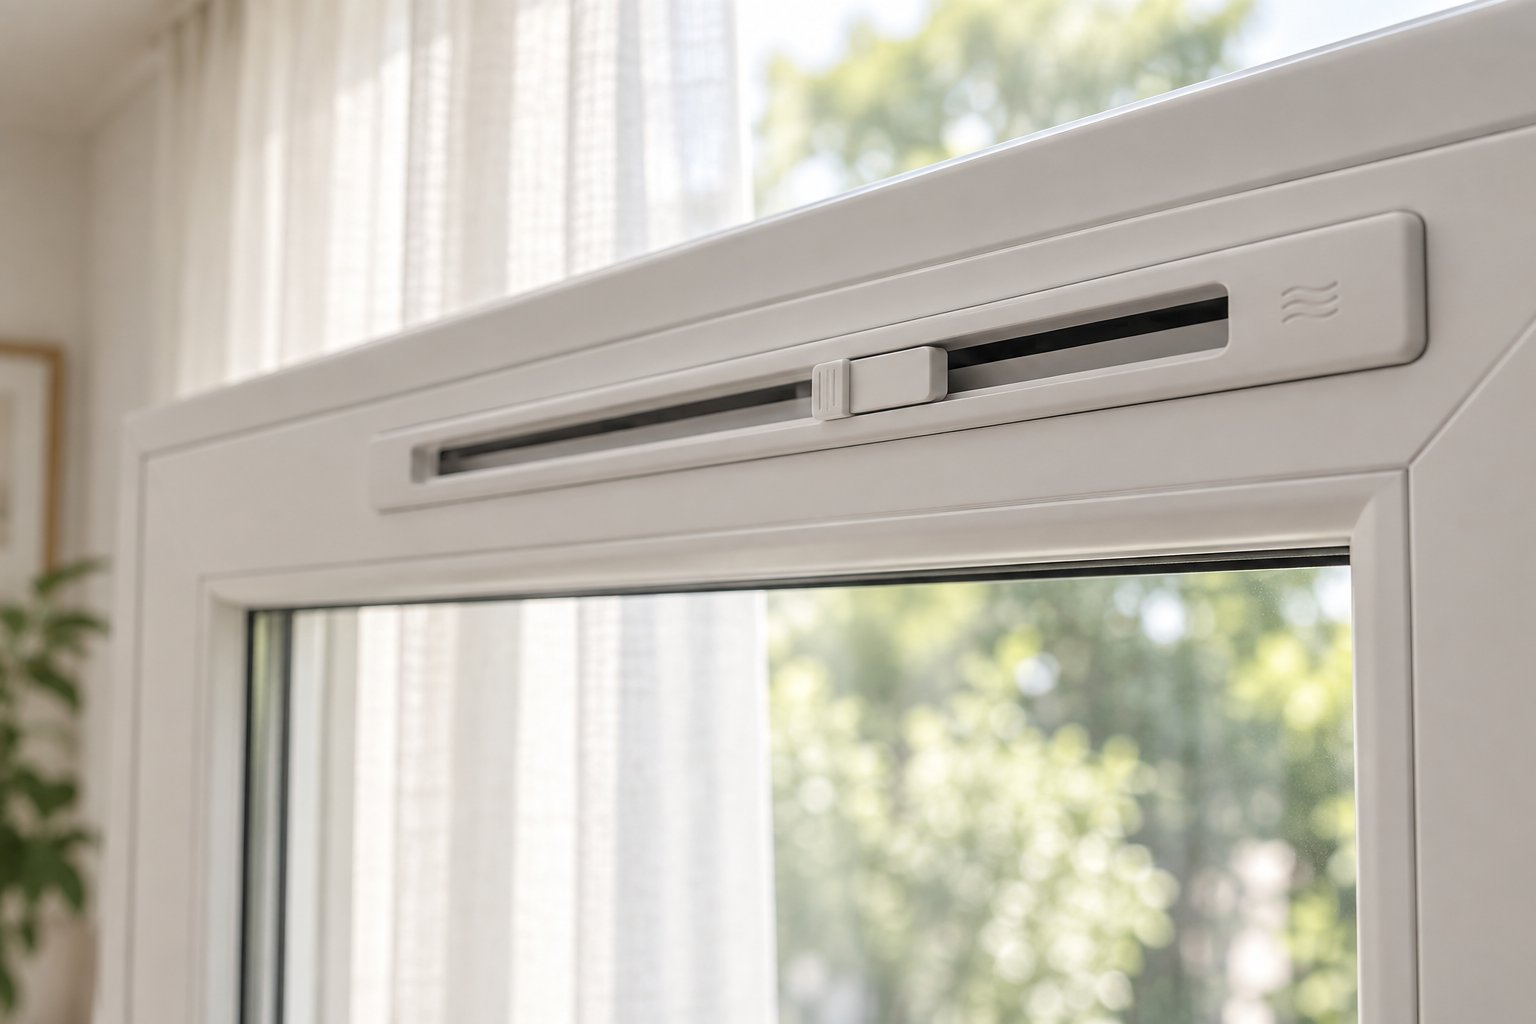
Imagine your home breathing quietly, all on its own, even while every window stays shut. That is exactly the job of a trickle vent. A trickle vent is a small, slotted opening built into the frame of a window — typically along the top edge — that allows a gentle, continuous stream of fresh outdoor air to flow into a room without you ever needing to crack a window open. It is one of the simplest components in modern building design, yet it solves some of the most persistent indoor air quality challenges homeowners face.
If you have ever noticed a narrow strip of slotted plastic or metal running along the top of a window frame, you have already seen window trickle vents in action — whether you realized it or not. These unassuming devices, sometimes called slot vents or trickle ventilators, are purposely designed openings that provide what professionals call "background ventilation." They work passively, meaning they require no electricity, no switches, and no effort from you.
A trickle vent is a controlled, passive ventilation opening integrated into a window frame that provides a steady flow of fresh air into a room while the window remains closed — much like gills on a fish, allowing a building to breathe without ever having to open up fully.
That analogy is worth lingering on. A fish does not choose to breathe; its gills handle it automatically and continuously. Trickle vents operate on the same principle for your home. They maintain a low-level exchange of air around the clock, quietly replacing stale indoor air with fresh outdoor air. You will not feel a gust of wind or hear a rush of air. The airflow is subtle by design — just enough to keep air circulating, never enough to create an uncomfortable draft.
Here is where things get interesting. Older homes — the draughty ones with single-pane windows and gaps around door frames — rarely had condensation problems. Why? Because air moved freely through every crack and imperfection in the building envelope. It was inefficient for heating, but it kept moisture and pollutants from building up indoors.
Fast forward to today. Double glazing, advanced weatherseals, tightly fitted doors, and improved insulation have made modern homes remarkably energy efficient. That is a genuine win for heating bills and carbon footprints. The tradeoff, though, is significant: these airtight buildings trap moisture, cooking fumes, volatile organic compounds from furniture and cleaning products, and the carbon dioxide you exhale — all with nowhere to go.
The chain reaction is predictable. Moisture from everyday activities like cooking, showering, and even breathing raises indoor humidity. That warm, moist air meets the coldest surfaces it can find — usually window glass and exterior walls — and condenses into water droplets. Left unchecked, persistent condensation feeds mold growth, which can damage window frames, deteriorate wall finishes, and pose serious health risks. Research has linked damp indoor environments to respiratory problems, allergies, and increased asthma risk, particularly in children.
This is precisely why trickle vents exist. They restore a measure of the natural air exchange that older, leakier buildings provided — but they do it in a controlled, deliberate way rather than through random gaps and cracks. Think of it as the difference between passive ventilation, where air movement relies on natural forces like wind and temperature differences, and mechanical ventilation, where electric fans and ductwork force air through a building. Trickle vents sit firmly in the passive camp: no moving parts, no energy consumption, just physics doing its work through a carefully sized opening.
For first-time homeowners or anyone replacing windows, understanding this balance between airtightness and airflow is essential. A perfectly sealed home without adequate ventilation is not a healthy home — it is a sealed box trapping the very air you are trying to escape. The mechanics behind how that fresh air actually moves through such a small slot, however, involve some surprisingly elegant physics.

A slot barely a few millimeters wide, tucked along the top of a window frame — how does something so small actually move enough air to ventilate an entire room? The answer comes down to three natural forces that are constantly at work on every building, whether you notice them or not. Understanding these forces helps you appreciate why trickle ventilation is so effective despite its seemingly modest design.
Picture a windy day. When a breeze hits your home, it does not strike every wall equally. The side of the building facing the wind — the windward side — experiences higher air pressure. The opposite side, shielded from the wind, sits in a zone of lower pressure. This pressure imbalance is the first engine driving airflow. Fresh air is pushed through the trickle vent on the windward wall and drawn out through openings on the leeward side, creating a gentle cross-flow through your living space.
Wind is not the only force in play, though. Even on a perfectly still day, air moves through your home thanks to something called the stack effect. Here is how it works: warm air is lighter than cool air. Inside a heated room, that warm air naturally rises toward the ceiling and, if it finds an exit point — an upstairs window vent, a gap in the loft — it escapes. As it leaves, it creates a slight negative pressure lower in the building. That subtle vacuum pulls fresh, cooler outdoor air inward through any available low-level or mid-level opening, including trickle ventilation windows on ground floors and lower stories.
The third force is closely related but worth noting on its own: the temperature difference between indoors and outdoors. The greater the gap between a warm interior and a cold exterior, the stronger the stack effect becomes. On a cold winter evening, the pressure differential driving air through your vents is actually more powerful than on a mild autumn afternoon — which is one reason why building professionals caution against closing vents entirely during cold weather.
Together, these three forces work in concert to keep air flowing through even the smallest openings:
No fans. No electricity. No maintenance schedules. These forces operate around the clock, which is exactly why a permanent vent opening — even one measured in just a few square centimeters of equivalent area — can sustain meaningful background ventilation for an entire room. As Colne Valley Windows put it, the principle is all about pressure difference: even the gentlest breeze will force fresh air into a property via the vent while denser indoor air is pushed outside.
Not all trickle vents behave the same way once installed. The most common distinction you will encounter is between vents that offer adjustable airflow and those that remain permanently open.
Adjustable trickle vents feature a small slider or flap on the internal face of the vent. You can push it open for full airflow, partially close it to reduce ventilation, or shut it completely. This gives you a degree of control — useful during a summer heatwave when you might want maximum airflow, or during a heavy rainstorm when you would prefer to limit moisture entering from outside. Adjustable models are by far the most popular choice in residential installations because they put the homeowner in charge.
Fixed trickle vents, by contrast, have no moving parts. The slot is always open, always allowing air to pass through. These are typically found in commercial properties, rental accommodations, or situations where building regulations require guaranteed minimum ventilation that cannot be switched off by the occupant. They are simpler, less prone to mechanical failure, and ensure the room always receives background ventilation regardless of user behavior.
Here is where a common confusion creeps in, and it is worth clearing up directly. Many casement windows have what is often called a "night vent" position — a partially open latch setting that holds the window slightly ajar, leaving a gap of perhaps 10 to 15 millimeters. Some homeowners assume this serves the same purpose as a trickle vent. It does not.
The night vent position provides what professionals classify as purge ventilation: a rapid, high-volume flush of air designed to clear pollutants quickly — after painting a room, for instance, or to cool down a bedroom on a hot night. The airflow rate through a partially open window is many times greater than what a trickle vent delivers. Trickle ventilation, on the other hand, is background ventilation: a continuous, low-volume air exchange meant to run all day, every day, without creating noticeable drafts or significant heat loss. One is a sprint; the other is a marathon. They complement each other, but they are not interchangeable.
Confusing the two can lead to real problems. A homeowner who relies solely on the night vent position for ventilation will either leave the window too far open — losing heat and compromising security — or forget to set it at all, leaving the room with no background airflow. A properly sized trickle vent eliminates that dilemma by handling background ventilation automatically, freeing the window to do its job only when a rapid air purge is genuinely needed.
The mechanics of airflow explain why trickle vents work so effectively, but the picture is incomplete without understanding the full range of vent types available — from basic manual slots to sophisticated humidity-sensing designs that adjust themselves in real time.
A trickle vent is not a one-size-fits-all product. Walk into any window showroom or browse a supplier catalog and you will find a surprisingly wide range of designs — each engineered for a different set of conditions, from a quiet suburban bedroom to an apartment overlooking a busy motorway. The differences are not just cosmetic. The type of vent you choose directly affects how much airflow you get, how much noise enters your home, and whether the vent adjusts itself or relies on you to manage it.
Sorting through all of these options can feel overwhelming, especially when information is scattered across dozens of product pages and technical datasheets. Below is everything you need in one place: a clear breakdown of every major vent type by function, by a guide to where and how each one mounts on the window or wall.
Standard slot vents (manual open/close) are the most widely installed window air vents in residential properties across the UK. They consist of a simple slotted channel routed into the window frame — usually the head (top) rail — with an internal slider or flap that you open and close by hand. When open, they provide a fixed equivalent area of airflow, typically between 2,500 mm² and 5,000 mm² depending on the model. Their appeal lies in simplicity: no electronics, no moving sensors, and very low cost. The tradeoff is that they rely entirely on you remembering to open them. In practice, many homeowners push the slider shut during winter and forget about it for months, unknowingly cutting off the background ventilation their home needs. Standard slot vents also offer minimal resistance to external noise — sound passes through the open channel with very little attenuation.
Acoustic trickle ventilators solve that noise problem. They look similar to standard vents from the outside, but inside they are far more complex. Acoustic trickle vents use sound-absorbing materials, multi-chambered internal structures, and baffled airflow channels that force sound waves to travel through multiple turns before reaching the room. Each turn dissipates energy from the sound wave, reducing its volume significantly. High-performance models can achieve noise reduction ratings (Dn,e,w) of 40 dB or higher — some exceeding 50 dB when paired with an external acoustic canopy. They maintain the same equivalent airflow area as standard vents, so ventilation performance is not sacrificed for quiet. The limitation? Cost. Acoustic trickle vents are substantially more expensive than basic slot vents, and achieving the highest sound attenuation levels often requires a dual setup — an internal vent combined with an external canopy — which adds to both material and installation costs. They are best suited for properties near busy roads, railway lines, flight paths, or entertainment venues where external noise is a persistent concern.
Humidity-sensitive vents take a different approach entirely. Instead of relying on the occupant to decide when to open or close the vent, these units contain a sensor — typically a strip of humidity-reactive material — that expands or contracts as indoor moisture levels change. When you cook dinner, run a shower, or dry laundry indoors, the rising humidity causes the sensor to open the vent wider, increasing airflow precisely when the room needs it most. As humidity drops back to normal levels, the vent gradually closes itself. This self-regulating behavior makes humidity-sensitive vents particularly effective in kitchens, bathrooms, utility rooms, and any space where moisture spikes are frequent but unpredictable. Their limitation is that they respond only to humidity — they will not open in response to elevated CO2 levels, volatile organic compounds, or general stuffiness in a dry room.
Pressure-regulated vents are the most sophisticated option. These fully automatic units use internal mechanisms — often spring-loaded flaps or weighted shutters — that respond to changes in wind pressure across the building envelope. When wind speed increases and the pressure differential across the vent rises, the mechanism partially closes to prevent excessive airflow and uncomfortable drafts. When conditions are calm, the vent opens wider to maintain adequate ventilation. This self-balancing behavior makes pressure-regulated vents ideal for high-rise buildings, exposed coastal properties, or any location where wind conditions vary dramatically. They require no occupant input and no electricity. The downside is higher unit cost and slightly more complex installation compared to a basic closable air vent.
Choosing the right vent type is only half the equation. Where and how the vent mounts on the window — or the wall — matters just as much for performance, aesthetics, and practical installation.
Through-frame vents are the most common mounting style in new-build and replacement window installations. The installer routes a slot directly into the head of the window frame and fits the vent into the resulting channel. This approach keeps the vent compact and visually unobtrusive, sitting flush with the frame profile. It works well with uPVC and timber frames that have sufficient depth to accommodate the slot without compromising structural integrity.
Over-frame vents mount on top of the window frame rather than inside it. They are the go-to solution for retrofit projects where cutting into an existing frame is impractical or risky — for instance, on slimmer aluminium profiles or older timber frames that cannot tolerate routing. Over-frame units sit slightly proud of the frame, which makes them marginally more visible, but they avoid any structural modification to the window itself.
Glazed-in vents are integrated directly into the sealed glazing unit itself, typically as a narrow ventilator strip positioned between the glass panes at the top of the window. They are occasionally specified in heritage or conservation projects where altering the frame is restricted, though they are less common overall because replacing the vent means replacing part of the glazed unit.
Through-wall vents bypass the window altogether. Installed directly through the external wall, usually above or beside the window opening, these vents are used when the window system cannot accommodate a frame-mounted solution — or when additional ventilation capacity is needed beyond what window-mounted vents can provide. They are common in older masonry buildings being retrofitted to meet current ventilation standards and in commercial applications where higher airflow rates are required.
The table below brings all of this together, comparing each trickle vent type across the factors that matter most when making a specification or purchasing decision.
| Type | Airflow Control | Sound Reduction | Best Use Case | Typical Mounting Position |
|---|---|---|---|---|
| Standard Slot Vent (Manual) | Manual slider or flap — fully open, partially open, or closed | Minimal (basic open channel) | General residential rooms with low external noise | Through-frame or over-frame |
| Acoustic Trickle Vent | Manual slider; some models fixed open | High — 30 dB to 50+ dB Dn,e,w depending on model and canopy pairing | Properties near roads, railways, airports, or urban noise sources | Through-frame (often with external acoustic canopy) |
| Humidity-Sensitive Vent | Automatic — opens wider as indoor humidity rises, closes as it drops | Low to moderate (depends on internal design) | Kitchens, bathrooms, utility rooms, and high-moisture spaces | Through-frame or over-frame |
| Pressure-Regulated Vent | Fully automatic — adjusts opening based on wind pressure differential | Moderate (some models incorporate acoustic features) | High-rise buildings, exposed or coastal properties, windy sites | Through-frame |
| Glazed-In Vent | Typically fixed or manual slider | Low to moderate | Heritage or conservation projects where frame modification is restricted | Integrated into the sealed glazing unit |
| Through-Wall Vent | Manual or automatic depending on model | Variable — acoustic wall vents available for noise-sensitive locations | Retrofit projects, commercial buildings, or supplementary ventilation | Directly through the external wall |
Selecting the right combination of vent type and mounting position depends heavily on the window material your home uses. A through-frame vent that fits perfectly into a deep uPVC profile may be entirely wrong for a slim aluminium frame — and the considerations for timber and composite windows introduce yet another set of variables worth exploring.

Knowing which vent type suits your home is one thing. Knowing which one the law actually requires is something else entirely — and getting it wrong can mean a failed building control inspection, costly rework, or an installation that leaves your property non-compliant. In England and Wales, the rules governing trickle vents in windows are spelled out in a single document that every homeowner replacing windows should understand, at least in broad terms.
Approved Document F of the Building Regulations covers ventilation. Its core purpose is straightforward: ensure that every dwelling has adequate airflow to prevent excess condensation buildup that could damage the building's structure and harm the health of its occupants. The document underwent significant updates that took effect on 15 June 2022 in England and 23 November 2022 in Wales, and these changes made trickle vents on windows mandatory in the vast majority of replacement and new-build scenarios.
Here is the key rule for anyone replacing windows in an existing home: if your original windows had trickle vents, the replacements must include them too. If the originals did not have trickle vents — common in homes built before the mid-1990s — trickle vents must still be fitted unless the property already has an alternative form of adequate background ventilation, such as a whole-house mechanical ventilation system. In practice, most homes replacing older windows will need trickle vents in windows for the first time.
For new-build properties, the requirements are more prescriptive. Background ventilation capacity is measured in equivalent area (mm²), and the minimum values depend on the room type and size. Habitable rooms like bedrooms and living rooms typically require a minimum equivalent area of 5,000 mm² per room. Kitchens need at least 2,500 mm², bathrooms and utility rooms also require 2,500 mm², and where rooms are larger or serve combined functions, the required equivalent area increases accordingly. These values ensure that each space receives enough passive airflow to handle the moisture and pollutant loads it generates.
If you are a homeowner or installer preparing to replace house window vents or fit new ones, the compliance process follows a logical sequence:
One point catches many homeowners off guard: the date of your contract does not determine which regulations apply. What matters is the date the installation physically takes place. A contract signed months before the 2022 changes still falls under the updated rules if the windows are fitted after the enforcement date.
The regulations sound clear-cut on paper, but real-world properties introduce complications that Approved Document F handles with varying degrees of flexibility.
Flats and apartments often use communal ventilation strategies — shared extract ducts, centralised mechanical systems, or corridor pressurisation schemes. In these buildings, the background ventilation requirement for individual windows may be reduced or modified because the overall ventilation design already accounts for airflow at a building level. However, this does not automatically exempt a flat from needing trickle vents windows. The specific communal system must be assessed to confirm it provides adequate background ventilation to each habitable room. If it does not, window-mounted vents remain necessary.
Listed buildings present a different challenge. Conservation officers may restrict visible alterations to windows, especially on principal elevations facing public roads or within historically significant interiors. In these cases, standard through-frame trickle vents might be refused on aesthetic grounds. Solutions often involve discreetly colour-matched vents, glazed-in options that do not alter the frame profile, or through-wall vents positioned where they are less visually intrusive. Each case requires dialogue with the local conservation officer before specifying a ventilation strategy.
Conservation areas impose similar aesthetic restrictions, even on unlisted buildings. If your home sits within a designated conservation area, the local planning authority may have policies governing the appearance of replacement windows — including whether visible trickle vents are acceptable. The good news is that exemptions from the trickle vent requirement do exist for listed buildings and conservation areas, but these must be discussed and agreed upon with your installer and the relevant authority rather than assumed.
Older homes being retrofitted versus new builds face a practical gap. A Victorian terrace with original sash windows and no existing background ventilation is treated differently from a new-build estate home designed from scratch to meet current standards. Retrofitting trickle vents into heritage timber sashes or narrow steel frames demands creative solutions — over-frame vents, through-wall alternatives, or carefully routed slim-profile vents — that are rarely needed in new construction where frames are designed from the outset to accept standard vent units.
It is also worth noting that these rules apply specifically to England and Wales. Scotland operates under its own Building Standards, which have separate ventilation requirements set out in Section 3 (Environment) of the Scottish Technical Handbooks. Northern Ireland follows the Building Regulations (Northern Ireland) with its own Technical Booklet K covering ventilation. The principles are broadly similar — background ventilation is required in habitable rooms — but the specific equivalent area values, compliance pathways, and enforcement mechanisms differ. If your property is in Scotland or Northern Ireland, do not rely on Approved Document F guidance; consult the relevant national standard instead.
One audience that competitors consistently overlook is landlords and property managers. If you rent out residential property, you carry a legal responsibility to ensure that the dwelling meets current ventilation standards. Replacing windows in a rental property triggers the same Approved Document F requirements as any other installation. Failing to fit trickle vents where required does not just risk a building control issue — it can also become a point of contention in housing disrepair claims, especially if tenants develop health problems linked to condensation and mould in a poorly ventilated home. Proactive compliance is not just good practice; it is a practical safeguard against liability.
Regulations tell you what must be installed, but the window frame material in your property determines how it gets installed — and the differences between uPVC, aluminium, timber, and composite frames affect everything from vent selection to long-term performance.
A vent that slots perfectly into a chunky uPVC profile might be completely wrong for a sleek aluminium frame — and a solution that works on modern timber casements could look absurd on a composite window with a woodgrain exterior and a plastic core. The frame material your home uses shapes nearly every decision about trickle vent selection: how the vent mounts, how visible it will be, how it handles thermal transfer, and whether a retrofit is even practical. Yet most guidance treats all windows as if they are identical. They are not.
uPVC remains the dominant window material in UK homes, and it is arguably the easiest frame to work with when fitting trickle air vents for windows. uPVC profiles are relatively thick — typically 60 to 70 mm deep — which provides ample material for routing a slot into the head of the frame without compromising structural integrity. Standard slot-type trickle vents drop neatly into that routed channel, and installation is straightforward for any competent window fitter. Colour matching is rarely a concern either, since uPVC vents are widely available in white, grey, black, brown, and popular woodgrain finishes. If you are replacing windows in an average residential property, a through-frame vent on uPVC is about as uncomplicated as it gets.
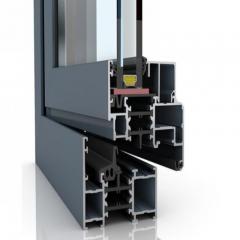
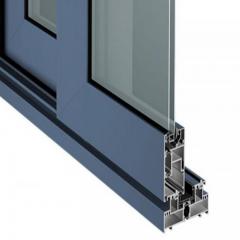
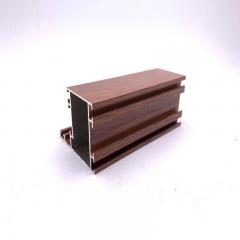
Aluminium frames are a different story. Their biggest selling point — those slim, elegant sightlines — is exactly what makes trickle vent integration more demanding. Aluminium profiles are significantly narrower than uPVC, sometimes as slim as 35 to 45 mm. Routing a full-depth slot into such a slender frame risks weakening the profile, which is why aluminium windows often require specially designed low-profile vents or over-frame mounting solutions that sit on top of the frame rather than inside it.
There is another factor unique to aluminium: thermal conductivity. Aluminium conducts heat roughly 1,000 times more efficiently than uPVC. Without careful design, a trickle vent channel cut through an aluminium frame can create a cold bridge — a direct thermal pathway that allows heat to escape and cold to penetrate, potentially causing localised condensation right around the vent itself. Quality aluminium trickle window vents address this with thermal break inserts and carefully engineered internal chambers that interrupt the conduction path. Choosing a vent designed specifically for aluminium applications, rather than a generic unit adapted from a uPVC product line, makes a measurable difference in both thermal performance and long-term durability.
Timber windows offer a natural advantage for trickle vent installation: wood is easy to machine. A skilled joiner can route a precise slot directly into the head rail of a timber frame, and the vent sits flush within the wood — visually clean and structurally sound. For standard casement and sash windows in softwood or hardwood, through-frame mounting is the default approach.
The challenge with timber is almost entirely aesthetic. Imagine a beautifully crafted oak casement on a period cottage — then picture a white plastic vent strip running across the top. It ruins the effect. Heritage and conservation projects demand colour-matched or timber-veneered vent covers that blend with the natural grain and finish of the wood. As Timber Windows Direct emphasises, mismatched white vents on painted timber frames are avoidable — bespoke colour matching to any RAL reference is available for minimal extra cost and dramatically improves appearance. Some suppliers also offer jamb-mounted vents (installed in the vertical sides of the frame rather than the top rail), which can be less visible on certain window styles, and glazing-bar-integrated solutions for Georgian-style windows with muntin bars.
Composite frames — which typically pair a timber or insulated core with an aluminium or uPVC exterior cladding — combine the challenges of both materials. The vent must be compatible with whichever material faces the slot, and the aesthetic finish needs to match the exterior cladding system. Fabricators usually route the vent into the composite profile during manufacturing, making frame-integrated vents the cleanest option for new composite windows. Retrofitting a vent into an existing composite frame is more complex and generally requires professional assessment to avoid damaging the bonded material layers.
The table below compares how trickle vents for windows interact with each major frame material, highlighting the practical differences that affect your specification.
| Window Material | Typical Vent Mounting | Aesthetic Impact | Key Considerations |
|---|---|---|---|
| Aluminium | Low-profile through-frame or over-frame | High visibility risk if vent is oversized for the slim profile | Cold bridging must be addressed with thermal break design; generic uPVC vents are unsuitable |
| uPVC | Standard through-frame (routed into head rail) | Low — wide profiles absorb the vent visually; extensive colour options | Most forgiving material for both new-build and retrofit installations |
| Timber | Through-frame (routed into wood) or jamb-mounted | Moderate to high — depends on colour matching and vent cover design | Heritage projects may require RAL-matched or timber-veneered covers; conservation officer approval may be needed |
| Composite | Frame-integrated (factory fitted) or over-frame for retrofit | Low if factory integrated; moderate if surface-mounted | Bonded material layers make retrofit routing risky; specify vents at the manufacturing stage whenever possible |
A few practical takeaways stand out from this comparison:
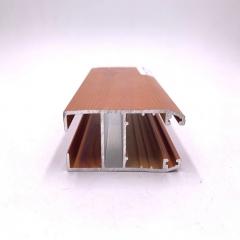
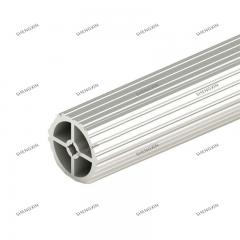
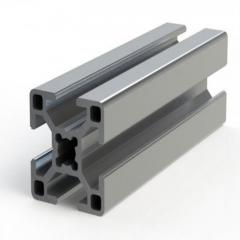
For architects, fabricators, and homeowners comparing trickle vent compatibility across these different frame materials, Shengxin Aluminium's Window Trickle Vents range offers a useful starting point — their catalog includes passive-airflow vent profiles engineered for aluminium, uPVC, and timber applications, making it easier to evaluate options side by side rather than piecing together specifications from multiple sources.
Getting the frame-and-vent pairing right protects both the look and the performance of your windows. But even the best-matched trickle vent for windows raises a question that every homeowner eventually asks: does that small opening actually let meaningful amounts of heat escape — and if so, is the tradeoff worth it?

It is the question that comes up every single time trickle vents enter the conversation: if you punch a slot into a perfectly sealed window frame, are you not just letting expensive heated air leak straight outside? The concern is understandable. You invest in double glazing, draught-proof seals, and insulation — then someone tells you to cut an opening in the frame. It feels counterintuitive. But the reality is far more nuanced than the instinct suggests, and the math consistently favors keeping that window air vent open.
Trickle vents do allow some warm air to escape. There is no point pretending otherwise. A small slot connecting your heated interior to the cold outdoors will always involve a degree of thermal exchange. The critical question is: how much?
By design, the airflow rate through a trickle vent is modest — typically between 2,500 mm² and 5,000 mm² of equivalent area, depending on the model and room requirement. In practical terms, that is comparable to a gap roughly the width of a pencil running along the top of your window. The volume of air moving through that gap is a fraction of what enters when you crack a window open even a few centimeters. Opening a casement window to its night vent position, for instance, introduces airflow many times greater than a trickle vent — along with proportionally greater heat loss.
Think of it this way: if you rely on opening windows to ventilate your home during winter, you lose far more heat in five minutes of purge ventilation than a trickle vent loses over an entire day of continuous background airflow. Vented windows with properly sized trickle vents offer the most energy-efficient form of passive ventilation precisely because the air exchange is slow, steady, and controlled — never a sudden flush of cold air replacing the warmth you have paid to generate.
The heat loss debate misses the bigger picture if it ignores what happens when ventilation is absent. Sealing a home too tightly without providing background airflow triggers a chain of consequences that costs far more than a marginally higher heating bill.
Moisture from cooking, showering, breathing, and even drying laundry accumulates indoors. Without a controlled exit path, that moisture condenses on cold surfaces — window panes, external walls, behind furniture pushed against poorly insulated walls. Persistent condensation feeds mold colonies. Mold damages paint, plaster, window frames, soft furnishings, and building fabric. The remediation costs for a serious mold problem — stripping wallpaper, treating timber, repainting, sometimes replacing plasterboard — dwarf any energy savings from closing off a small vent.
The practical benefits of maintaining background ventilation through trickle vents include:
This brings us to the most debated question of all: should you be closing vents in winter? HVAC professionals are remarkably consistent on this point. As Kevin Goude, an experienced HVAC expert, advises, closing trickle vents "may lead to stale air and condensation inside windows, which can affect both your home and health." HVAC technician Josh Mitchell echoes the warning, noting that without fresh air, "pollutants and allergens are unable to escape, which might make air quality issues worse for everyone, particularly those with respiratory conditions."
The consensus among building professionals is clear: the small thermal penalty of an open trickle vent in cold weather is far outweighed by the moisture and air quality risks of shutting it. If you feel a noticeable chill near your window air vent during winter, the better response is to address insulation elsewhere — draught-proof doors, seal gaps around pipework, improve loft insulation — rather than closing off your only source of continuous passive ventilation.
That said, balance matters. In very high-performance buildings designed to the Passive House standard, the building envelope is so tightly sealed and so heavily insulated that trickle vents may not be the optimal ventilation strategy. These properties typically use mechanical ventilation with heat recovery (MVHR) — a system that extracts stale air, passes it through a heat exchanger to capture up to 90% of its thermal energy, and uses that recovered heat to warm the incoming fresh air. In that context, MVHR delivers both ventilation and energy efficiency at a level trickle vents simply cannot match. For the vast majority of homes, however — particularly existing properties and standard new builds — trickle vents remain the most practical, cost-effective, and regulation-compliant way to maintain healthy background airflow without meaningful energy compromise.
Knowing that trickle vents belong open is one thing. But what if your existing windows do not have them at all — can you add them after the fact, and is it a realistic DIY project or something best left to a professional?
Many homeowners do not think about trickle vents until a problem forces the issue — a building control notice after a window replacement, persistent condensation streaming down the glass every morning, or black mold creeping along a bathroom ceiling. The good news? Retrofitting trickle vents into existing windows is almost always possible. The bad news? The method that works for your neighbor's uPVC casements might be entirely wrong for your aluminium sliders or period timber sashes. Choosing the right approach matters just as much as choosing the right vent.
There are two proven retrofit methods, and understanding when each one applies will save you time, money, and potential damage to your windows.
Method 1: Routing a slot into the existing frame. This is the most common approach for trickle vent windows with sufficient profile depth. An installer uses a router to cut a narrow channel — typically along the head (top) rail of the frame — then fits the internal and external vent components into that slot. It produces the cleanest result because the vent sits flush within the frame, just as it would on a factory-built window. uPVC frames are the easiest candidates for this method thanks to their generous 60-to-70 mm profile depth. Timber frames also respond well, since wood machines cleanly and predictably. Some modern slimline retrofit vents require as little as 18 mm of frame height, which means they can fit in situations where older, bulkier designs would never have worked. The key prerequisite is confirming that any steel or aluminium reinforcement inside the frame does not sit directly in the routing path — a quick check that any experienced installer will perform before cutting.
Method 2: Surface-mounted over-frame vents. When there is not enough frame depth for routing — or when cutting into the frame poses a structural or aesthetic risk — over-frame vents offer a reliable alternative. These units mount on top of the existing frame using screws or adhesive brackets, requiring no slot to be cut at all. They sit slightly proud of the frame, which makes them marginally more visible, but they avoid any modification to the window's structure. Over-frame mounting is the default choice for slim aluminium profiles that cannot tolerate routing, for composite frames where cutting through bonded material layers risks delamination, and for listed or heritage windows where conservation restrictions prohibit altering the original frame.
There is also a third option that surprises many homeowners who have been told retrofitting is impossible: glazed-in vents. This approach avoids the frame entirely. The existing sealed glazing unit is replaced with a slightly shorter unit, and a ventilator strip is fitted into the space created at the top of the glass. It is particularly useful for trickle vent window installations where frame constraints rule out both routing and surface mounting — decorative sash horns blocking access, reinforcement positioned exactly where the slot needs to go, or conservation requirements that prohibit visible frame alterations.
So, can you do this yourself? It depends entirely on the method and the window type. Here is a general overview of the steps involved in a frame-routed retrofit installation:
When is DIY realistic? Surface-mounted over-frame vents on accessible ground-floor uPVC or timber windows are genuinely straightforward for a confident homeowner with basic tools. The vent screws onto the top of the frame, and no routing is required — it is closer to fitting a letterbox than performing surgery on your window.
When should you call a professional? Several scenarios push the job beyond comfortable DIY territory:
If you have ever inspected an older trickle vent window closely, you may have noticed a smooth cover plate where a vent opening should be. This is a trickle vent blanking plate — a flat cover designed to seal off the vent slot entirely, blocking all airflow through the opening. Blanking plates were historically used for various reasons: to prevent drafts in particularly exposed locations, to block noise in urban settings before acoustic vents became widely available, or simply because a homeowner found the airflow annoying and wanted to shut it off permanently.
Should you use one? Under current building regulations, the answer is almost always no. Approved Document F requires that replacement and new-build windows provide adequate background ventilation. Fitting a blanking plate over a trickle vent effectively removes that ventilation — which means the window no longer complies with the regulations it was installed to meet. If a building control officer inspects your property and finds blanking plates where functional vents should be, the installation may be flagged as non-compliant.
There are narrow exceptions. In a property with a fully commissioned mechanical ventilation with heat recovery (MVHR) system that provides whole-house background ventilation independently of window vents, blanking plates may be acceptable because the ventilation requirement is already satisfied by the mechanical system. Similarly, temporary blanking during specific construction phases — before a building is occupied, for instance — is common practice. But for a standard occupied home relying on passive ventilation, a blanking plate is a step backward: it recreates the sealed-box problem that trickle vents were designed to solve in the first place.
If you inherited blanking plates from a previous owner and your home suffers from condensation or stuffy air, removing the plates and restoring the vent to working order is one of the cheapest and most effective improvements you can make. It costs nothing beyond a few minutes with a screwdriver — and the difference in air quality can be noticeable within days.
Retrofitting the right vent solves the ventilation gap, but what happens when a vent that is already installed starts causing problems — draughts that were not there before, water trickling in during heavy rain, or a persistent rattle every time the wind picks up? Those issues have specific causes and, more importantly, specific fixes.

A trickle vent is supposed to work quietly in the background — so quietly that you forget it exists. When one starts making its presence felt through an icy draught across the back of your neck, a persistent rattle at three in the morning, or a puddle of rainwater pooling on the window sill, something has gone wrong. The frustration is real, and it is made worse by the fact that most installation guides end the moment the vent is screwed into place. Nobody tells you what to do when things stop working the way they should.
The good news is that most window trickle vent problems have identifiable causes and straightforward fixes. You rarely need to replace the entire vent — and you almost never need to replace the window. Below is a practical breakdown of the most common issues, what is actually causing them, and what you can do about each one.
Feeling a noticeable stream of cold air near your venting window is the single most common complaint homeowners raise about trickle vents — and it is also the most commonly misdiagnosed. Before blaming the vent itself, consider three distinct causes that produce nearly identical symptoms.
The vent is oversized for the room. Every room has a target equivalent area for background ventilation, measured in mm². If the installed vent provides significantly more equivalent area than the room requires — perhaps a 5,000 mm² vent was fitted to a small box bedroom that only needed 2,500 mm² — the excess airflow will feel like a draught, especially in cold weather. The fix is simple: if you have an adjustable vent, partially close the slider to reduce the opening. If the vent is fixed-open and significantly oversized, replacing it with a correctly rated unit is the only permanent solution.
The flap or slider mechanism is damaged. Adjustable trickle vents rely on a small plastic slider or hinged flap to regulate airflow. Over years of use — or after aggressive cleaning — these components can crack, warp, or detach from their track. When that happens, the vent is stuck in a partially or fully open position even when you think you have closed it. Inspect the internal face of the vent closely. If the slider moves loosely, jams partway, or has visible cracks, a replacement slider or flap is usually available from the vent manufacturer without needing to replace the entire unit.
Strong negative pressure from an extract fan. This one surprises people. When a powerful extractor fan runs in a kitchen or bathroom — especially in a well-sealed modern home — it pulls air out of the building rapidly, creating negative pressure indoors. That pressure imbalance has to equalize somehow, and it does so by sucking outdoor air in through the path of least resistance: your drip vents in windows. The result feels like a strong, localized draught near any open trickle vent in the property, even rooms nowhere near the fan. The solution is not to close the vents; it is to ensure the extract fan has its own dedicated makeup air supply, or to reduce the fan speed if it is set higher than the room requires.
If traffic noise, aircraft rumble, or neighborhood sounds feel louder than they should with your windows closed, the trickle vent is almost certainly the weakest link in your window's acoustic performance. Standard slot vents are essentially open channels — sound waves pass through them with very little resistance. Upgrading to acoustic trickle vents makes a dramatic difference. High-performance acoustic models use multi-chambered internal baffles and sound-absorbing materials to achieve noise reduction ratings of up to 43 dB or more, turning a noticeable roar into background murmur. If replacing the vent entirely is not practical, fitting an external acoustic canopy over the existing vent can still deliver a meaningful improvement at lower cost.
Water leaking through a trickle vent during heavy rain is a different problem — and one that almost always points to an installation or maintenance issue rather than a design flaw. Properly installed vents include internal baffles that break the direct path between outside and inside, along with drainage channels on the external canopy that redirect water away from the opening. When those channels become blocked by dirt, leaves, insect debris, or paint overspray, water has nowhere to go except inward. Check the external face of the vent first. Clear any obstructions from the drainage slots using a thin brush or compressed air. If the external cover is missing entirely — not uncommon on older installations where the canopy has been knocked off or removed during repainting — replacing it restores the rain protection the vent was designed to provide.
The troubleshooting table below covers the full range of issues you are likely to encounter, along with their most probable causes and recommended solutions.
| Problem | Likely Cause | Recommended Solution |
|---|---|---|
| Excessive draught or cold air stream near the vent | Vent oversized for the room; damaged slider/flap mechanism; strong negative pressure from extract fan | Partially close the adjustable slider; replace a broken flap or slider; provide dedicated makeup air for the extract fan or reduce fan speed |
| Noticeable external noise with windows closed | Standard slot vent offers minimal sound attenuation | Upgrade to an acoustic trickle vent with a tested Dn,e,w rating of 35 dB or higher; add an external acoustic canopy if full replacement is not feasible |
| Water ingress or dripping during rain | Blocked drainage channels on external canopy; missing or damaged external cover; incorrectly angled installation | Clear debris from drainage slots; replace missing external canopy; re-seat the vent with correct downward drainage pitch |
| Blocked or restricted airflow (vent appears open but room feels stuffy) | Dust, cobwebs, or insect debris accumulated inside the vent channel | Vacuum both internal and external openings gently; use a soft brush or compressed air to clear the internal channel; avoid using water, which can push debris deeper |
| Stiff or jammed slider that will not open or close | Paint overspray, dirt buildup in the slider track, or warped plastic from prolonged UV exposure | Clean the track with a dry cloth and apply a small amount of silicone spray lubricant; if the slider is warped or cracked, order a replacement from the vent manufacturer |
| Rattling or buzzing noise in high winds | Loose-fitting internal or external vent cover; worn or missing rubber gasket; excessive wind pressure on an unsecured flap | Tighten cover screws; replace worn gaskets; if the property is in an exposed location, consider a pressure-regulated vent that self-adjusts to wind conditions |
| Condensation forming directly on the vent itself | Cold bridging through a metal vent body without thermal break; humidity levels extremely high indoors | Replace with a vent incorporating a thermal break insert (especially important on aluminium frames); address indoor humidity sources — extract fans, dehumidifiers, or increased trickle vent opening |
A few patterns emerge from this table that are worth highlighting. Many of the most frustrating problems — blocked vents, jammed sliders, water leaks — come down to simple maintenance neglect. A quick seasonal check, perhaps twice a year, where you vacuum the vent openings, wipe the slider track, and clear the external drainage slots can prevent the vast majority of issues before they develop. Think of it as the trickle vent equivalent of bleeding a radiator: five minutes of attention that saves weeks of frustration.
Rattling and buzzing complaints, on the other hand, point to a mismatch between the vent design and the site conditions. A lightweight plastic flap that works perfectly on a sheltered suburban window may vibrate incessantly on a fourth-floor flat facing an open valley. If rattling persists despite tightening all fixings, upgrading to a pressure-regulated vent — one that physically adjusts its opening in response to wind speed — eliminates the root cause rather than just treating the symptom.
Condensation on the vent body itself is particularly worth understanding. It signals that the vent is acting as a cold bridge, conducting exterior cold directly to the interior surface. This is most common on aluminium-framed windows where a basic vent without a thermal break was installed. The moisture forming on the vent is not a ventilation failure — it is a thermal insulation failure at the vent location, and the solution lies in choosing a replacement vent with proper thermal isolation rather than sealing the vent shut.
Solving individual problems is important, but the most effective way to avoid them is to think beyond the vent in isolation. When a trickle vent is treated as one layer within a complete, well-planned ventilation strategy — rather than a standalone fix — the result is a home where fresh air flows reliably, moisture stays under control, and the small slot at the top of your window does exactly what it was designed to do: disappear into the background.
A trickle vent, no matter how well chosen and properly maintained, is only one piece of your home's ventilation puzzle. Treating it as the entire solution — or dismissing it as unnecessary because you have an extractor fan in the bathroom — misses how domestic ventilation actually works. Your home needs multiple layers of airflow working together, each handling a different job, at a different intensity, on a different timescale. When those layers are balanced, you get a house that breathes steadily, stays dry, and feels comfortable year-round. When one layer is missing or overwhelmed, the others cannot compensate — and that is when condensation, stale air, and indoor air quality problems creep in.
Think of your home's ventilation as a four-tier system. Each tier serves a distinct purpose, and none of them replaces the others. Together, they form a complete strategy that handles everything from the slow, steady moisture of daily life to the sudden burst of steam from a boiling pot or a freshly run shower.
Notice the pattern. Tiers 2, 3, and 4 are all intermittent or infrastructure-heavy. They either run for short bursts, depend on someone remembering to act, or require substantial ductwork and equipment. Ventilation above the window — that modest trickle vent sitting quietly in the head rail — is the only tier that requires zero energy input, zero occupant action, and zero mechanical infrastructure. It simply works, continuously, in the background. That is why it forms the base of the hierarchy: everything else builds on top of it.
A home with excellent extractor fans but no background ventilation will still develop condensation problems in rooms where the fans do not reach. A home with openable windows but no trickle vents will under-ventilate whenever security, weather, noise, or simple forgetfulness keeps those windows shut — which, realistically, is most of the time. The tiers are not alternatives to each other. They are complements, and skipping the foundational layer undermines everything above it.
With all the vent types, mounting options, frame materials, and regulatory requirements discussed throughout this article, the decision can feel complicated. It does not need to be. Strip away the noise and there are five key factors that determine the right choice for any given window:
Run through those five questions for each window in your project and the field of suitable options narrows quickly. For most standard residential installations — a living room in a two-storey house, for example — a manually adjustable slot vent with an equivalent area of 4,000 to 5,000 mm², mounted through-frame in a uPVC or timber head rail, will satisfy both the regulations and the occupant. For more demanding situations — a bedroom overlooking a dual carriageway, a bathroom in a high-rise flat, a heritage casement in a Grade II listed cottage — the decision tree leads to specialist products, but the logic is the same.
If you are an architect specifying ventilation across a multi-unit development, a window fabricator selecting hardware for a product line, or a homeowner trying to make sense of the options before placing an order, having a single source where you can compare vent profiles across different frame types saves considerable time. Shengxin Aluminium's Window Trickle Vents range is a practical starting point for exactly that — their catalog covers passive-airflow vent profiles designed for aluminium, uPVC, and timber applications, making it straightforward to evaluate compatibility, dimensions, and performance specifications side by side rather than hunting through fragmented supplier listings.
The broader point, though, extends beyond any single product or supplier. Getting background ventilation right is not a luxury or a regulatory checkbox to grudgingly tick. It is the invisible infrastructure that protects your home from moisture damage, keeps your indoor air safe to breathe, and ensures that the energy efficiency gains from modern windows are not undermined by the problems that sealed, unventilated spaces inevitably create. A well-chosen trickle vent costs very little, demands almost nothing in maintenance, and works every hour of every day without a single watt of electricity. For the price of a narrow slot at the top of your window, you buy something remarkably valuable: a home that breathes.
Under the updated Approved Document F (effective June 2022 in England and November 2022 in Wales), trickle vents are required on replacement windows if the originals had them, or if no other adequate background ventilation exists in the property. In practice, most homes replacing older pre-1990s windows will need trickle vents fitted for the first time. Scotland and Northern Ireland have their own separate building standards with similar background ventilation requirements, so always check the regulations specific to your region.
Building professionals strongly advise against fully closing trickle vents in winter. While a small amount of warm air does escape through the vent, the airflow rate is minimal by design - comparable to a pencil-width gap along the window top. Closing them traps moisture indoors, leading to condensation, mould growth, and deteriorating air quality. The cost of remediating mould damage far exceeds any marginal energy saving. If you feel a cold draught, address insulation elsewhere rather than sealing off your only passive ventilation source.
Yes, retrofitting trickle vents into existing windows is almost always possible through two main methods. The first involves routing a slot into the top of the frame and fitting a vent into it, which works well on uPVC and timber frames with sufficient depth. The second uses surface-mounted over-frame vents that screw onto the top of the frame without any cutting. A third option replaces the glazing unit with a slightly shorter pane and adds a glazed-in vent strip. The best method depends on your frame material, profile depth, and any heritage or conservation restrictions. Suppliers like Shengxin Aluminium offer vent profiles compatible with aluminium, uPVC, and timber frames at https://www.shengxinaluminium.com/window-trickle-vents_c115.
These two features serve entirely different ventilation purposes and should not be confused. A trickle vent provides continuous background ventilation - a slow, steady exchange of air designed to run 24/7 through a small slotted opening in the frame. A night vent position holds a casement window slightly ajar, delivering purge ventilation - a rapid, high-volume flush of air for short-term use, such as cooling a bedroom or clearing fumes after painting. One is a marathon, the other a sprint. Relying solely on the night vent position for daily ventilation either loses excessive heat or gets forgotten entirely, leaving the room without adequate airflow.
Excessive draught usually stems from three causes: an oversized vent for the room, a damaged slider or flap mechanism, or strong negative pressure created by a powerful extractor fan elsewhere in the home. For the first, partially close the adjustable slider; for the second, replace the broken component; for the third, ensure the extract fan has its own makeup air supply. For noise issues, standard slot vents offer minimal sound reduction. Upgrading to acoustic trickle vents with tested ratings of 35 dB or higher, or adding an external acoustic canopy, can dramatically reduce noise transmission while maintaining the same ventilation performance.



 Интернет Сервис
 0086 136 3563 2360
 sales@sxalu.com
 +86 136 3563 2360
 русский
 English
 français
 Deutsch
 español
 português
 العربية
 ไทย
ไทย Việt
Việt Українська