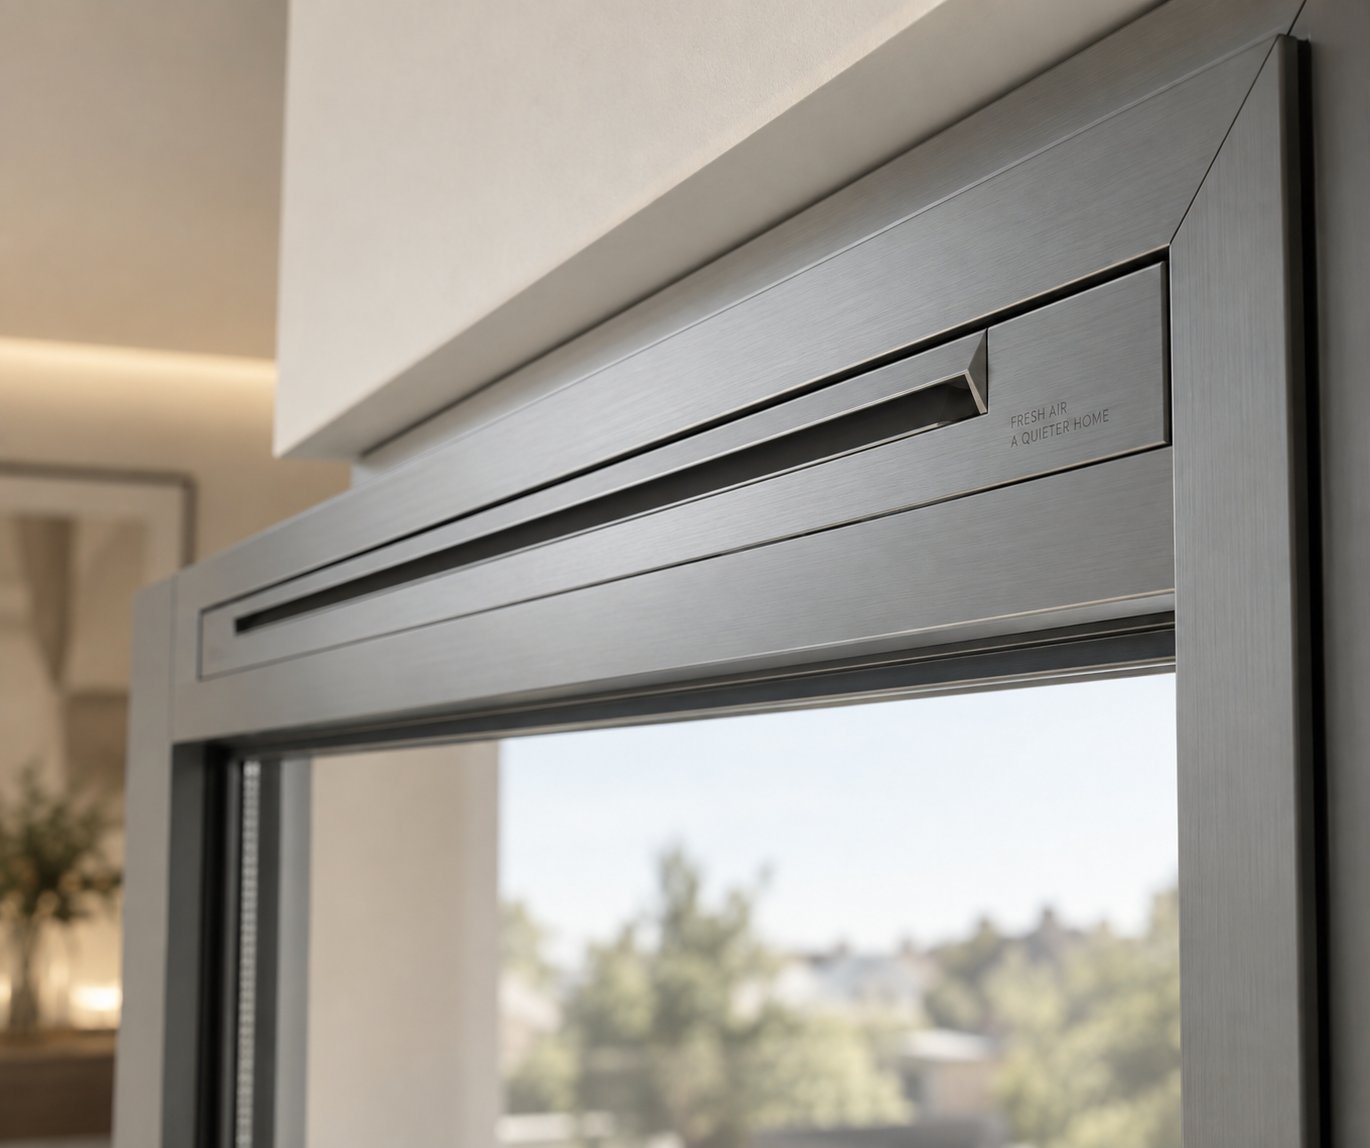
Picture a freshly installed window with crisp, clean lines — and then imagine a chunky plastic strip bolted across the top of the frame, breaking the entire look. That plastic strip is a standard surface-mounted trickle vent, and while it does its job of providing background ventilation, it comes at the cost of aesthetics. Flush trickle vents solve that exact problem by hiding the ventilation device inside the window frame itself.
Before diving deeper, a quick note on terminology. You may have searched for "tickle vents" — a common misspelling — or heard the term "drip vents in windows" used casually on-site. Both refer to the same family of products: trickle vents. The word "trickle" describes the gentle, continuous flow of air these devices allow into a room, and once you know that, the name makes perfect sense.
Flush trickle vents are small, controllable ventilation devices recessed into a channel cut within the window frame profile, sitting level with the surface rather than protruding above it. They deliver the same controlled background ventilation as standard window trickle vents but preserve the clean, uninterrupted lines of the window design.
A standard trickle vent is a two-part component — an external weather cover and an internal controllable opening — fixed to the surface of the frame head. It sits on top of the profile, adding visible height and creating an obvious break in the window's outline. You'll notice it immediately from both inside and outside the building.
A flush trickle vent works on the same principle but takes a fundamentally different approach to placement. Instead of mounting on the surface, the vent body is routed or inset into a channel cut directly into the frame. The word "flush" refers specifically to this recessed installation: the vent sits level with the frame surface, creating a sleek, low-profile appearance that is nearly invisible from most viewing angles. Both the external rain shield and the internal control flap sit within the depth of the frame rather than on top of it.
The mechanical function is identical to any other trickle vent. Air enters through the external opening, passes through the frame, and exits into the room through the internal opening. The homeowner can open or close the internal flap to control how much airflow enters. The difference is purely in how the device integrates with the frame — and that integration makes all the difference visually.
So why go to the trouble of recessing a vent into the frame when a surface-mounted version does the same job? Three distinct pressures are driving demand for this cleaner approach.
Modern window design expectations. Contemporary architecture favours slim profiles, flush casements, and minimal sightlines. A surface-mounted vent — typically protruding several millimetres above the sash or frame — contradicts that design intent. When a client invests in sleek aluminium or timber windows, a visible plastic strip across the frame head feels like an afterthought. Flush alternatives preserve the architect's original vision without sacrificing ventilation.
Conservation and heritage contexts. Traditional 19th-century windows never featured visible ventilation strips. In conservation areas, planning officers may object to surface-mounted fittings that alter the facade of a protected building. Trickle vents that sit within the frame profile offer a potential compliance pathway — satisfying current Building Regulations while respecting the building's historical character.
Rising homeowner expectations. Even outside heritage settings, homeowners increasingly expect hardware to be unobtrusive. Visible hinges, bulky handles, and protruding vents all feel at odds with the clean, considered interiors that dominate design trends. Flush vents align with that expectation by making ventilation invisible — or as close to invisible as engineering allows.
These aesthetic and architectural motivations explain why the flush profile is not just a cosmetic preference but a genuine specification requirement for a growing number of projects. The real question, though, is whether that sleeker design compromises how the vent actually moves air — a question that starts with understanding the mechanics inside the frame.
A sleek appearance means nothing if the vent cannot move air effectively. So how does a device hidden inside the frame manage to ventilate a room just as well as one that sits on top of it? The answer lies in a compact two-part construction and a carefully engineered airflow path — both designed to fit entirely within the depth of the window profile.
Every window trickle vent, whether surface-mounted or flush, consists of two cooperating halves: one facing the weather outside and one facing the room inside. What makes flush trickle vents different is where those halves sit relative to the frame surface.
The external weather shield. This component faces the outdoors and serves as the first line of defense against rain, wind-driven moisture, and insect intrusion. On a standard trickle vent, this cover sits visibly on top of the frame. On a flush model, it slots into a routed recess on the external face of the frame head, sitting level with — or only marginally proud of — the surrounding surface. Despite its low profile, the shield still incorporates angled baffles or a downward-facing lip that deflects rainwater away from the airflow slot.
The internal controllable opening. On the room side, a canopy or slotted grille fits into a matching recess. This is the part you interact with daily. A sliding or hinged control flap lets you open, partially restrict, or fully close the airflow passage. As WindowWare's trickle vent guide notes, most trickle air vents for windows consist of these two main parts — an external canopy to protect against rain and insects, and an internal ventilator that allows the occupant to control airflow.
The critical distinction is that both components sit within the frame depth rather than on top of it. The routed channel — cut during manufacture or on-site with a router — creates a pocket deep enough to house each piece flush with the profile surface. From across the room, you'll barely notice anything is there.
Imagine standing outside your window on a breezy day. Here is exactly how air travels through a flush trickle vent and into your room:
A common concern is whether this recessed design sacrifices airflow capacity. In practice, well-engineered flush vents achieve Equivalent Area (EA) ratings fully comparable to their surface-mounted counterparts — often ranging from 2,500 to 5,000mm² or more, depending on the vent length. EA is the measurement that matters for Building Regulations compliance, and a flush profile does not inherently limit it. The airflow path may be slightly more tortuous due to the recessed geometry, but manufacturers compensate through precise slot dimensioning and internal channel design.
This means specifiers and homeowners can choose a flush trickle vent for its aesthetic advantages without worrying about a performance penalty — provided they select a product with an EA rating appropriate for the room. And that raises an important next question: how does a flush model stack up against a standard surface-mounted vent across all the factors that influence a purchasing decision?
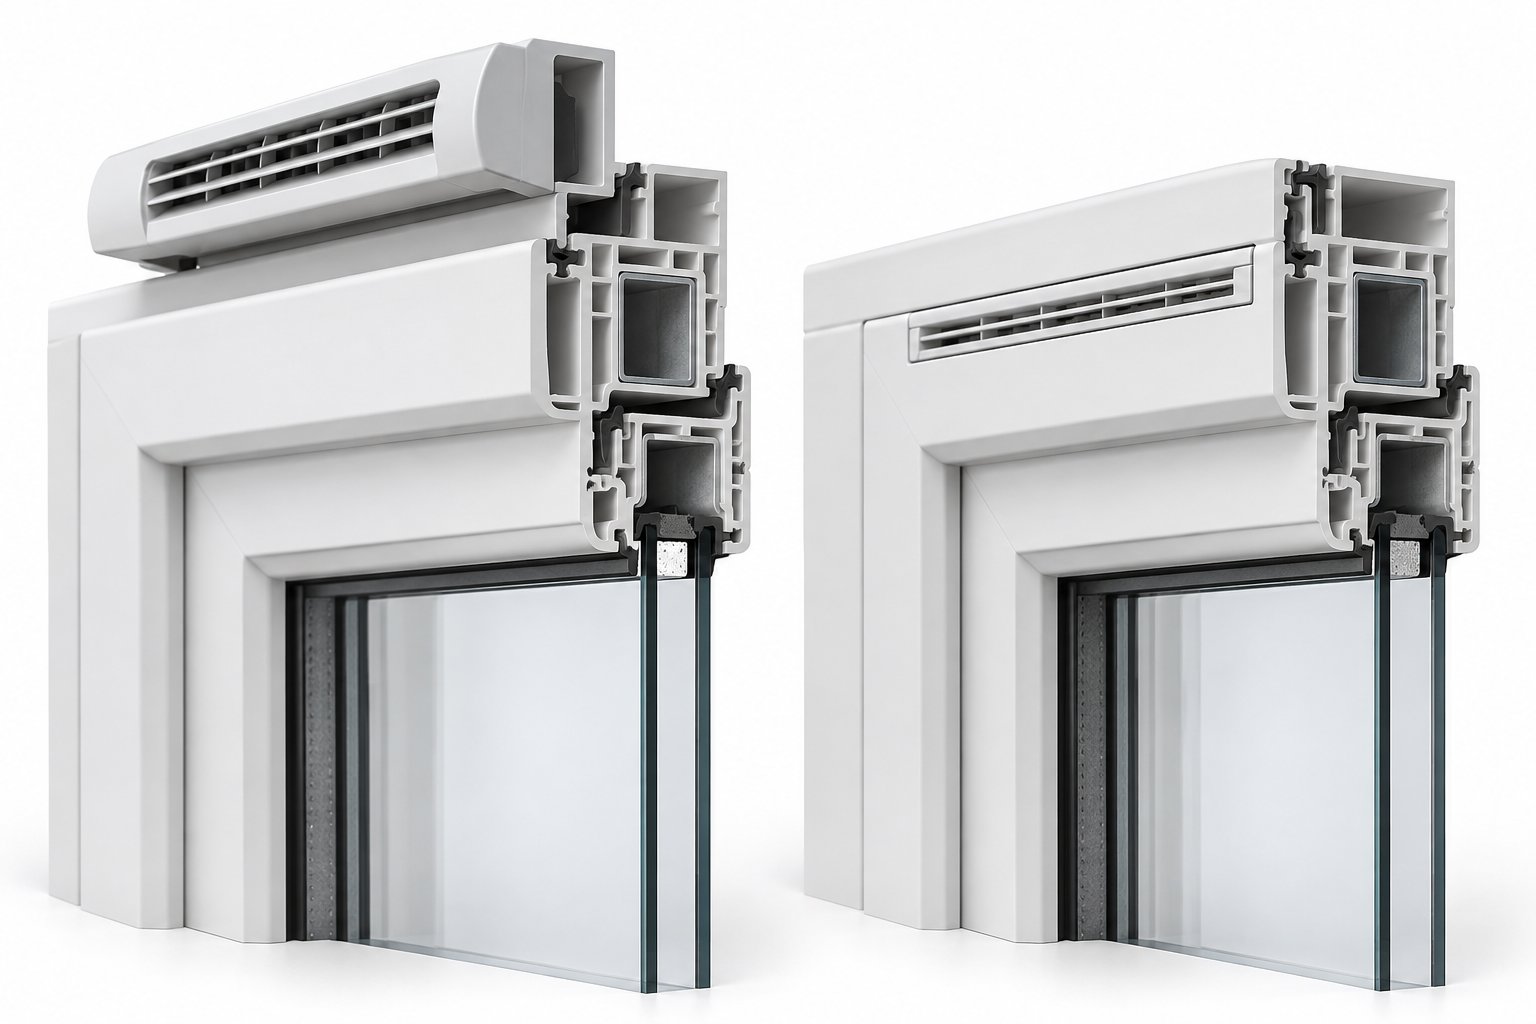
Choosing between a flush model and a standard surface-mounted option is not simply about looks. Cost, installation effort, frame compatibility, and even noise performance all factor into the decision. The table below puts the two types side by side across every dimension that matters, giving you a clear picture before committing to either route.
| Comparison Factor | Flush Trickle Vents | Standard Surface-Mounted Vents |
|---|---|---|
| Aesthetics and Profile Height | Recessed into the frame; sits level with the surface. Near-invisible from most viewing angles. | Protrudes several millimetres above the frame head. Clearly visible from both inside and outside. |
| Installation Complexity | Requires a routed or milled channel in the frame — a more involved process that demands precision tooling. | Screws directly onto the frame surface. Simpler and faster, typically needing only a drill and screwdriver. |
| Typical Cost Range | Moderate to higher — the vent unit itself may cost similarly, but professional routing adds labour expense. | Lower overall — both the product and fitting costs are generally less due to simpler installation. |
| Equivalent Area (EA) Performance | Comparable to surface-mounted types when correctly specified. Available in standard EA ratings suitable for Building Regulations compliance. | Wide range of EA ratings readily available. No performance disadvantage. |
| Frame Material Suitability | Excellent for timber (routes cleanly) and aluminium (often pre-engineered for flush integration). uPVC requires compatible products and careful routing around reinforcement bars. | Universally compatible — fits timber, uPVC, and aluminium with minimal adaptation. |
| Noise Performance | The recessed airflow path can be slightly more tortuous, offering marginally better passive sound attenuation. Specialist acoustic flush models are available. | Straight-through air path may transmit slightly more external noise. Acoustic versions also available. |
This is where the gap between the two types is most obvious — literally. Standard trickle vents for windows bolt onto the frame head and add a visible strip that typically protrudes 15 to 20mm above the sash or outer frame. You'll spot them instantly from the street, and from inside, the plastic cover is always in your peripheral vision at the top of the window.
Flush models, by contrast, disappear into the frame profile. Because the vent body sits inside a routed channel, the external weather shield and internal canopy align with the surrounding surface. From certain angles — particularly at ground level looking up at first-floor windows — they are virtually undetectable. For projects where the window's clean sightlines are a priority, such as contemporary new builds, minimalist renovations, or heritage properties where planning officers scrutinise every visible fitting, that visual discretion is not a luxury. It is a specification requirement.
Here is the honest trade-off. Flush integration demands more from the installer. A channel must be routed or milled into the frame head to the exact depth and width specified by the vent manufacturer. That routing step requires either factory machining during window fabrication or on-site work with a router or milling tool — neither of which is as quick as simply screwing a surface-mounted unit into place.
The practical implications vary by frame material:
This added complexity naturally pushes the overall cost higher than a surface-mounted fitting. The vent units themselves are often priced similarly, but the labour involved in routing adds a premium — particularly on retrofit projects where the frame is already installed in the wall and workshop machinery is not an option.
Fairness matters here. Flush models are not the right answer for every project, and pretending otherwise would be misleading. Standard surface-mounted windows trickle vents earn their place in several common scenarios:
The bottom line? Flush trickle vents excel where aesthetics, architectural intent, or planning constraints demand a discreet solution. Standard vents win on simplicity, cost, and retrofit practicality. Neither type is universally superior — the right choice depends entirely on the project's priorities. And regardless of which type you select, both must satisfy the same regulatory requirements, which brings us to the legal framework that governs trickle ventilation in England.
A flush profile and a standard surface-mounted vent may look vastly different on the frame, but in the eyes of the law they must meet exactly the same ventilation standards. Whether you choose a recessed model for its clean lines or a bolt-on unit for its simplicity, Approved Document F of the Building Regulations sets the performance bar both must clear. Misunderstand these rules and you risk failed inspections, costly rework, or — worse — a home that quietly makes its occupants unhealthy.
Wondering whether trickle vents in windows are actually mandatory for your project, or just a nice-to-have? The triggers are more straightforward than many homeowners assume — and more binding than some installers admit.
Since the significant update to Part F that took effect in June 2022, trickle ventilation must be addressed in three core scenarios:
Here is where a persistent misconception needs clearing up. Some homeowners believe they can simply ask their installer to leave trickle vents off the replacement windows and sign a waiver. That is not a valid compliance route. As LABC (Local Authority Building Control) guidance makes clear, an installer operating under a Competent Person Scheme like FENSA or CERTASS must self-certify that all work — including ventilation — complies with Building Regulations. A homeowner's personal preference does not override a legal requirement.
Limited exemptions do exist for listed buildings and properties in conservation areas, but even then the regulations state that work should comply "where reasonably practicable." If you are dealing with a heritage property, early consultation with your local authority's Listed Building Officer and Building Control Surveyor is essential before assuming you are exempt.
You will see the term Equivalent Area — usually abbreviated as EA — on every trickle vent product specification. But what does it actually mean?
EA is the effective open area of the vent, measured in square millimetres (mm²). It represents how much air can realistically pass through the device under standardised test conditions, accounting for internal baffles, screens, and other airflow restrictions. A vent with a large physical slot may still have a modest EA if internal components impede the air path — which is why you should never estimate performance by measuring the visible slot with a tape measure.
Flush trickle vents are available in a range of EA ratings that match those offered by surface-mounted alternatives. Selecting the correct rating depends on two factors: the room type being ventilated and the overall trickle ventilation strategy for the dwelling. The table below maps common room types to minimum EA requirements based on guidance in the current Approved Document F:
| Room Type | Minimum Background Ventilation (EA) | Notes |
|---|---|---|
| Habitable rooms (bedrooms, living rooms, dining rooms) | 8,000 mm² | Based on rooms up to 20 m² floor area. Larger rooms may warrant higher EA values. |
| Kitchen (with extract fan) | 4,000 mm² | Extract fan must also meet minimum extraction rates specified in Part F. |
| Bathroom / WC (with extract fan) | 4,000 mm² | Extract fan must also meet minimum extraction rates specified in Part F. |
| Utility room (with extract fan) | 4,000 mm² | Applicable where a background ventilator is fitted alongside mechanical extraction. |
Beyond individual room thresholds, Part F also sets minimum ventilator counts for entire dwellings. A one-bedroom property needs at least four background ventilators distributed across its habitable rooms and wet rooms. Properties with two or more bedrooms require a minimum of five. These minimums ensure air moves through the whole dwelling rather than concentrating in a single space — something a single large vent in the living room cannot achieve on its own.
Crucially, you can reach a room's EA requirement with one vent or with multiple smaller ones. A bedroom needing 8,000 mm² EA could use a single vent rated at 8,000 mm² or two units rated at 4,000 mm² each. This flexibility is especially useful with flush models, because the available frame-head length may not accommodate one long vent — splitting the requirement across two shorter units can solve a sizing constraint without sacrificing compliance.
Meeting the numbers on paper is only half the battle. You also need to prove it. Here are practical steps that smooth the compliance process for both parties:
Getting the regulatory side right protects you from enforcement action and, more importantly, ensures the people living in the property benefit from the healthy indoor air quality that Part F was designed to deliver. With the legal framework clear, the next practical challenge is matching the right vent size and EA rating to the physical dimensions of your window frame — a step that trips up more specifiers than you might expect.
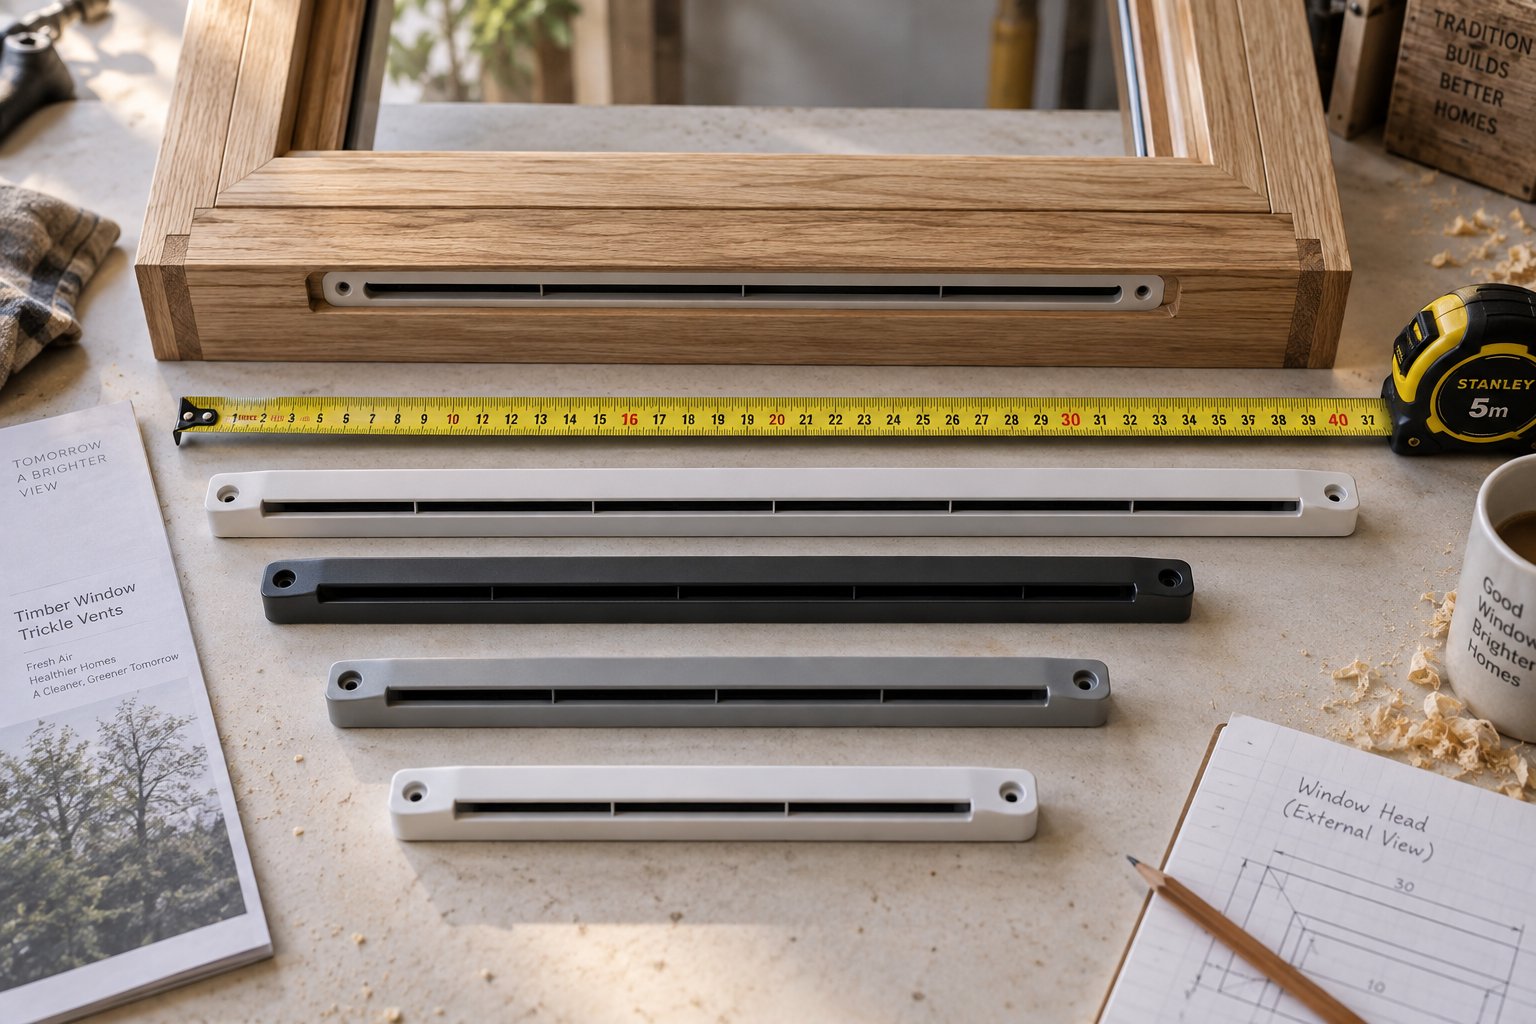
Knowing the EA numbers and the regulatory thresholds is one thing. Translating those numbers into a physical product that actually fits your window frame? That is where most specifiers and homeowners hit a wall. A trickle vent for windows might carry the perfect EA rating on its datasheet, yet be completely unusable if it is too long for the frame head, too deep for the profile, or incompatible with the frame material. Getting the size right means balancing four factors simultaneously: available frame length, required equivalent area, material compatibility, and profile depth for routing.
The vent must physically fit across the frame head — the horizontal top section of the window — without overhanging, fouling hardware, or interfering with the meeting stile on coupled frames. This sounds obvious, but it is the constraint that narrows your options faster than any other.
Standard flush vent lengths typically fall into a few common sizes. You will frequently encounter 300mm units suited to narrower windows such as side lights and small casements, 400mm and 430mm units designed for medium-width frames, and longer options stretching to 500mm or beyond for wider openings. The length directly influences the EA rating a single vent can deliver — a longer slot means a larger open area, which means more airflow capacity.
What happens when your frame head is wide enough for a generous vent? You benefit from the flexibility to install a single longer unit with a higher EA rating, potentially satisfying the room's entire background ventilation requirement in one piece. Narrower frames present the opposite challenge. If the available head length cannot accommodate a vent with sufficient EA, you have two practical options: install a shorter vent and accept a lower EA contribution from that window (compensating with vents on other windows in the same room), or fit two shorter units side by side if the frame width allows it.
Before ordering anything, measure the clear internal width of the frame head — excluding any hardware zones, espagnolette keeps, and corner welds on uPVC profiles. Leave at least 10mm clearance at each end to avoid weakening the frame corners during routing.
With your available frame length confirmed, the selection process follows a logical sequence. Walk through these steps and you will arrive at the correct product every time:
This step-by-step approach prevents the two most common sizing mistakes: choosing a vent that fits the frame but falls short on EA, and choosing a vent with the right EA that physically will not fit the available space.
The material your window frame is made from shapes which flush vents are compatible — and how straightforward the routing process will be.
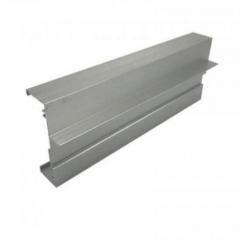
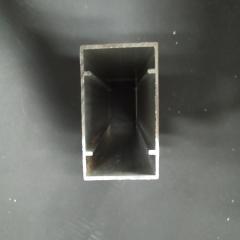
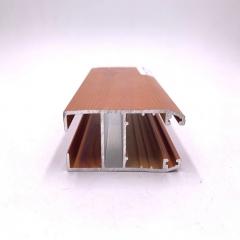
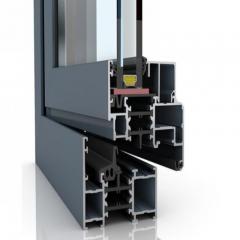
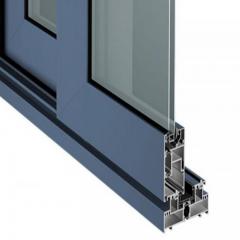
Aluminium frames are often the simplest starting point. Many modern thermally broken aluminium profiles are extruded with standardised slot widths already engineered into the design, making flush vent integration almost plug-and-play. The slot dimensions tend to be consistent across a profile system, so once you identify the correct vent for one window, it typically works across the entire project. Suppliers like Shengxin Aluminium offer both standard and custom slot vent dimensions designed specifically for aluminium frame integration — a practical advantage when a project involves non-standard profile sizes or requires flush-profile covers that align precisely with the extrusion geometry.
Timber frames route cleanly and accept flush vents well, but profile depth varies widely between manufacturers and timber species. Confirm that the frame head has enough material depth to accept the routed channel without compromising structural integrity. Hardwoods like oak tolerate deeper channels more confidently than lightweight softwoods. Also check that the vent manufacturer specifies compatible fixing methods for timber — screw gauges and pilot hole sizes differ from those used in metal or plastic profiles.
uPVC frames introduce the most variability. Wall thicknesses, internal chamber layouts, and hidden steel reinforcement bars all differ between profile systems. A flush vent designed for one uPVC system may not seat correctly in another. Always verify compatibility with both the vent manufacturer and the window profile supplier before committing. If steel reinforcement sits directly beneath the intended routing zone, on-site channel cutting becomes significantly more difficult — and potentially inadvisable without factory machining.
One final consideration that is easy to overlook: the depth of the frame profile available for routing. Flush vents need a channel deep enough to house both the external cover and the internal canopy without the components sitting proud of the surface. Slim-profile frames — particularly in aluminium — may limit channel depth, which in turn limits which vent models can achieve a truly flush finish. Always check the manufacturer's minimum routing depth specification against your frame's actual profile depth before placing an order.
Selecting the right size is a methodical process, not a guessing game. Measure the frame, calculate the EA, confirm the material compatibility, and verify the profile depth. Get those four factors right and the vent will fit, perform, and disappear into the frame exactly as intended. The next challenge is making sure it is installed correctly — because even a perfectly sized vent underperforms if the routing, sealing, or alignment goes wrong during fitting.
A perfectly sized vent sitting in its packaging does absolutely nothing for your indoor air quality. The performance you get depends almost entirely on how well it is fitted — and with flush trickle vents, the fitting process carries higher stakes than a simple surface-mounted installation. Routing a channel into a window frame is irreversible. Cut too deep, and you weaken the profile. Misalign internal and external components, and you invite water ingress. Skip the perimeter seal, and draughts follow.
Professional installation is the recommended route for most homeowners, particularly on upper-floor windows or uPVC frames with hidden steel reinforcement. That said, understanding each stage of the process helps you communicate clearly with your installer, ask the right questions, and spot substandard work before it becomes a long-term problem.
What separates flush vent fitting from a standard surface-mounted job? One word: routing. Standard trickle window vents screw directly onto the frame head — a drill, a screwdriver, and five minutes per window. Flush models require a precisely machined channel in the frame, which demands a different set of tools and considerably more care.
Here is what you will typically need on hand:
Gather everything before making a single mark on the frame. Stopping mid-route to search for a missing bit or an alternative cutter breaks concentration — and on a task where millimetre accuracy matters, lost focus means lost frame integrity.
While every manufacturer's instructions vary slightly in dimensions and fixing methods, the general installation sequence for flush trickle vents follows a consistent logic. Here is the process from first measurement to final check:
Always follow the specific vent manufacturer's instructions over any generic guide. Channel dimensions, fixing centres, and gasket placement vary between products, and a procedure that works perfectly for one model may produce a poor fit on another.
Even experienced installers encounter pitfalls with recessed vent fitting. Knowing what to watch for prevents the most frequent — and most damaging — errors.
The routing step is what makes flush trickle vent installation irreversible. Measure twice, check the depth stop, and test-fit before committing to any permanent fastening.
A well-installed flush vent should be virtually invisible from the street, move freely when operated, and keep water on the outside where it belongs. That invisible integration is exactly the point — but it raises a less obvious question. When you deliberately create an opening in a window frame, what happens to the window's ability to block noise from the street? The answer depends on something most homeowners never consider: the geometry of the airflow path itself.
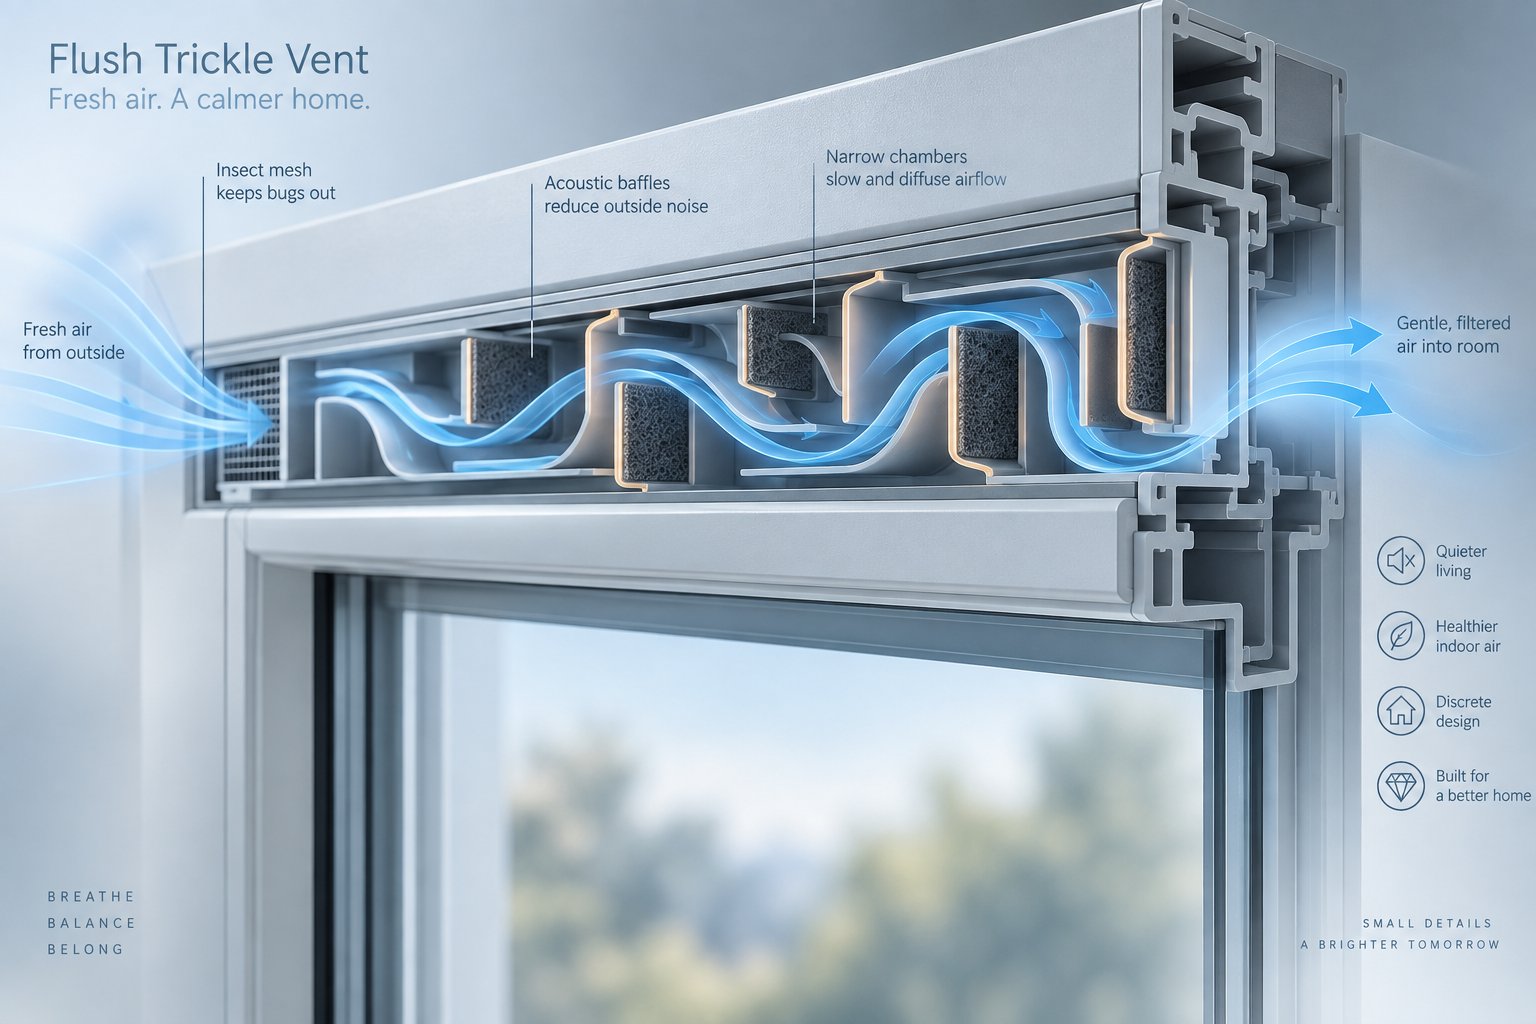
Every trickle vent — flush or surface-mounted — punches a deliberate hole in your window's defense against external noise. That is the unavoidable trade-off of background ventilation: the same opening that lets fresh air in also lets sound waves through. Yet not all openings behave the same acoustically. The geometry of the air path inside the vent determines how much noise actually reaches your room, and this is where the recessed design of flush trickle vents introduces a subtle but meaningful difference.
Imagine sound as water flowing through a pipe. A straight pipe offers no resistance — the water rushes through unimpeded. Add bends, and the flow slows as energy is lost at each turn. Sound waves behave similarly inside a trickle vent.
A standard surface-mounted vent typically offers a relatively direct air path. Air enters the external cover, passes through the frame slot, and exits the internal canopy with minimal changes in direction. Sound waves follow that same straight route with little attenuation.
Flush trickle vents, by contrast, sit inside a routed channel within the frame profile. This recessed placement naturally introduces more changes of direction — the airflow path becomes more tortuous, forcing sound waves to bend as they navigate the channel walls, the inset weather shield, and the recessed internal canopy. Each bend dissipates a small amount of acoustic energy. The result is marginally better passive sound attenuation compared to an equivalent surface-mounted vent, even when neither product is specifically engineered for noise control.
That said, "marginally better" is not the same as "soundproof." For properties near busy roads, railway lines, or flight paths, a standard flush vent — even with its more tortuous air path — will not deliver enough noise reduction on its own. These situations call for specialist acoustic trickle vents engineered specifically for sound attenuation. The good news? Acoustic models are available in flush-fit profiles, so you do not have to sacrifice that clean window aesthetic to gain serious noise reduction.
What makes an acoustic model different from a standard flush vent? The internal architecture. Acoustic versions incorporate multi-chamber baffle designs and sound-absorbing linings — materials like acoustic foam inserts that convert sound energy into heat through friction. These baffled chambers force sound waves through a labyrinthine path far more complex than even the natural tortuosity of a standard recessed vent. As testing data shows, well-designed acoustic background ventilators achieve weighted sound reduction indices (Dn,e,w) ranging from 29 dB for basic models up to 55 dB for high-performance units — a substantial improvement over the negligible attenuation of a standard vent of either type.
If sound insulation matters for your project, you need to look beyond marketing claims and focus on independently tested performance data. Acoustic trickle vents are rated using the Dn,e,w metric — a single-number weighted value expressed in decibels that represents the vent's ability to reduce sound transmission under standardised laboratory conditions. The higher the number, the more noise the vent blocks.
To put those figures in perspective, consider that a 10 dB reduction sounds roughly half as loud to the human ear. A basic acoustic vent rated at 29 dB provides noticeable relief from background traffic hum, while a high-performance unit at 50 dB or above can handle proximity to major transport corridors. Specifiers should look for products tested to BS EN ISO 10140 or equivalent standards, and should request third-party test certificates rather than relying on manufacturer self-declarations alone.
A few practical points worth noting when evaluating acoustic performance:
A flush profile alone does not guarantee acoustic performance — the internal baffle design and air path geometry determine sound reduction capability. If noise control is a priority, specify a purpose-designed acoustic trickle vent rather than relying on the passive benefits of a recessed installation.
Understanding what flush vents can and cannot do for sound insulation sets realistic expectations — and prevents the frustration of discovering after installation that traffic noise still filters through. Acoustic performance, however, is just one of several issues homeowners encounter over the lifetime of their vents. Draughts, condensation, and unexpected whistling all crop up eventually, and knowing how to diagnose each one saves both money and unnecessary worry.

You have chosen the right size, confirmed the EA rating, ensured Part F compliance, and had the vents professionally installed. Everything works perfectly — until one cold January morning you notice a persistent draught near the top of the window, or a patch of condensation forming on the frame head, or a faint whistle that only appears when the wind shifts direction. Does that mean something has gone wrong?
Usually, no. Most issues homeowners experience with flush trickle vents fall into a handful of predictable categories, and nearly all of them have straightforward fixes. The key is understanding which symptoms are normal behaviour and which signal an actual problem worth addressing.
This is the complaint that generates the most confusion — because the very purpose of a trickle vent is to let air into the room. Some air movement near the top of the window is not a fault. It is the product doing exactly what it was designed to do. Background ventilation means a continuous, controlled trickle of fresh air replacing stale indoor air, and you will occasionally feel that airflow if you stand directly beneath the vent or hold your hand up near it.
Excessive draughts, however, tell a different story. If cold air is noticeably streaming in — enough to make the area near the window uncomfortable or to move lightweight curtains — investigate these three likely causes:
One important rule of thumb: if closing the flap completely makes almost no difference to the draught, the air is probably entering somewhere else entirely — a degraded perimeter seal around the window frame, worn gaskets on the opening sash, or even gaps in the wall-to-frame junction. In that case, the vent is not your problem. The window's overall sealing is.
Spotting moisture droplets on the frame head near a flush vent feels counterintuitive. Why would a ventilation device — something designed to improve airflow — attract condensation? The answer, almost always, is that the vent is not causing the moisture. It is revealing a wider ventilation shortfall in the room.
Condensation forms when warm, moisture-laden indoor air meets a cold surface. The frame head around the vent slot may be fractionally cooler than the surrounding frame because outdoor air passes through the channel immediately behind it. That temperature difference creates a localised cold spot where water vapour in the room air condenses.
Here is the part that surprises most homeowners: keeping the vent open actually reduces condensation rather than making it worse. An open trickle vent allows humid indoor air to escape and draws in drier outside air, lowering the overall moisture level in the room. A closed vent traps all that humidity inside, raising the dew point and encouraging condensation on every cold surface — not just around the vent, but on glass panes, window sills, and even walls.
If condensation persists despite leaving house window vents open, look beyond the vent itself:
A high-pitched whistle or hum during breezy weather is one of the most common complaints about any trickle vent — flush or surface-mounted. As Glass Tec Windows explains, the basic cause is moving air: when wind forces itself through a narrow opening, the resulting vibration can produce an audible tone. The smaller and more constricted the gap, the higher the pitch.
Flush trickle vents are not immune to this effect, but their recessed design can actually work in their favour. The more tortuous airflow path created by the inset channel tends to break up the laminar flow that produces clean whistling tones. Still, certain wind directions and speeds will find the right combination of pressure and gap geometry to generate noise.
Before assuming the vent is defective, try these targeted checks:
Persistent whistling that resists all of these fixes may point to an inherent design limitation of the specific vent model at your site's typical wind exposure. In that scenario, upgrading to an acoustic flush vent — with internal baffles that disrupt airflow turbulence — is the most effective long-term solution.
Flush trickle vents are low-maintenance by design, but "low" does not mean "zero." A few minutes of attention once or twice a year keeps them working smoothly and prevents small issues from escalating into the draughts, condensation, or noise problems described above.
Treat these checks like a quick health audit rather than an overhaul. Most of the time you will find nothing wrong — and that confirmation alone is worth the few minutes invested. A well-maintained vent continues to deliver quiet, draught-free background ventilation year after year, which is ultimately the entire point of choosing a flush design in the first place.
With the practical troubleshooting covered, one question remains: how do you pull all of this information together — sizing, regulations, acoustics, maintenance — into a clear decision for your specific project? The answer depends on whether you are a homeowner replacing windows, an installer quoting a job, or a specifier writing a schedule.
Sizing charts, regulatory thresholds, acoustic ratings, installation sequences, maintenance schedules — this article has covered a lot of ground. But information only becomes useful when it leads to a clear decision. Your next step depends entirely on your role in the project, so here is a streamlined action plan for each audience.
If you are upgrading your windows, start with one simple question: does Building Regulations Part F require trickle ventilation in your replacement? In most cases the answer is yes — particularly if the originals already had trickle vents on windows or the room lacks alternative background ventilation such as air bricks or mechanical extract.
Once that is confirmed, raise the flush option with your window installer early in the quoting process — not as an afterthought once the frames are ordered. Factory-routed channels are cleaner and more precise than on-site cutting, so specifying flush models before manufacture avoids compromise.
Live near a busy road, railway, or under a flight path? Ask specifically about acoustic flush models. A standard recessed vent provides marginally better passive noise attenuation than a surface-mounted type, but purpose-designed acoustic units with internal baffles deliver significantly higher sound reduction — without sacrificing that clean window line you are paying for.
Your workflow is more systematic, and the checklist is tighter:
On that last point, consolidating your supply chain saves time and freight costs. Shengxin Aluminium offers a full range of standard slot vents in 250 mm, 350 mm, and 450 mm lengths — with EA ratings from approximately 2,500 mm² to 5,000 mm² — alongside custom lengths up to 1,000 mm and bespoke RAL colour matching for volume projects. Because these vents are engineered for aluminium frame integration with flush-profile covers and ship alongside Shengxin's thermal break extrusions, specifiers can place a single order covering profiles, gaskets, and ventilation components in one consolidated shipment. That simplifies procurement and ensures dimensional compatibility across the bill of materials.
Here is everything this article has covered, distilled into the essentials worth remembering:
Flush trickle vents are the optimal choice when clean window lines and Building Regulations compliance both matter — delivering invisible ventilation that works as hard as any surface-mounted alternative, without compromising the design intent of the window.
The primary difference is how each type mounts to the window frame. Standard surface-mounted trickle vents bolt onto the top of the frame head and protrude visibly by 15 to 20mm, creating an obvious strip across the window profile. Flush trickle vents, on the other hand, slot into a routed channel cut directly into the frame so they sit level with the surface. Both types use the same two-part construction — an external weather shield and an internal controllable opening — and both achieve comparable Equivalent Area (EA) ratings for Building Regulations compliance. The trade-off is that flush models require more precise installation involving frame routing, which adds labour cost, while standard vents simply screw on with basic tools. Aluminium frames from manufacturers like Shengxin Aluminium often come pre-engineered with flush-compatible slot channels, simplifying the process considerably.
Yes, in most cases. Since the June 2022 update to Building Regulations Approved Document Part F (England), replacement windows must include trickle ventilation if the original window had trickle vents or if the room lacks adequate alternative background ventilation such as air bricks or a mechanical ventilation system. New-build dwellings and extensions also require background ventilation meeting minimum Equivalent Area thresholds — 8,000 mm² for habitable rooms and 4,000 mm² for kitchens and bathrooms with extract fans. Installers registered with Competent Person Schemes like FENSA or CERTASS must self-certify compliance, meaning homeowners cannot simply opt out. Limited exemptions may apply to listed buildings, but early consultation with your local authority is essential before assuming an exemption applies.
A standard flush trickle vent offers only marginally better passive sound attenuation than a surface-mounted equivalent. The recessed installation creates a slightly more tortuous airflow path, which dissipates a small amount of acoustic energy as sound waves navigate the channel bends. However, for properties near busy roads, railways, or flight paths, this passive benefit is insufficient. Purpose-designed acoustic flush trickle vents with internal multi-chamber baffles and sound-absorbing linings are available and can achieve weighted sound reduction values (Dn,e,w) from 29 dB up to 55 dB. When specifying acoustic models, match the vent's rating to the glazing performance so neither component becomes the weak link in the acoustic envelope.
Yes, flush trickle vents can be fitted to uPVC windows, but compatibility requires careful verification. uPVC profiles vary significantly in wall thickness, internal chamber layout, and the position of hidden steel reinforcement bars. Before routing a channel, the installer must confirm that the chosen vent product is designed for the specific uPVC profile system and must check for reinforcement steel in the intended cutting zone — hitting a steel bar mid-route risks damaging both tooling and the frame's structural integrity. Factory machining during window manufacture is strongly preferred over on-site routing for uPVC frames. Suppliers such as Shengxin Aluminium offer slot vents in standard and custom dimensions that are also compatible with uPVC applications, which can help resolve sizing challenges on non-standard profiles.
Maintenance is minimal but important for long-term performance. Once or twice a year, wipe the internal canopy and external weather shield with a damp cloth and mild detergent to remove dust and grime. Operate the sliding or hinged control flap through its full range to ensure it moves freely — debris or dried condensation residue in the slider track is the most common cause of stiffness. Inspect the external cover for cracks or lifting, and use a soft brush or compressed air to clear insect debris and cobwebs from the airflow channel. Finally, check the perimeter foam gasket around the vent body; if it feels hard or compressed flat, replace it with a matching self-adhesive seal strip such as Q-Lon or Aquamac to maintain a draught-free fit.



 Интернет Сервис
 0086 136 3563 2360
 sales@sxalu.com
 +86 136 3563 2360
 русский
 English
 français
 Deutsch
 español
 português
 العربية
 ไทย
ไทย Việt
Việt Українська