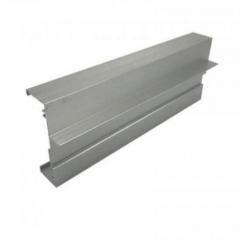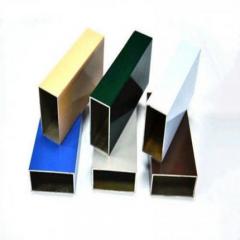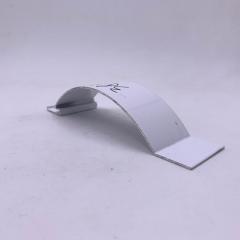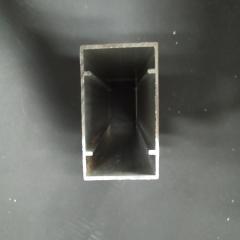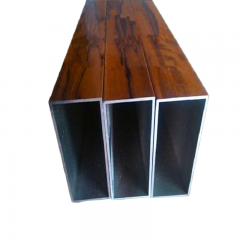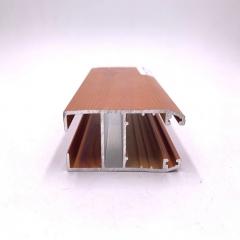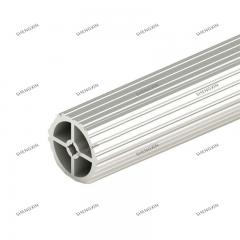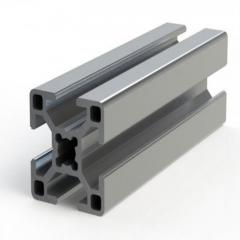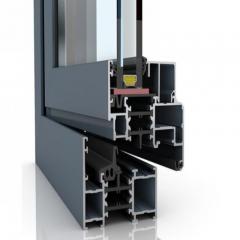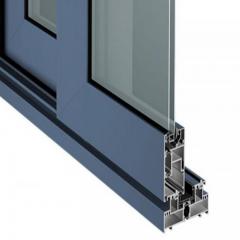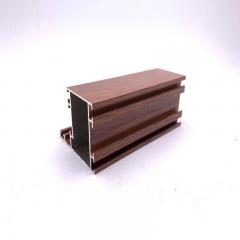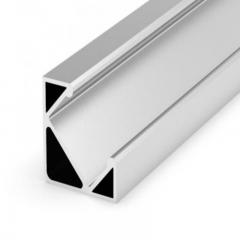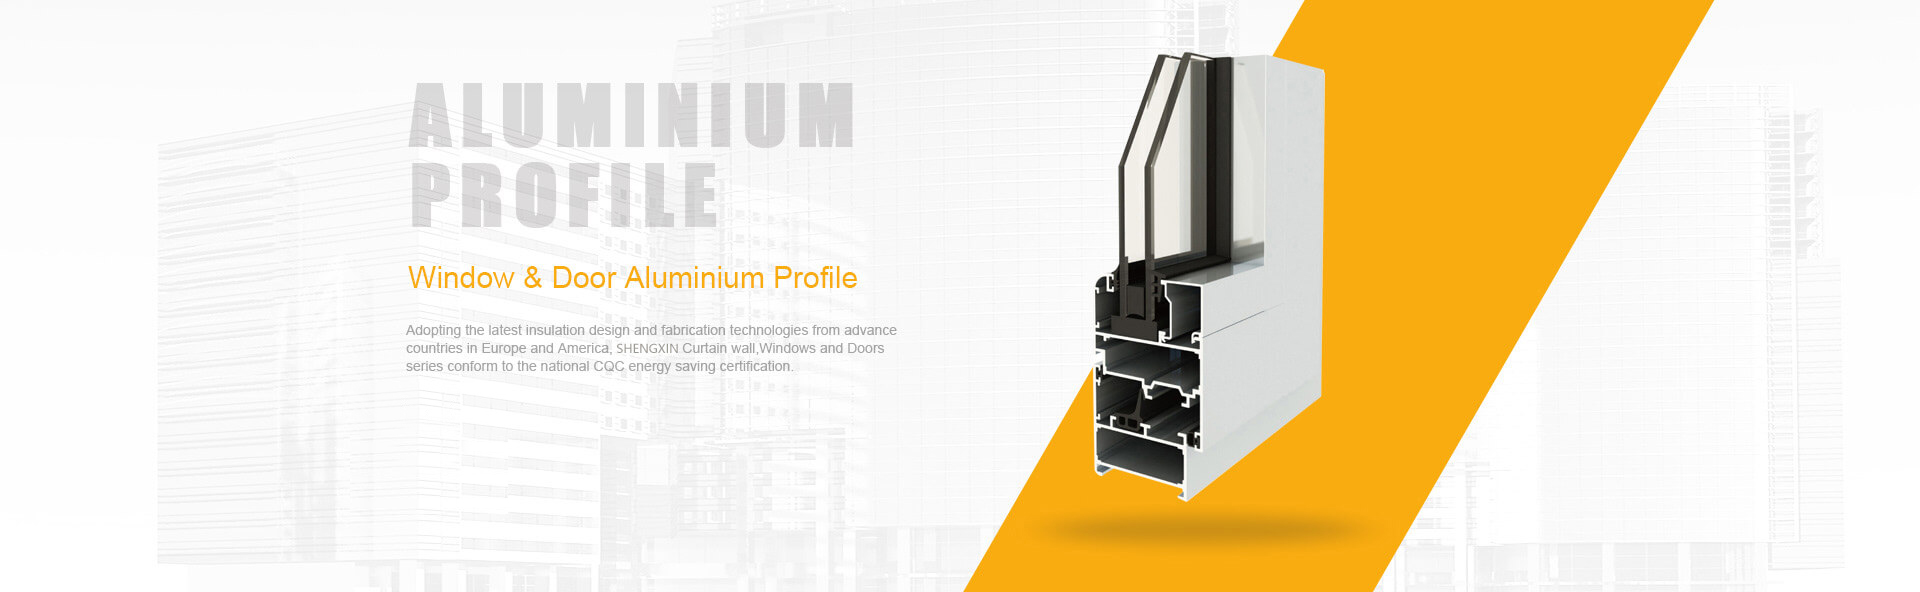
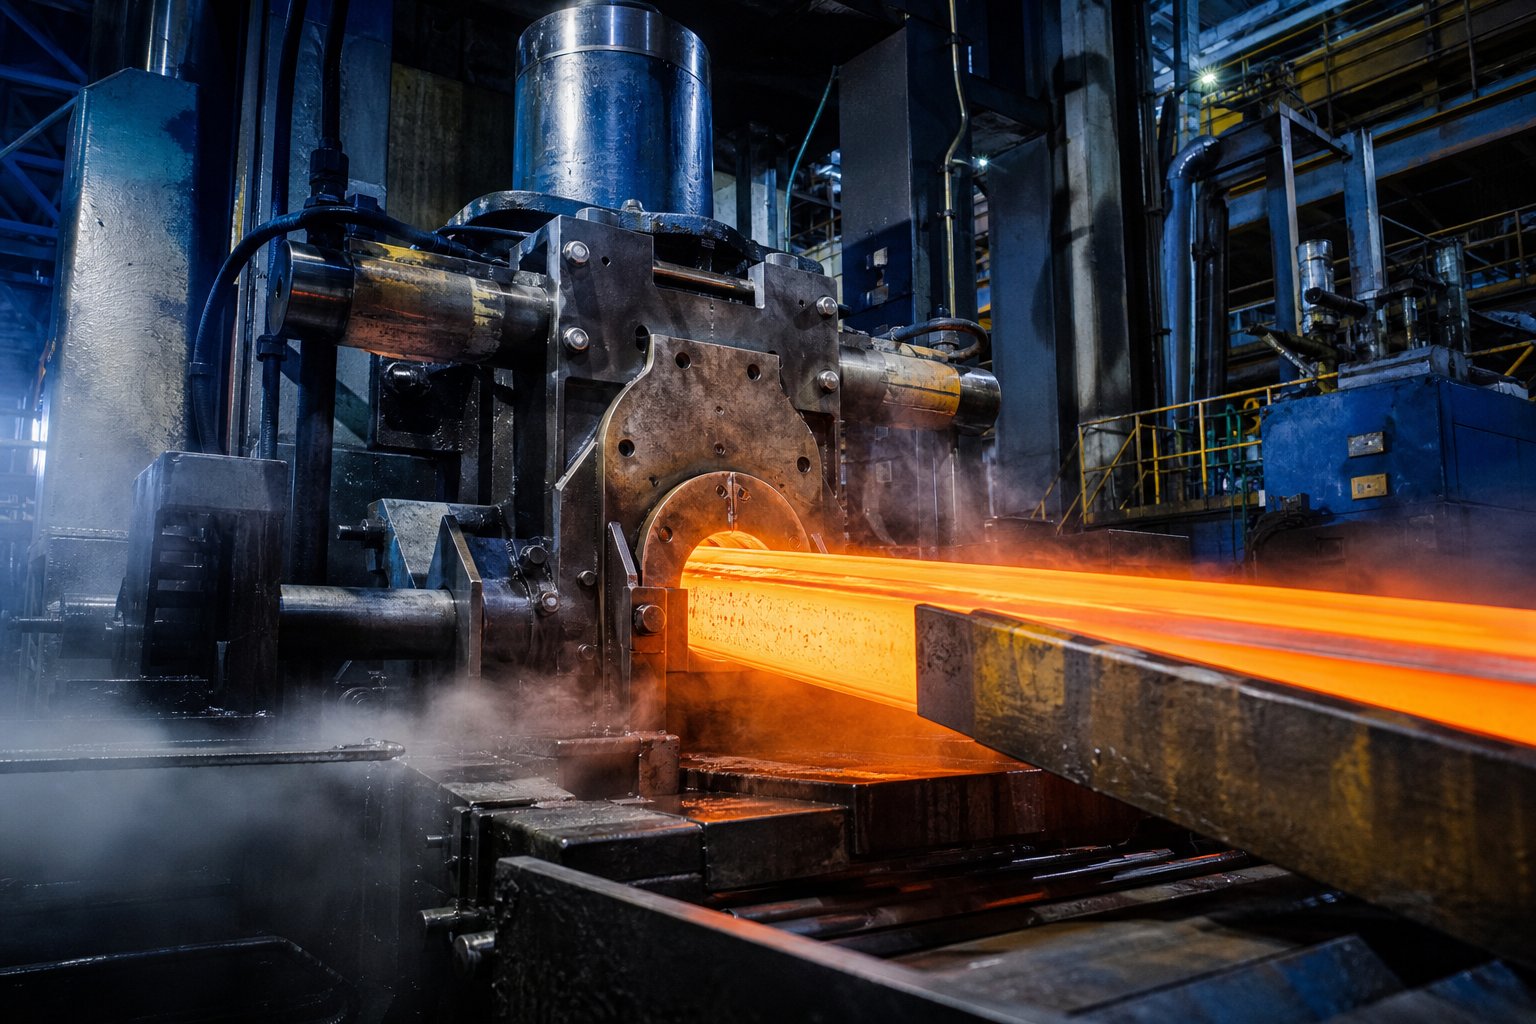
Imagine squeezing toothpaste from a tube. As you apply pressure, the paste flows through the opening and emerges in a consistent, shaped form. Now picture that same principle applied to heated aluminum and scaled up to industrial proportions with hydraulic rams generating up to 15,000 tons of force. That's the aluminum extrusion process in its simplest terms.
Aluminum extrusion is a fabrication process that forces a heated aluminum billet through a custom-shaped steel die to produce a continuous profile with a consistent cross-section.
During the aluminum extrusion process, a cylindrical aluminum log called a billet gets heated to temperatures between 800°F and 900°F. At this temperature, the metal becomes malleable without melting completely. A powerful hydraulic ram then pushes this softened billet through a precisely engineered steel die. As the aluminum squeezes through the die opening, it takes on the exact shape of that opening and emerges as a continuous profile on the other side.
Think of it like a sophisticated Play-Doh factory, but instead of colorful clay toys, you're creating everything from window frames and heat sinks to aircraft components and automotive parts. The beauty lies in the process's ability to produce complex cross-sectional shapes in a single operation.
So why should engineers, designers, and procurement professionals care about understanding this process? The answer comes down to making smarter decisions. When you understand how aluminum extrusion works, you can design parts that are easier and more cost-effective to manufacture. You'll know which shapes are achievable and which might require alternative methods.
This manufacturing method has become the backbone of countless industries for good reason. It delivers exceptional strength-to-weight ratios, allows for intricate geometries in a single piece, and offers remarkable design flexibility. From high-rise buildings to Tesla vehicles, extruded aluminum profiles are everywhere around you.
Here's what this guide offers that others don't: practical decision-making guidance rather than just technical descriptions. Most resources either give you a surface-level overview or bury you in 100+ page technical manuals. This comprehensive resource bridges that gap, providing you with actionable insights on die design, alloy selection, cost factors, and troubleshooting, all in one accessible location. Whether you're specifying your first custom profile or optimizing an existing design, you'll find the information you need to move forward confidently.
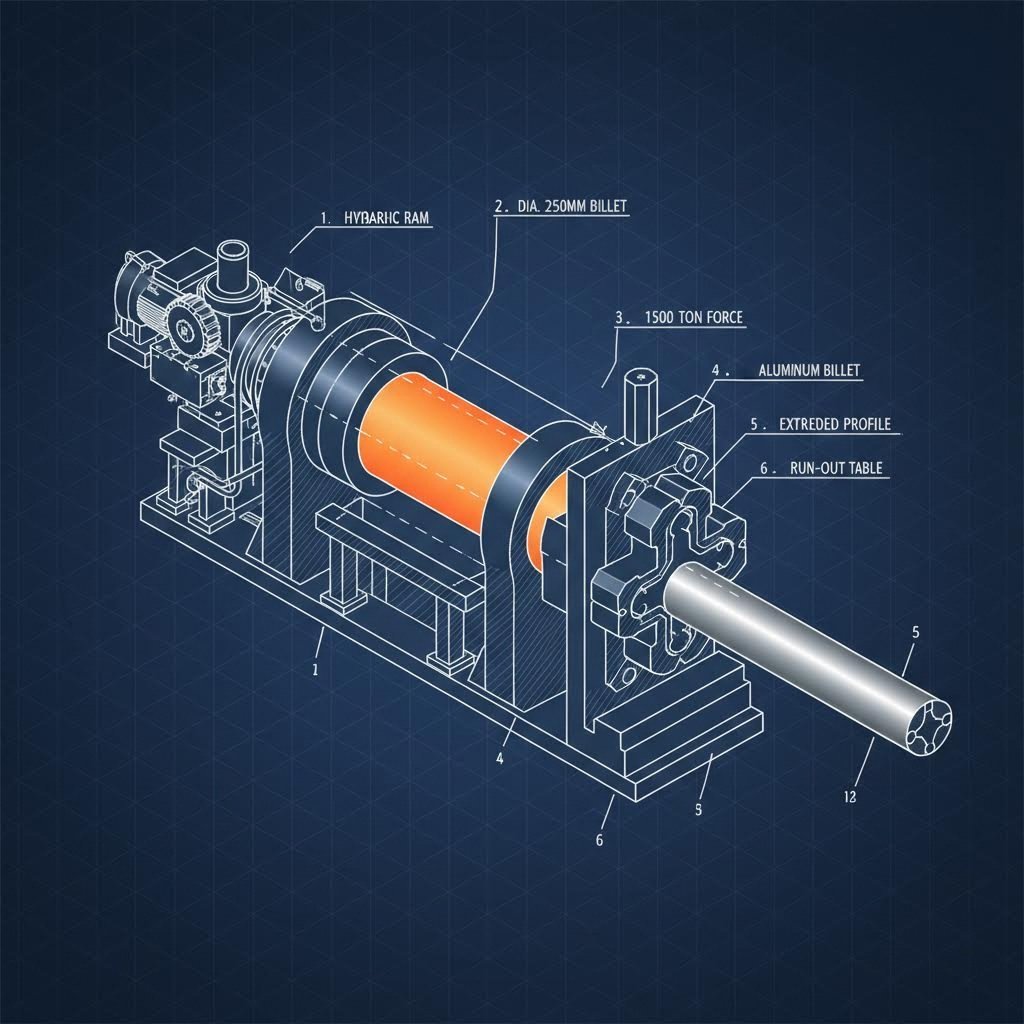
Now that you understand what aluminum extrusion is and why it matters, let's walk through exactly how extruded aluminum is made. The metal extrusion process involves a precise sequence of steps, each with specific parameters that directly impact the quality of your finished profile. Understanding these details helps you communicate more effectively with manufacturers and make better design decisions.
How does aluminum extrusion work in practice? The journey from raw material to finished component follows a carefully controlled sequence. Here's the complete breakdown:
Three interconnected variables govern the success of every extrusion operation: temperature, pressure, and speed. Getting these parameters right means the difference between a perfect profile and a rejected batch.
Temperature Control
The ideal billet temperature balances two competing needs. You want the metal soft enough to flow smoothly through the die, but not so hot that it becomes too fluid. Excessive temperatures cause the aluminum to resist entering tight areas of the die, potentially resulting in dimensions falling outside acceptable tolerances. Worse, overheated metal can tear at sharp corners and thin edges. The best approach maintains the lowest temperature that still permits efficient extrusion.
Pressure Requirements
The extrusion ratio, which compares the billet's cross-sectional area to the profile's cross-sectional area, directly determines how much pressure you need. Higher ratios mean smaller die openings relative to the billet size, requiring greater force to push the metal through. Complex profiles with thin walls or intricate details demand more pressure than simple solid shapes.
Extrusion Speed
Speed directly correlates with both temperature and pressure inside the container. Push too fast and you risk surface defects; go too slow and productivity suffers. Operators must carefully balance all three parameters to maintain a steady process and generate consistent extruded profiles.
You'll encounter two primary approaches to the metal extrusion process, each with distinct advantages depending on your application.
Direct Extrusion
This is the most common method in the industry. The die remains stationary while a moving ram forces the heated billet through it. Both the ram and the aluminum move in the same forward direction, which is why some call this forward extrusion. The technique works well for most standard applications but generates significant friction as the billet slides against the container walls.
Indirect Extrusion
Here, the process reverses. The billet and container stay stationary while the die assembly moves against the billet on a long stem. This backward movement forces aluminum through the die opening. The key advantage? Significantly less friction. With the billet not sliding against container walls, heat generation stays more consistent throughout the extrusion. This translates to better temperature control, more uniform mechanical properties, and improved grain structure in the finished profile.
When should you consider indirect extrusion? Applications demanding tighter tolerances and superior surface quality often benefit from this method. However, direct extrusion remains the workhorse for high-volume production where the friction trade-offs are acceptable. Understanding both methods helps you discuss options intelligently with your extrusion partner and select the approach that best matches your project requirements.
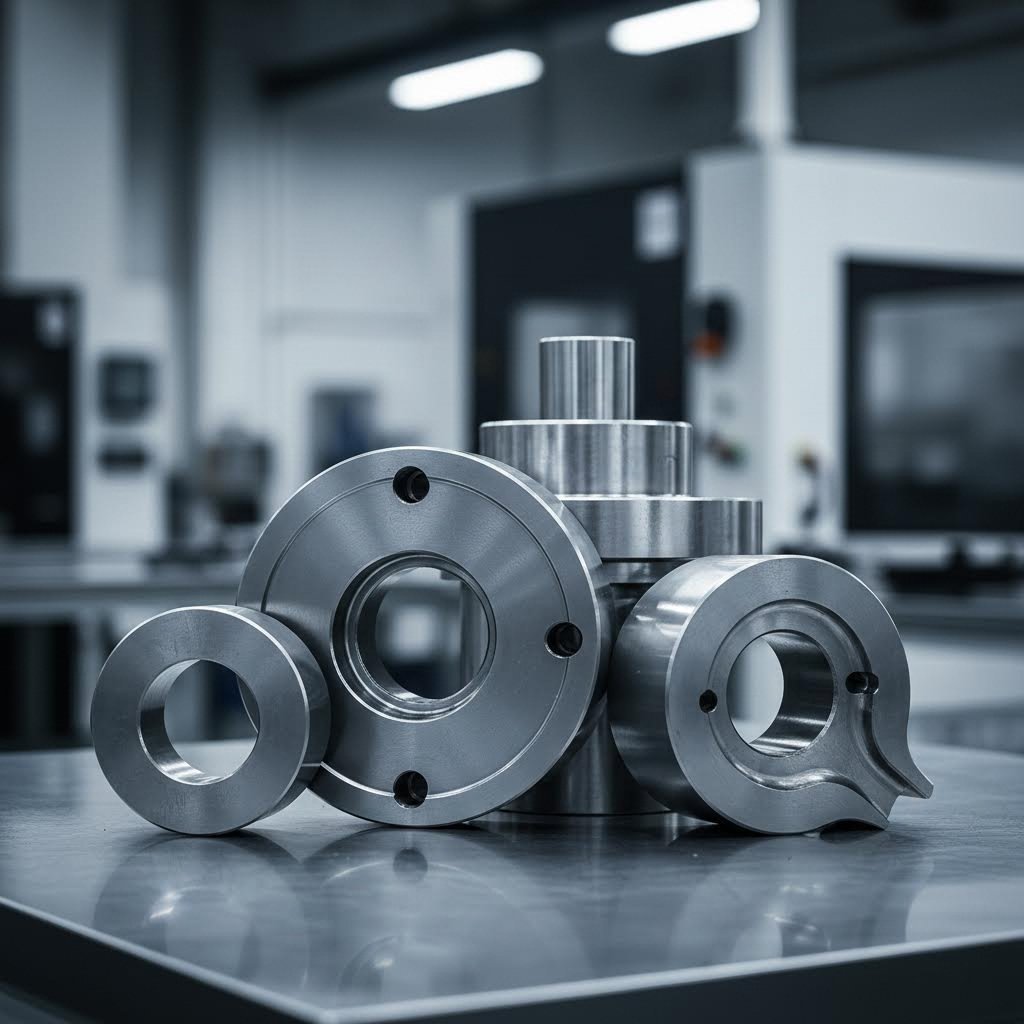
You've seen how aluminum flows through the extrusion press, but here's a question many engineers overlook: what determines whether that flowing metal becomes a flawless profile or a rejected part? The answer lies in die design. This critical component shapes every aspect of your finished extrusion, yet most aluminum extrusion design guides barely scratch the surface. Understanding die fundamentals gives you a significant advantage when specifying custom profiles or troubleshooting quality issues.
Think of the extrusion die as the DNA of your aluminum profile. This thick steel disk, typically made from heat-treated H13 tool steel, contains precisely machined openings that determine your profile's exact cross-sectional shape. When heated aluminum forces through these openings under pressures reaching 15,000 tons, every design decision in that die directly impacts what emerges on the other side.
The most critical principle in aluminum extrusion design is achieving uniform material flow velocity. Imagine water flowing through a river with varying depths. The shallow sections create faster currents while deeper pools slow the flow. Similar dynamics occur inside an extrusion die. If aluminum flows faster through one section of the die opening than another, you'll end up with warped profiles, dimensional inconsistencies, and surface defects.
Die designers control flow velocity primarily through bearing length, which is the distance aluminum travels within the die itself. Here's the logic: longer bearing lengths create more resistance, slowing the aluminum down. Shorter bearings reduce resistance, speeding flow up. By carefully varying bearing lengths across different sections of the die opening, skilled designers ensure all parts of your profile exit at the same speed, regardless of wall thickness variations.
Modern aluminium extrusion tooling development increasingly relies on Finite Element Analysis (FEA) simulations to model material flow, thermal behavior, and structural integrity before manufacturing the physical die. This virtual prototyping identifies potential problems early, reducing costly trial-and-error iterations once production begins.
Every extrusion profile falls into one of three categories, each requiring a specific die type with distinct design considerations and complexity levels. Knowing which category your profile belongs to helps you anticipate tooling costs and potential manufacturing challenges.
| Die Type | Profile Characteristics | Common Applications | Complexity Level | Relative Die Cost |
|---|---|---|---|---|
| Solid Dies | No enclosed voids or openings; simple cross-sections | Bars, angles, channels, I-beams, flat strips | Low to Moderate | Lowest |
| Hollow Dies | One or more fully enclosed internal cavities | Tubes, window frames, multi-void t-slots, structural members with internal reinforcements | High | Highest |
| Semi-Hollow Dies | Partially enclosed voids with gaps or openings | C-channels with narrow gaps, profiles with deep recesses, complex architectural shapes | Moderate to High | Moderate to High |
Solid dies represent the simplest category. They feature a flat face with openings matching your desired profile shape. Aluminum flows directly through these openings without needing to form around internal features. Solid die stacks typically include three components: a feeder plate (also called a weld plate) that controls aluminum flow and enables continuous extrusion between billets, the die itself containing the final profile opening, and a backer that reinforces the die against extreme pressures.
Hollow dies create the most challenging designs. To form internal cavities, these dies use a two-piece porthole design consisting of a mandrel and a cap. The mandrel contains legs or webs supporting a central void that shapes internal features. The cap forms external contours and assembles with the mandrel. During extrusion, heated aluminum enters through ports in the mandrel, flows around the legs, then welds back together before exiting through the cap. This welding action creates the hollow interior while maintaining structural integrity.
Semi-hollow dies occupy the middle ground. These profiles have voids, but the voids aren't fully enclosed. Designers use a formula called the "tongue ratio" (Area/Gap²) to distinguish semi-hollow from solid profiles. According to industry guidelines, the larger the void area and the narrower the gap, the higher the tongue ratio and the more likely a shape qualifies as semi-hollow. Higher tongue ratios mean increased difficulty because the tongue area becomes prone to breakage under extreme extrusion forces.
Beyond the die itself, every extrusion requires a complete tool stack to survive the intense pressures involved. Understanding this support tooling helps you appreciate why certain designs cost more and take longer to manufacture.
The essential support components include:
Material selection plays a crucial role in tooling performance. H13 tool steel dominates the industry due to its excellent combination of thermal conductivity, wear resistance, and toughness. Proper heat treatment enhances these properties, improving hardness while maintaining the toughness needed to resist cracking under repeated stress cycles.
Die life depends on multiple factors beyond material selection. Design complexity significantly impacts longevity. Intricate designs with sharp corners or delicate features experience higher stress concentrations, leading to premature wear. The alloy being extruded matters too. Harder alloys containing silicon or magnesium accelerate die wear compared to softer compositions. Extrusion speed and temperature create friction and heat that degrade tooling over time. Effective lubrication reduces this friction, while proper thermal management prevents distortion and cracking.
Surface treatments extend die life considerably. Nitriding, chromium plating, and specialized hard coatings enhance wear resistance and improve the surface finish of extruded profiles. These treatments add to initial die costs but typically pay for themselves through reduced maintenance and longer service life.
Proper die design reduces defects by addressing potential problems before they occur. When designers ensure uniform material flow, you avoid warping and dimensional variations. When they specify appropriate bearing lengths and surface treatments, you minimize die lines and surface tearing. When they collaborate early with extruders to optimize manufacturability, you reduce both tooling costs and the risk of production issues. This collaborative approach between designers, die manufacturers, and extruders represents the single most effective strategy for successful extrusion projects.
With die design fundamentals covered, the next consideration is choosing between hot and cold extrusion techniques, each offering distinct advantages depending on your specific application requirements.
You've learned how aluminum flows through dies and how tooling shapes your final profile. But here's a decision that fundamentally changes everything about your extrusion project: should you use hot extrusion or cold extrusion? This choice affects material properties, dimensional accuracy, surface quality, and even your project's environmental footprint. Surprisingly, most aluminum extrusion resources skip this comparison entirely, leaving engineers and procurement professionals without the guidance they need.
Let's break down both techniques so you can match the right process to your specific requirements.
Hot extrusion operates above the material's recrystallization temperature, typically between 400°C and 500°C (750°F to 930°F) for aluminum alloys. At these elevated temperatures, the metal's flow stress drops dramatically, making it far more malleable. This temperature advantage unlocks capabilities that cold extrusion simply cannot match.
Why does this matter for your project? When aluminum becomes more ductile at high temperatures, you can push it through complex die geometries that would be impossible at room temperature. Think multi-void hollow sections, thin-walled architectural profiles, and intricate heat sink designs with delicate fins. The reduced resistance means standard aluminium extrusions with complicated cross-sections become economically viable.
Hot extrusion also enables longer profile lengths and faster production speeds. According to industry analysis, hot extrusion delivers high throughput for profiles, making it the dominant choice when you need continuous meters of material at competitive line speeds. For most aluminum profiles used in construction, transportation, and industrial applications, hot extrusion remains the preferred production method.
The metallurgical benefits extend beyond manufacturability. During hot extrusion, dynamic recrystallization refines the grain structure, potentially improving mechanical properties. Post-extrusion quenching and aging treatments (T5 or T6 tempers) further tailor the aluminum's strength and hardness characteristics. This heat-treatment flexibility gives you precise control over final material performance.
However, hot extrusion does involve trade-offs. Surface oxidation occurs at elevated temperatures, requiring atmosphere control or proper lubrication to maintain acceptable finishes. Dimensional tolerances typically fall within H7 to H11 grades, which suits most structural and architectural applications but may not satisfy precision component requirements.
Cold extrusion flips the equation entirely. Operating at or near room temperature, this process relies on mechanical force rather than heat-softened material. The aluminum work hardens during deformation, actually increasing in strength and hardness as it flows through the die.
When would you choose this approach? Cold extrusion excels when you need tight dimensional tolerances that rival machined components. The absence of thermal expansion and contraction during processing means your profiles maintain exceptional dimensional stability. Surface finishes are typically superior because there's no oxidation from elevated temperatures.
The work-hardening effect deserves special attention. As noted by extrusion specialists, cold extrusion creates strain-hardened structures with increased dislocation density, directly boosting final part strength. For applications where as-formed mechanical properties matter more than post-process heat treatment, cold extrusion delivers inherent advantages.
Cold extrusion proves particularly valuable for compact, axisymmetric precision parts like fasteners, sleeves, sockets, and small electronic components. The near-net-shape capability often eliminates secondary machining operations entirely, offsetting higher per-part processing costs through downstream savings.
The limitations? Cold extrusion requires significantly higher forces since the material isn't softened by heat. This restricts practical applications to smaller, simpler geometries compared to hot extrusion. Multi-stage reductions with intermediate annealing may be necessary for complex parts, adding process steps and cost.
The following table summarizes the key differences between these two extrusion techniques across the parameters that matter most for your project decisions:
| Parameter | Hot Extrusion | Cold Extrusion |
|---|---|---|
| Temperature Range | 400°C to 500°C (750°F to 930°F) for aluminum | Room temperature to slightly elevated (below recrystallization) |
| Suitable Alloys | Wide range including difficult-to-form and high-strength alloys | Ductile materials: low-carbon steels, aluminum, copper, brass |
| Surface Finish Quality | Good; oxidation possible without proper control | Excellent; no thermal oxidation concerns |
| Dimensional Accuracy | H7 to H11 grade tolerances; suitable for most applications | Near-machined tolerances; low Ra surface roughness |
| Geometry Capability | Complex hollows, thin walls, large cross-sections, long profiles | Compact axisymmetric parts; simpler geometries |
| Material Properties | Refined grain structure; properties tailored via T5/T6 aging | Work-hardened; higher as-formed strength |
| Typical Applications | Window frames, structural members, heat sinks, automotive profiles | Fasteners, gears, sleeves, electronic housings, precision components |
Choosing between hot and cold extrusion requires weighing several interconnected factors. Start by asking these questions about your application:
Sustainability increasingly influences manufacturing decisions, and extrusion technique selection plays a role here too. Hot extrusion consumes more energy due to billet and tooling heating requirements. The furnaces and temperature maintenance systems add to both operational costs and carbon footprint.
Cold extrusion operates at room temperature, eliminating heating energy entirely. However, the higher mechanical forces required mean stiffer press frames and more robust tooling, which carry their own embodied energy costs. Lubricant preparation adds minor additional requirements.
From a lifecycle perspective, both techniques produce recyclable aluminum products. The choice between them should factor in your organization's sustainability goals alongside technical and economic considerations. For aluminum profiles specifically, hot extrusion remains the most suitable method according to the Aluminium Extruders Council and industry experts, balancing throughput, capability, and overall efficiency for most applications.
With a clear understanding of how extrusion technique affects your final product, the next crucial decision involves selecting the right aluminum alloy to achieve your desired performance characteristics.
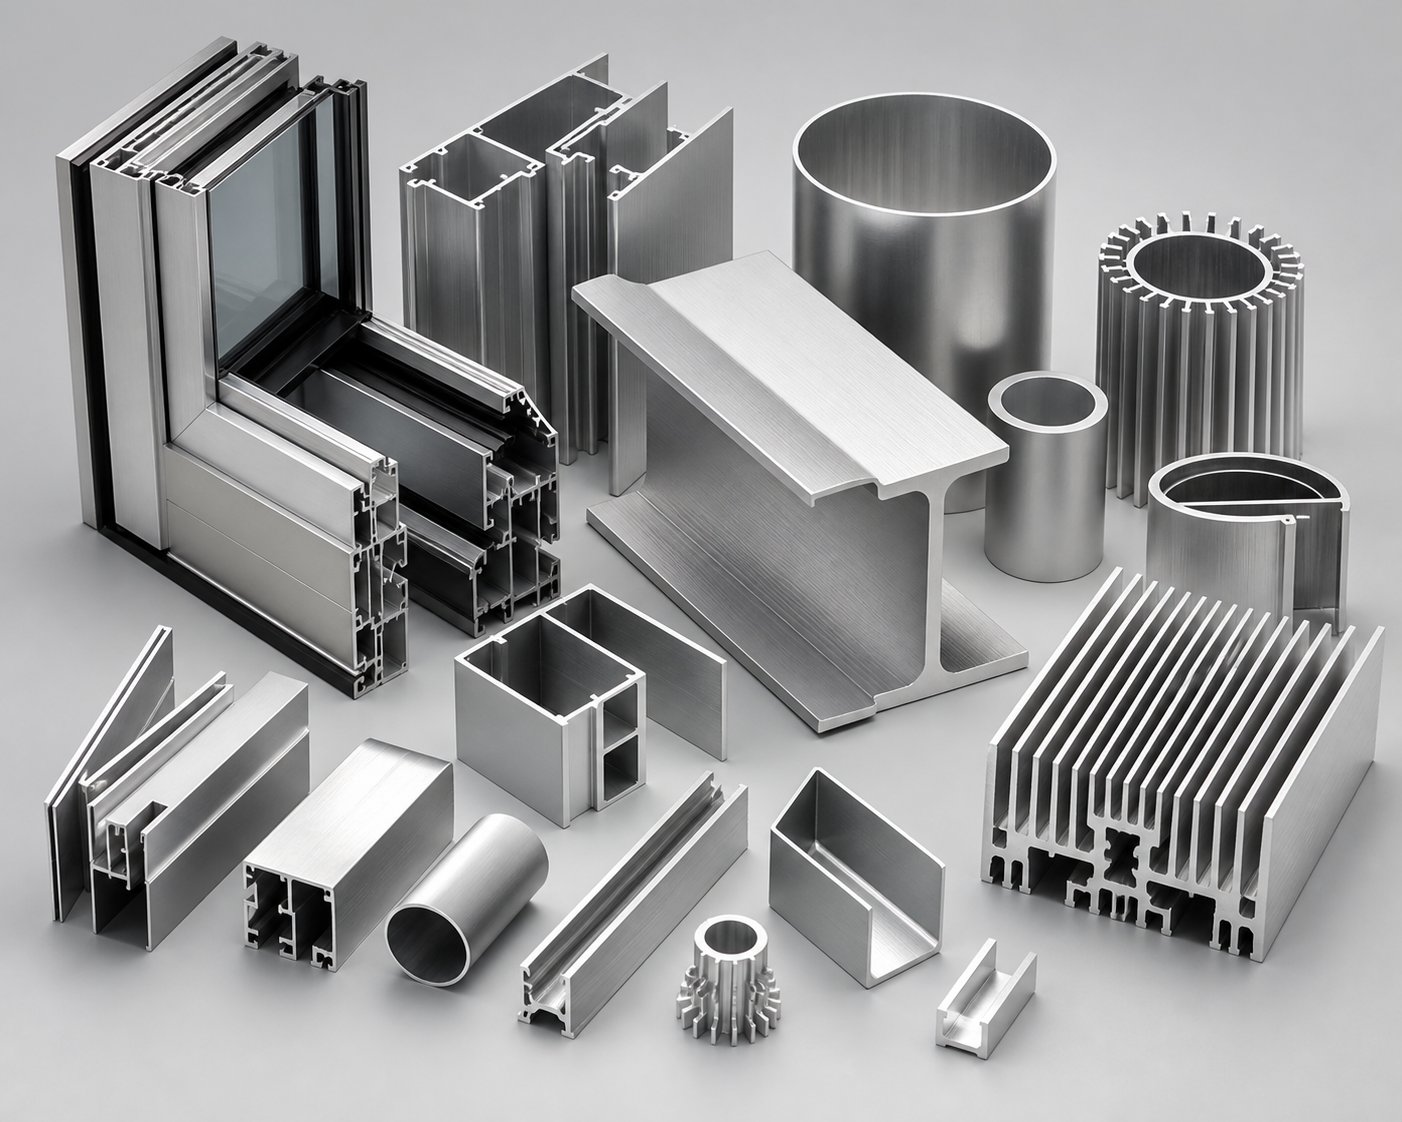
You've selected your extrusion technique and understand how die design shapes your profile. Now comes a decision that directly determines your product's mechanical performance, surface quality, and even manufacturing cost: which aluminum alloy should you specify? This choice confuses many engineers because the differences between popular alloys like 6063, 6061, 6005, and 7075 aren't immediately obvious from their numeric designations.
Here's the reality most extruded aluminum shapes catalogs don't tell you: alloy selection involves trade-offs. Higher strength often means reduced extrudability. Better surface finish may sacrifice structural performance. Understanding these relationships helps you match your alloy choice to what actually matters for your application.
The 6xxx-series aluminum alloys dominate the extrusion industry, accounting for nearly 75 percent of all aluminum profiles produced. These alloys share magnesium and silicon as their primary alloying elements, forming magnesium silicide (Mg₂Si) during heat treatment. This compound provides the strength and corrosion resistance that make these alloys so versatile.
But why do so many different 6xxx alloys exist if they share the same base chemistry? The answer lies in subtle variations in magnesium, silicon, and trace element content that create distinctly different performance profiles. Let's examine the four alloys you'll encounter most frequently when browsing an aluminum extrusion catalog.
6063: The Architectural Workhorse
Alloy 6063 has earned its reputation as the go-to choice for architectural applications. With excellent extrudability and superior surface finish characteristics, this alloy flows through complex die geometries that would challenge stronger alternatives. Window frames, door frames, curtain wall systems, and decorative trim all benefit from 6063's ability to produce intricate profiles with smooth, visually appealing surfaces.
What makes 6063 so extrudable? Its lower magnesium and silicon content compared to structural alloys means reduced flow stress during the extrusion process. The metal pushes through dies more easily, enabling faster production speeds and longer die life. These manufacturing advantages translate directly into lower costs for your aluminium extrusion parts.
In the T6 temper, 6063 delivers a yield strength of approximately 23,000 psi and ultimate tensile strength around 28,000 psi. While these numbers fall below structural alloys, they're perfectly adequate for applications where appearance and corrosion resistance matter more than maximum load-bearing capacity.
6061: The Structural Standout
When your application demands higher strength, alloy 6061 steps up. This versatile alloy offers balanced strength with good machinability, making it suitable for everything from structural components to precision machined parts.
The key difference? Alloy 6061 contains approximately 0.28% copper in addition to its magnesium and silicon. This copper content boosts strength characteristics significantly. In the T6 temper, 6061 achieves yield strength of at least 35,000 psi and ultimate tensile strength exceeding 42,000 psi, which is comparable to some structural steels.
However, that copper addition comes with trade-offs. Corrosion resistance decreases slightly compared to copper-free alloys. Extrudability drops too, meaning more complex profiles become harder to produce and surface finish may not match 6063's smooth appearance. For structural applications where the profile will be painted or hidden from view, these trade-offs rarely matter.
6005 (and 6005A): The Middle Ground
Positioned between 6063 and 6061, alloy 6005 offers medium-strength structural performance with better extrudability than 6061. Rail car components, ladder rails, and structural tubing commonly use this alloy when 6063 isn't quite strong enough but 6061's reduced manufacturability creates problems.
In the T6 condition, 6005 achieves yield strength around 260 MPa and tensile strength near 310 MPa. Its manganese content remains low (≤0.5%), which keeps extrusion characteristics manageable while still delivering meaningful strength improvements over 6063.
7075: Maximum Strength Applications
For the most demanding structural applications, alloy 7075 delivers exceptional strength that approaches aerospace-grade performance. With zinc as its primary alloying element plus significant magnesium and copper content, 7075-T6 achieves tensile strengths that reach as high as 90,000 PSI, rivaling many steels.
The catch? This alloy is categorized as difficult to extrude. Production speeds drop significantly, die wear accelerates, and achievable profile complexity decreases. Corrosion resistance also falls below 6xxx-series alloys. You'll typically see 7075 specified for aerospace fittings, high-performance automotive components, and other applications where strength justifies the manufacturing challenges and higher costs.
Understanding the relationship between alloy chemistry and extrusion behavior helps you make smarter specification decisions. The following comparison table summarizes the key characteristics you need to evaluate:
| Alloy | Extrudability Rating | Yield Strength (T6) | Tensile Strength (T6) | Corrosion Resistance | Primary Applications |
|---|---|---|---|---|---|
| 6063 | Excellent | ~240 MPa (35 ksi) | ~270 MPa (39 ksi) | Excellent | Architectural profiles, window frames, decorative trim, furniture |
| 6061 | Moderate | ~276 MPa (40 ksi) | ~310 MPa (45 ksi) | Good | Structural components, automotive frames, marine fittings, CNC parts |
| 6005/6005A | Good | ~260 MPa (38 ksi) | ~310 MPa (45 ksi) | Good | Rail cars, ladders, structural tubing, modular frameworks |
| 7075 | Difficult | ~503 MPa (73 ksi) | ~572 MPa (83 ksi) | Fair | Aerospace fittings, high-stress structural parts, defense applications |
Why Extrudability Matters for Your Budget
Here's something that directly affects your project economics: alloys rated as excellent for extrudability produce profiles faster, with longer die life, and with fewer quality issues. An aluminum extrusion catalog might show the same profile available in both 6063 and 6061, but the 6061 version often costs more because of these manufacturing realities.
Extrudability also limits achievable geometries. According to the Aluminum Extrusion Manual, alloys like 6063, 6101, and 6463 are rated as having excellent extrudability, while 7075 and 7178 are categorized as difficult to extrude. If your design includes thin walls, tight radii, or complex hollow sections, specifying 6063 gives you the best chance of successful production at reasonable cost.
Matching Alloy to End-Use Requirements
When selecting your alloy, start by ranking what matters most for your application:
Cost Implications of Alloy Choice
Alloy selection affects costs in ways that extend beyond raw material pricing. Higher-strength alloys typically require slower extrusion speeds, meaning less output per press hour. They accelerate die wear, increasing tooling replacement frequency. They may demand tighter process controls and more frequent quality inspections.
Conversely, specifying an alloy that's stronger than necessary wastes money on capability you don't use. A structural angle that only needs to support its own weight doesn't benefit from 7075's aerospace-grade strength. The key is matching alloy performance to actual application requirements, neither over-specifying nor under-specifying.
With your alloy selected based on strength, extrudability, and corrosion resistance requirements, the next step involves choosing surface treatments that enhance both appearance and long-term performance of your finished profiles.
Your aluminum profile has emerged from the die, been stretched straight, and cut to length. But here's something many aluminum extrusion design guidelines overlook: that raw "mill finish" aluminum is just the starting point. Without proper surface treatment, your profile remains vulnerable to scratches, stains, and oxidation that compromise both appearance and longevity.
Surface finishing transforms functional extrusions into finished products ready for demanding applications. The treatment you select directly impacts corrosion resistance, aesthetic appeal, maintenance requirements, and even recyclability at end of life. Understanding your options helps you balance performance needs against budget constraints while meeting aluminum extrusion tolerances for your specific application.
Four primary finishing technologies dominate the aluminum extrusion industry, each offering distinct advantages depending on your project requirements. Let's examine what makes each approach unique.
Anodizing: The Electrochemical Advantage
Unlike paints or coatings that sit on top of the metal, anodizing fundamentally changes the aluminum surface itself. This electrochemical process submerges your profile in an acid bath while passing electric current through it. The result? A super-hard aluminum oxide layer that becomes fully integrated with the base metal rather than merely adhering to it.
This integration creates exceptional durability. The anodic layer won't peel, chip, or flake because it's literally part of the aluminum structure. Scratch resistance improves dramatically, and the surface gains excellent corrosion protection. For electronics housings, premium window frames, and precision mechanical parts, anodizing delivers a finish that maintains its appearance through years of handling and exposure.
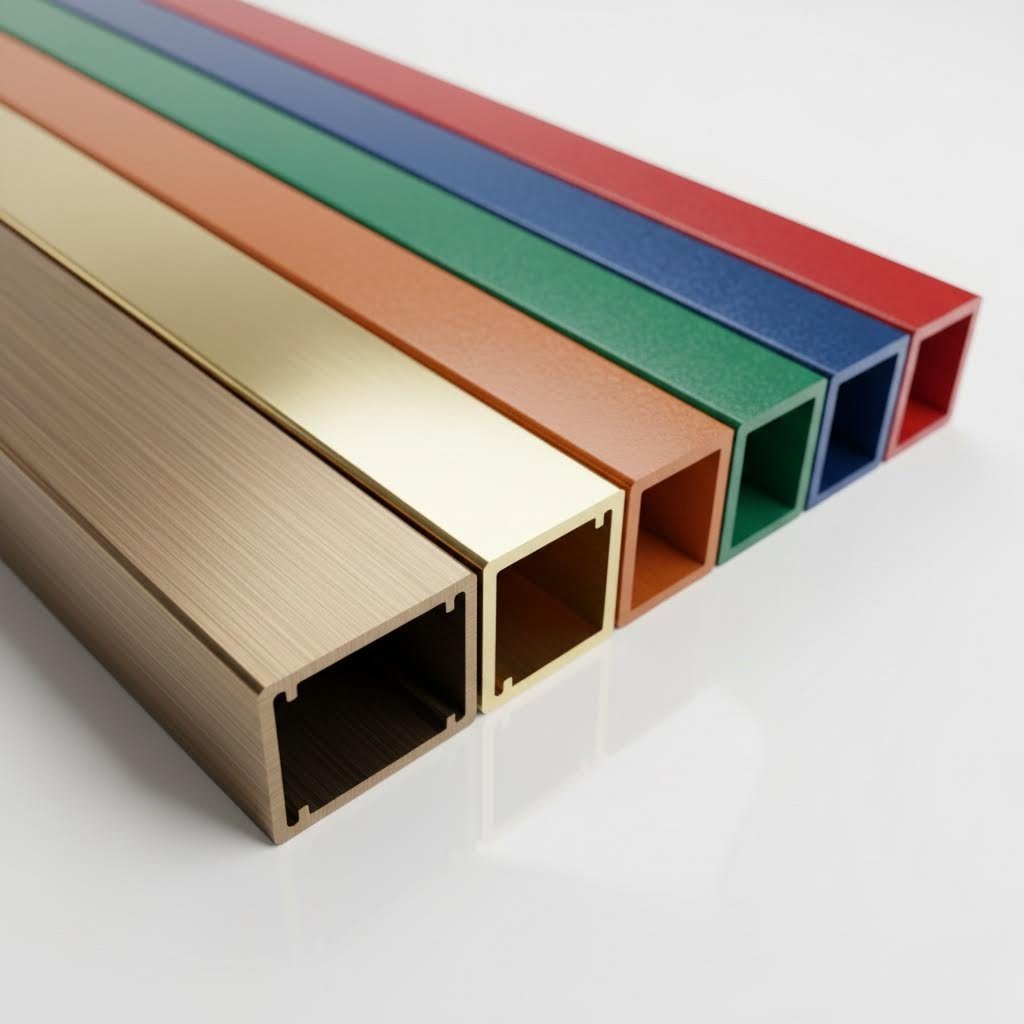
Anodizing also offers unique aesthetic possibilities. The porous nature of the oxide layer accepts dyes, enabling colors ranging from natural silver and bronze tones to vibrant reds, blues, and custom shades like Champagne and Rose Gold. Experienced manufacturers such as Shengxin Aluminium offer anodizing in these custom colors, demonstrating the range of finishes achievable through this process.
The sustainability angle matters here too. According to the Aluminum Anodizers Council, anodizing adds no extra material to the surface since the coating consists entirely of aluminum oxide. This means anodized profiles remain fully recyclable without the decoating steps required for painted products.
Powder Coating: Color Freedom and Durability
When your project demands specific colors or patterns that anodizing can't achieve, powder coating steps in. This process applies dry powder electrostatically to grounded aluminum parts, then cures the coating in an oven where it melts and flows into a smooth, durable, and adherent finish.
The color possibilities are virtually unlimited. Standard RAL colors, custom color matching, metallic effects, textured finishes, and even wood-grain patterns become achievable. For fencing, furniture, automotive parts, and industrial components where color matching matters, powder coating provides the flexibility you need.
Durability holds up well under normal conditions, though powder coating can't match anodizing's hardness or PVDF's weathering resistance. The coating sits on top of the metal rather than integrating with it, making it theoretically susceptible to chipping under severe impact. However, proper pretreatment and application techniques minimize these concerns for most applications.
PVDF Coating: The Exterior Champion
For building facades, curtain walls, and metal roofing exposed to harsh weather, PVDF (Polyvinylidene Fluoride) coating represents the gold standard for exterior projects. Architects specify PVDF, often known by trade names like Kynar 500, when they need finishes that maintain color integrity for decades under intense UV exposure.
What makes PVDF so resilient? The fluoropolymer chemistry creates exceptional resistance to UV degradation, chalking, and fading. Projects in coastal environments, desert climates, or high-altitude locations benefit from PVDF's ability to shrug off conditions that would dull or discolor lesser coatings within years.
The premium performance comes with premium costs. PVDF application requires specialized liquid paint systems and controlled factory processes, making it more expensive than powder coating. For interior applications or moderate exposure conditions, this investment may not be necessary.
Mechanical Finishes: Texture and Function
Sometimes the goal isn't adding a protective layer but rather modifying the surface texture itself. Mechanical finishing techniques like brushing, polishing, sandblasting, and bead blasting create distinctive appearances while improving functional characteristics.
Brushed finishes hide fingerprints and minor scratches, making them popular for consumer electronics and appliance trim. Polished surfaces create mirror-like reflectivity for decorative applications. Sandblasted textures provide grip and reduce glare. These mechanical treatments often serve as preparation steps before anodizing or coating, but they can also stand alone for interior applications with minimal exposure concerns.
Selecting the right surface treatment requires balancing multiple factors. The following comparison helps you evaluate options against what matters most for your project:
| Finish Type | Durability Rating | Color Options | Relative Cost | Ideal Applications |
|---|---|---|---|---|
| Anodizing | Excellent (integrated with metal) | Limited palette; metallic and earth tones; custom colors possible | Moderate | Electronics, architectural facades, premium window/door frames, precision parts |
| Powder Coating | Good to Very Good | Unlimited; RAL colors, metallics, textures, wood-grain effects | Low to Moderate | Fencing, furniture, automotive parts, industrial components, interior trim |
| PVDF Coating | Excellent (UV/weather resistance) | Wide range; maintains color stability for 20+ years | High | Building facades, curtain walls, metal roofing, harsh environment exteriors |
| Mechanical Finishes | Fair (often combined with other treatments) | Natural aluminum appearance with varied textures | Low | Interior decorative trim, consumer electronics, appliance components |
Practical Selection Guidance
When deciding which finish suits your aluminium extrusion design guidelines, consider these decision points:
Advanced Finishing Capabilities
Beyond these core options, specialized treatments address niche requirements. Micro-arc oxidation creates ceramic-like coatings with extreme hardness and electrical insulation properties. Multi-layer systems combine mechanical preparation, anodizing, and topcoats for maximum protection. Manufacturers with comprehensive processing capabilities, like Shengxin Aluminium's deep processing services, offer these advanced options including anodizing, powder coating, PVDF, and micro-arc oxidation under one roof, simplifying your supply chain for complex finishing requirements.
Sustainability and End-of-Life Considerations
Your finish choice affects more than immediate performance. It also determines what happens when your product reaches end of life. Anodized aluminum retains full recyclability because the oxide layer is chemically identical to aluminum. The recycling process handles it seamlessly.
Painted and coated products require decoating before recycling, adding process steps and energy consumption. According to sustainability research, this distinction makes anodizing the most environmentally friendly surface treatment option when considering the complete product lifecycle.
For organizations tracking environmental metrics or pursuing sustainability certifications, specifying anodized finishes where technically appropriate supports broader corporate responsibility goals without sacrificing performance.
Surface treatment transforms your extruded profile into a finished product ready for its intended application. But even with perfect finishing, quality issues can arise during extrusion itself. Understanding common defects and their prevention strategies helps you specify profiles that meet your aluminum extrusion tolerances consistently.
You've specified the right alloy, selected an appropriate surface treatment, and partnered with a capable manufacturer. So why did your latest batch of profiles arrive with visible streaks, dimensional variations, or rough patches? Even well-controlled extrusion processes can produce defects when parameters drift outside optimal ranges or when equipment wear goes undetected.
Here's what most standard aluminum extrusion profiles pdf documents won't tell you: understanding defects gives you negotiating power. When you can identify a die line versus a handling scratch, or distinguish blistering caused by moisture from porosity caused by trapped air, you communicate more effectively with suppliers and resolve quality issues faster. This knowledge also helps you set realistic tolerance expectations based on what the extrusion process can actually deliver.
Defects in aluminum extrusions fall into three broad categories: surface defects that affect external appearance, dimensional defects that impact fit and function, and internal defects that compromise structural integrity without being immediately visible. Learning to spot these issues early prevents costly downstream problems.
Surface Defects
Surface imperfections are typically the easiest to identify because they're visible to the naked eye under proper lighting. Scratches appear as superficial abrasions or grooves, often caused by poor handling, insufficient lubrication, or foreign particles contaminating the die. Die lines show up as longitudinal grooves running the length of the profile, indicating wear patterns or imperfections on the die surface itself.
Blistering presents as raised bubbles on the aluminum surface. These result from trapped gases or moisture that expand during the high-temperature extrusion process. If billets aren't adequately preheated to drive off moisture, or if raw material quality is inconsistent, blistering becomes a recurring problem. Pick-ups create rough texture when small aluminum particles adhere to the profile surface, typically due to contamination on the die or insufficient cleaning during production.
Dimensional Defects
Dimensional inconsistencies affect whether your profile will actually fit its intended assembly. Warping, twisting, and bowing occur when material flow through the die isn't uniform or when cooling happens unevenly after extrusion. Wall thickness variations result from die wear, improper die design, or temperature fluctuations during the extrusion run.
According to the Aluminum Extruders Council, dimensional tolerances typically fall within specific grades depending on profile complexity and alloy. When your received profiles consistently fall outside these published tolerances, the root cause usually traces back to process control issues rather than inherent process limitations.
Internal Defects
The most concerning defects hide beneath the surface. Internal cracking, porosity, and voids compromise structural performance without obvious visual indicators. These defects often require non-destructive testing methods like ultrasonic inspection to detect. Causes include excessive extrusion speed, improper billet temperature, or contamination in the raw material that creates weak points within the aluminum structure.
The following reference table connects specific defects to their causes, how to identify them, and what corrective actions resolve the underlying problems:
| Defect Type | Common Causes | Visual Indicators | Corrective Actions |
|---|---|---|---|
| Surface Tearing | Excessive extrusion speed; billet temperature too high; sharp die corners without adequate radii | Rough, torn appearance at profile edges or thin sections; visible surface cracks | Reduce extrusion speed; lower billet temperature; modify die design to include proper radii at transitions |
| Blistering | Moisture in billet; inadequate preheating; high hydrogen content in raw material | Raised bubbles on surface; may rupture during subsequent processing | Ensure thorough billet preheating; verify raw material quality; control storage conditions to prevent moisture absorption |
| Die Lines | Die wear; damage to die bearing surface; contamination buildup on die face | Longitudinal grooves or marks running parallel to extrusion direction | Polish or recondition die bearing surfaces; implement scheduled die maintenance; clean dies between production runs |
| Dimensional Inconsistency | Temperature variations during run; uneven material flow; die deflection under pressure | Profile dimensions outside tolerance; wall thickness variations; twist or bow along length | Improve temperature monitoring and control; optimize die bearing lengths for uniform flow; strengthen die support tooling |
| Internal Cracking | Extrusion ratio too high; billet temperature too low; contamination creating stress concentrations | Not visible externally; detected through ultrasonic testing or mechanical property failures | Adjust extrusion ratio to acceptable range; verify billet temperature reaches target before pressing; improve raw material quality control |
Process Control as Prevention
Preventing defects starts with controlling the three critical variables discussed earlier: temperature, pressure, and speed. According to quality inspection research, modern extrusion processes rely on automated systems with sensors that continuously monitor parameters and make real-time adjustments. This reduces human error and catches deviations before they produce defective material.
Temperature control deserves particular attention. Maintaining the correct billet temperature ensures proper material flow, while consistent die temperature prevents the thermal cycling that accelerates die wear. When temperatures drift outside optimal ranges, surface quality degrades, dimensional accuracy suffers, and internal defects become more likely.
Die Maintenance Practices
Your die is the single most critical factor in profile quality. Regular inspection and cleaning prevents the contamination buildup that causes pick-ups and die lines. Scheduled polishing of bearing surfaces extends die life and maintains surface finish quality. Implementing a formal maintenance program rather than waiting for visible problems pays dividends through consistent output and reduced scrap rates.
Quality Inspection Integration
Catching defects early minimizes waste. Visual inspection under proper lighting should happen at multiple points during production, not just at final packaging. Surface roughness measurement using profilometers provides objective data on finish quality. Dimensional checks with calipers, micrometers, and laser measuring devices verify profile geometry against tolerance specifications.
For critical applications, non-destructive testing methods like dye penetrant inspection reveal surface cracks that visual examination might miss. Ultrasonic testing identifies internal defects before they cause field failures. The investment in comprehensive inspection pays for itself by preventing defective products from reaching customers.
Tolerance Specifications in Practice
Industry tolerance standards published by organizations like the Aluminum Council establish achievable dimensional accuracy for different profile types and alloy grades. Understanding these standards helps you set realistic expectations. Requesting tolerances tighter than standard capabilities increases costs and rejection rates. Specifying tolerances looser than actually needed wastes the precision the process can deliver.
When reviewing your standard aluminum extrusion profiles pdf specifications, pay attention to how tolerance requirements scale with profile complexity. Simple solid shapes achieve tighter tolerances than complex hollow sections. Higher-strength alloys that are more difficult to extrude typically show more dimensional variation than easy-flowing alloys like 6063. Matching your tolerance requirements to what the process naturally produces keeps costs in check while ensuring functional fit.
With quality control fundamentals in place, the next consideration involves understanding how various factors combine to determine your overall project costs and identifying opportunities to optimize your design for cost-effective production.
You've mastered the technical aspects of aluminum extrusion: alloy selection, die design, surface treatments, and quality control. But here's the question that ultimately determines whether your project moves forward: what will it actually cost? Understanding aluminum extrusion cost factors helps you budget accurately, negotiate effectively, and make design decisions that balance performance with economics.
The good news? Aluminum extrusion often delivers significant cost advantages over alternative manufacturing methods. According to industry analysis, while casting tools can exceed $30,000, custom extrusion dies typically cost under $1,000. Additionally, extrusion dies can be built and proven in just weeks compared to the months required for casting tools. But realizing these advantages requires understanding what drives costs and where optimization opportunities exist.
Custom aluminum extrusion pricing depends on multiple interconnected variables. Some factors remain outside your control, like global aluminum prices and shipping logistics. Others you directly influence through design choices and supplier partnerships. Here are the primary cost drivers you need to understand:
Here's what experienced engineers understand: decisions made during the design phase have the greatest impact on final project economics. By the time you're ready to order, most cost-reduction opportunities have already passed. Consider these strategies for balancing performance requirements with budget constraints.
Simplify Profile Geometry Where Possible
Breaking intricate profiles into simpler components enhances manufacturability and reduces tooling costs. Symmetrical extrusion profiles enable uniform material flow through dies, resulting in lower production expenses and fewer quality issues. Consider whether complex single-piece designs could be replaced with simpler extruded components joined during aluminum extrusion assembly.
Maintain Uniform Wall Thickness
Adjacent wall thickness ratios exceeding 2:1 create dimensional control challenges and slow production speeds. Balanced wall thickness delivers faster production cycles, enhanced dimensional precision, and improved profile consistency. These manufacturing advantages translate directly into lower per-piece costs.
Match Alloy to Actual Requirements
Specifying 6063-T6 instead of 6061-T6 boosts productivity rates by 5 to 10 percent in extrusion processes while reducing die wear. Unless your application genuinely requires the higher strength of 6061, the easier-flowing alloy delivers equivalent functionality at lower cost. Consult your aluminium extrusion design guide to confirm minimum strength requirements before defaulting to stronger, more expensive alloys.
Leverage Extrusion's Cost Advantages
Although individual complex extrusions might cost more than simple formed sheet steel parts, overall system costs often decrease. The extrusion process eliminates numerous secondary operations required in traditional fabrication methods: welding, fastening, drilling, and assembly labor. A single extrusion can consolidate what previously required multiple machined components, reducing part count, inventory complexity, and assembly time.
Consider Production Volume Economics
Normal tool turnaround runs 3 to 4 weeks with production following within a week of sample approval. If your project involves ongoing production needs, discuss metal pricing arrangements with your manufacturer. Some extruders buy considerable amounts of metal in advance for your production needs over time, making extrusion costs more predictable and potentially locking in favorable rates during price volatility.
Partner with Vertically Integrated Manufacturers
Facilities that combine extrusion, fabrication, and finishing services under one roof minimize logistical management burdens and reduce costs compared to coordinating operations between multiple vendors. For example, Shengxin Aluminium provides end-to-end support from die development through mass production, backed by 35 advanced extrusion presses ranging from 600T to 5500T capacity and over 30 years of industry experience. This factory-direct model eliminates middleman markups while ensuring consistent quality control across all processing stages.
Account for Shipping and Logistics
International shipping costs have varied widely in recent years, with 40-foot container shipping from Asia to North America ranging from $8,000 to as high as $20,000. Local duties and tariffs on imported products add additional considerations. Despite these variables, shorter lead times in Asia compared to North America, combined with lower production costs, still deliver value for many customers. Factor shipping logistics into your total landed cost calculations when comparing supplier options.
By understanding these aluminum extrusion cost factors and applying design-for-manufacturing principles early in your project, you position yourself to achieve both technical requirements and budget targets. The key is making informed decisions at each stage rather than optimizing only at the end when flexibility has diminished.
You've now gained a comprehensive understanding of the aluminum extrusion process, from billet preparation through surface finishing and quality control. But knowledge alone doesn't produce parts. Turning your project from concept into production requires methodical planning and the right partnerships. Let's translate what you've learned into actionable next steps.
Before reaching out to manufacturers, gather the technical specifications and reference materials that will streamline your conversations and accelerate quoting. The Aluminum Extruders Council provides an invaluable Aluminum Extrusion Manual covering fabrication techniques, thermal management considerations, and detailed alloy specifications. This aluminum extrusion resources guide serves as an excellent companion to the decision framework you've developed.
Industry associations also maintain directories connecting you with qualified extruders. Using their "Find an Extruder" tools narrows your search to manufacturers with relevant experience for your specific application, whether architectural, industrial, or specialty.
Ready to take action? Work through this checklist to ensure your aluminum extrusion project planning covers all critical elements:
Remember that aluminum's infinite recyclability adds a sustainability advantage to your project regardless of which specific options you select. This environmental benefit increasingly matters for organizations tracking carbon footprint and lifecycle impacts.
The most successful extrusion projects share one common element: early collaboration between designers and manufacturing partners. Experienced manufacturers who offer comprehensive support from die development through mass production help you optimize designs for manufacturability, avoid costly revisions, and achieve both technical and economic targets. When you're ready to move forward, seek partners who demonstrate deep process knowledge, quality certifications, and transparent communication throughout the project lifecycle.
Aluminum extrusion forces a heated aluminum billet (800°F-900°F) through a custom-shaped steel die using hydraulic pressure up to 15,000 tons. The metal becomes malleable without melting, taking the exact cross-sectional shape of the die opening as it emerges. The process includes die preheating, billet heating, hydraulic pressing, quenching, stretching, and aging to achieve final mechanical properties. This method produces complex profiles in a single operation, making it ideal for everything from window frames to automotive components.
Standard aluminum extrusion tolerances typically fall within H7 to H11 grades for hot extrusion processes. Tolerance specifications vary based on profile complexity, alloy selection, and wall thickness. Simple solid shapes achieve tighter tolerances than complex hollow sections, while higher-strength alloys like 7075 show more dimensional variation than easy-flowing alloys like 6063. Industry organizations like the Aluminum Extruders Council publish detailed tolerance tables that help engineers set realistic expectations based on profile type.
Direct extrusion uses a stationary die while a moving ram forces the heated billet through it, with both ram and aluminum moving in the same forward direction. Indirect extrusion reverses this: the billet and container stay stationary while the die assembly moves against the billet. Indirect extrusion generates significantly less friction since the billet doesn't slide against container walls, resulting in better temperature control, more uniform mechanical properties, and improved grain structure. Direct extrusion remains the workhorse for high-volume production.
Alloy 6063 is the most popular choice for extrusion, offering excellent extrudability, superior surface finish, and good corrosion resistance—ideal for architectural applications like window frames. For structural applications requiring higher strength, 6061 provides yield strength around 40 ksi with good machinability. Alloy 6005A offers a middle ground for medium-strength structural needs. For maximum strength applications like aerospace components, 7075 delivers tensile strengths approaching 83 ksi but is more difficult to extrude.
Custom extrusion dies typically cost between $400 and $2,000 depending on complexity. Simple solid shapes require dies in the $400-$1,000 range, while large parts needing 2,000-4,000 ton presses can reach $2,000. Many manufacturers refund tool costs if you purchase a stipulated amount within two years and don't charge for replacement tooling if orders continue. This makes extrusion significantly more economical than casting, where tools can exceed $30,000. Working with vertically integrated manufacturers like Shengxin Aluminium provides factory-direct pricing from die development through mass production.



 Интернет Сервис
 0086 136 3563 2360
 sales@sxalu.com
 +86 136 3563 2360
 русский
 English
 français
 Deutsch
 español
 português
 العربية
 ไทย
ไทย Việt
Việt Українська